
Welcome to the AO Smith Water Heater Owners Manual. This guide provides essential information for safe installation, operation, and maintenance. Learn to optimize performance and efficiency with troubleshooting tips for lasting reliability.
1.1 Purpose of the Manual
This manual is designed to guide you through the safe and efficient use of your AO Smith water heater. It provides detailed instructions for installation, operation, and maintenance to ensure optimal performance. The manual also highlights essential safety precautions and troubleshooting tips to address common issues. By following the guidelines outlined, you can maximize energy efficiency and extend the lifespan of your water heater. Whether you’re a new user or familiar with the product, this manual serves as a comprehensive resource to help you understand and utilize your AO Smith water heater effectively.
1.2 Key Features of AO Smith Water Heaters
AO Smith water heaters are known for their durability, energy efficiency, and innovative features. They offer advanced temperature controls, robust insulation, and eco-friendly designs. Many models include digital displays for precise temperature adjustments and remote monitoring capabilities. Stainless steel and ceramic components ensure long-lasting performance. Additionally, AO Smith water heaters are designed with safety in mind, featuring temperature and pressure relief valves. Their commitment to energy savings is evident through features that minimize standby heat loss. These features make AO Smith water heaters a reliable choice for both residential and commercial use, providing consistent hot water while reducing energy consumption.
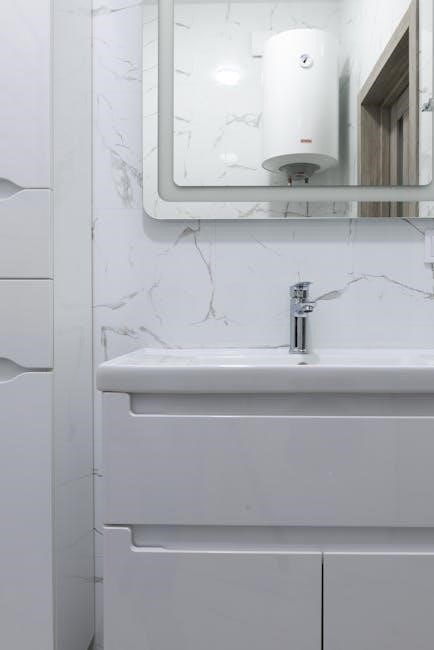
Installation and Safety Precautions
Ensure professional installation following local codes and manufacturer guidelines. Proper venting, electrical connections, and temperature-pressure relief valve installation are critical for safe operation and long-term reliability.
2.1 Pre-Installation Checks
Before installing your AO Smith water heater, ensure the site meets all local building codes and manufacturer specifications. Check electrical connections, venting systems, and water supply lines for compatibility. Verify the temperature-pressure relief valve is correctly installed and operational. Inspect the area for proper drainage and ventilation to prevent gas leaks or moisture buildup. Ensure the heater is placed on a level surface and protected from direct sunlight or freezing temperatures. Review the manual for specific requirements and safety guidelines to guarantee a safe and efficient installation process.
2.2 Safety Features and Warnings
Your AO Smith water heater is equipped with multiple safety features to prevent accidents. Always read and follow the safety messages in this manual to avoid potential hazards. The temperature-pressure relief valve must be operated annually, and inspected every 2-4 years. Never operate the heater if it has been flood-damaged or if the venting system is restricted. Ensure proper ventilation to prevent carbon monoxide buildup. Keep the area around the heater clear of flammable materials. Failure to follow these guidelines may result in personal injury or property damage. Regular maintenance and adherence to safety protocols are essential for safe operation.
Operating the Water Heater
Understanding your AO Smith water heater’s temperature settings is crucial for optimizing energy efficiency and ensuring safety. Adjusting the temperature can help reduce energy consumption while maintaining comfort. Proper settings also prevent scalding and minimize standby heat loss.
3.1 Understanding Temperature Settings
Proper temperature settings are key to optimizing your AO Smith water heater’s performance. The default temperature is typically set between 120°F and 140°F. Lowering it to 120°F enhances energy efficiency and reduces standby heat loss. Higher settings may be needed for large households or specific needs. Always prioritize safety to avoid scalding, especially for children or the elderly. Adjustments should be made carefully, as excessive heat can increase energy bills. Refer to your manual for guidance on adjusting temperature settings to balance comfort and efficiency.
3.2 Daily Usage and Energy Efficiency Tips
To maximize efficiency, consider your daily water usage patterns. Lowering the temperature setting can reduce energy consumption without sacrificing comfort. Installing low-flow fixtures and fixing leaks promptly helps conserve water and energy. Using a timer or smart controls to cycle the heater during off-peak hours can also lower utility bills. Regular maintenance, such as inspecting the anode rod and insulation, ensures optimal performance. Additionally, upgrading to an energy-efficient model or adding insulation to pipes can minimize standby heat loss, further enhancing your water heater’s efficiency and longevity.
Maintenance and Troubleshooting
Regular maintenance ensures optimal performance and longevity. Inspect the anode rod, check for leaks, and flush sediment annually. Address common issues promptly to avoid costly repairs.
4.1 Regular Maintenance Tips
Regular maintenance is crucial for extending the lifespan of your AO Smith water heater. Inspect the anode rod annually and replace it if severely corroded; Check for leaks around connections and valves, addressing any issues promptly. Flush sediment from the tank by draining 1-2 gallons quarterly to ensure efficiency. Test the Temperature and Pressure (T&P) relief valve annually and inspect it every 2-4 years. Ensure proper ventilation to avoid gas buildup. Clean the exterior and protect it from corrosion. Refer to the manual for detailed procedures and safety guidelines to maintain optimal performance and safety.
4.2 Common Issues and Solutions
Addressing common issues with your AO Smith water heater ensures reliable operation. If the water is too hot, check temperature settings and adjust as needed. For no hot water, verify power supply and heating element functionality. Leaks may indicate loose connections or a faulty T&P valve; tighten or replace parts as required. Sediment buildup can cause inefficiency; flush the tank regularly. If the pilot light won’t stay lit on gas models, inspect the draft hood and venting system. Always refer to the manual for troubleshooting steps and contact a professional if issues persist to avoid further complications and ensure safety.

Warranty and Support
AO Smith offers comprehensive warranty coverage and dedicated support. Register your product for warranty benefits and access repair services. Find authorized providers for maintenance and claims assistance easily online.
5.1 Warranty Registration and Claims
Proper warranty registration ensures your AO Smith water heater is protected. Register online with proof of purchase for extended coverage and faster claims processing. Claims can be submitted through the official website or by contacting customer support. Ensure all documentation is complete to avoid delays. Timely registration guarantees access to repair services and replacements under warranty terms. AO Smith’s dedicated support team assists with claims, providing hassle-free solutions for defects or malfunctions. Keep your warranty active to enjoy uninterrupted protection and support for your water heater.
5.2 Finding Repair and Service Providers
AO Smith provides a comprehensive network of authorized service providers for efficient repairs. Visit the official website to locate certified technicians near you. Use the “Find a Service Provider” tool by entering your location. Ensure any repairs are done by trained professionals to maintain warranty validity. Contact AO Smith support for assistance in scheduling service. Regular maintenance by certified experts ensures optimal performance and extends the lifespan of your water heater. Trust only authorized personnel for genuine parts and reliable service.

Energy Efficiency and Cost Savings
AO Smith water heaters offer advanced insulation to reduce standby heat loss and optimize energy use. Adjusting temperature settings enhances efficiency without sacrificing comfort, lowering utility bills.
6.1 Adjusting Temperature for Efficiency
Adjusting your AO Smith water heater’s temperature is key to maximizing efficiency. Lowering the thermostat by just a few degrees can significantly reduce energy consumption, helping to lower your utility bills. The U.S. Department of Energy recommends setting your water heater to 120°F for optimal efficiency. This temperature balances energy savings with sufficient hot water supply. Additionally, installing a thermostat with a timer allows you to schedule heating during off-peak hours, further enhancing energy efficiency and cost savings. Always refer to your owner’s manual for specific guidance on temperature adjustment for your model.
6.2 Understanding Standby Heat Loss
Standby heat loss occurs when heat escapes from your AO Smith water heater into the surrounding environment, even when it’s not in use. This phenomenon increases energy consumption and reduces efficiency. Modern AO Smith models feature foam insulation to minimize standby heat loss. Proper installation in an insulated area and maintaining the heater at a moderate temperature can further reduce this loss. Regularly inspecting and maintaining the insulation ensures optimal performance. By addressing standby heat loss, you can save energy and lower your utility bills while extending the lifespan of your water heater.

Advanced Features of AO Smith Water Heaters
AO Smith water heaters offer advanced features like digital controls, smart monitoring, and eco-friendly technologies to enhance efficiency and user experience. These innovations ensure optimal performance and convenience.
7.1 Digital Controls and Settings
AO Smith water heaters feature advanced digital controls, offering intuitive operation and precise temperature adjustment. With touchscreen interfaces and Wi-Fi connectivity, users can monitor and adjust settings remotely via smartphone apps. These controls enable customizable temperature profiles, energy usage tracking, and scheduling for optimal efficiency. Smart diagnostics alert users to potential issues, ensuring proactive maintenance. The digital interface also provides real-time feedback on energy consumption, helping users make informed decisions to reduce costs. Enhanced safety features, like remote shut-off and temperature lockouts, add an extra layer of protection. These cutting-edge controls simplify management and maximize the heater’s performance and energy efficiency.
7.2 Remote Monitoring and Smart Features
AO Smith water heaters offer advanced remote monitoring through smartphone apps, enabling users to track performance, adjust settings, and receive alerts. Smart features include real-time notifications for temperature changes or system issues; Energy usage tracking helps optimize consumption, while vacation mode ensures energy efficiency when you’re away. Compatibility with smart home systems allows seamless integration for enhanced control. Remote diagnostics enable quick troubleshooting, reducing downtime. These features provide unparalleled convenience, energy savings, and peace of mind, ensuring your water heater operates efficiently and reliably from anywhere.
Environmental Impact and Compliance
AO Smith water heaters are designed with eco-friendly features, including foam insulation to reduce standby heat loss and compliance with energy regulations, promoting sustainability and eco-conscious lifestyles.
8.1 Eco-Friendly Features
AO Smith water heaters incorporate advanced eco-friendly features such as high-efficiency insulation, reducing standby heat loss. These models often include smart controls and low-emission burners, minimizing environmental impact. Energy Star certification ensures adherence to strict efficiency standards, lowering energy consumption and operational costs. Additionally, some units utilize recyclable materials and are designed for longer lifespan, reducing waste. By integrating cutting-edge technology, AO Smith promotes sustainable water heating solutions without compromising performance or reliability, making them a preferred choice for environmentally conscious homeowners seeking to reduce their carbon footprint while enjoying consistent hot water supply.
8.2 Compliance with Energy Regulations
AO Smith water heaters are designed to meet or exceed stringent energy regulations. They comply with national and local energy standards, ensuring reduced energy consumption and lower utility bills. Many models are Energy Star certified, indicating they meet U.S. Environmental Protection Agency guidelines for energy efficiency. Compliance with these regulations helps homeowners qualify for rebates and incentives. By adhering to energy standards, AO Smith supports eco-friendly practices and contributes to a sustainable future while maintaining high performance and reliability in water heating solutions.