quartzite care and maintenance pdf

Quartzite is a metamorphic rock primarily composed of quartz, formed from sandstone through natural heat and pressure. Known for its durability, hardness, and attractive appearance, it is widely used for countertops, flooring, and wall cladding in both indoor and outdoor settings, making it a popular choice in home design due to its strength and aesthetic appeal.

1.1 What is Quartzite?

Quartzite is a metamorphic rock primarily composed of quartz, formed when sandstone undergoes high heat and pressure over millions of years. It is known for its exceptional hardness, durability, and attractive appearance, making it a popular choice for countertops, flooring, and wall cladding. Quartzite is highly resistant to stains, acids, and abrasion, with a Mohs hardness rating of 7, and is often used in both indoor and outdoor settings due to its strength and aesthetic appeal.

1.2 Properties of Quartzite

Quartzite is an extremely hard and dense natural stone with a Mohs hardness rating of 7, making it highly resistant to scratches, stains, and abrasion. It is also heat-resistant and durable, suitable for high-traffic areas. However, it is porous and requires regular sealing to protect against stains and water damage. Its attractive appearance and strength make it a versatile choice for countertops, flooring, and outdoor applications, blending functionality with aesthetic appeal.

1.3 Uses of Quartzite in Home Design

Quartzite is a popular choice in home design due to its durability and aesthetic appeal. It is widely used for countertops, flooring, and wall cladding, adding a luxurious touch to both indoor and outdoor spaces. Its strength and weather resistance make it ideal for high-traffic areas, while its natural beauty enhances kitchens, bathrooms, and outdoor landscapes, blending functionality with decorative charm.

Daily Cleaning of Quartzite

Quartzite surfaces should be cleaned daily using a soft cloth, pH-neutral cleaner, or mild dish soap and warm water. Avoid harsh chemicals or abrasive materials.

2.1 Recommended Cleaning Products

For daily cleaning, use pH-neutral cleaners, mild dish soap, or stone-specific products. Avoid harsh chemicals, abrasive materials, or acidic substances like vinegar, as they can damage the surface. Always test a small area first to ensure compatibility. Regular cleaning with gentle products helps maintain the appearance and longevity of your quartzite surfaces.

2.2 Step-by-Step Cleaning Process

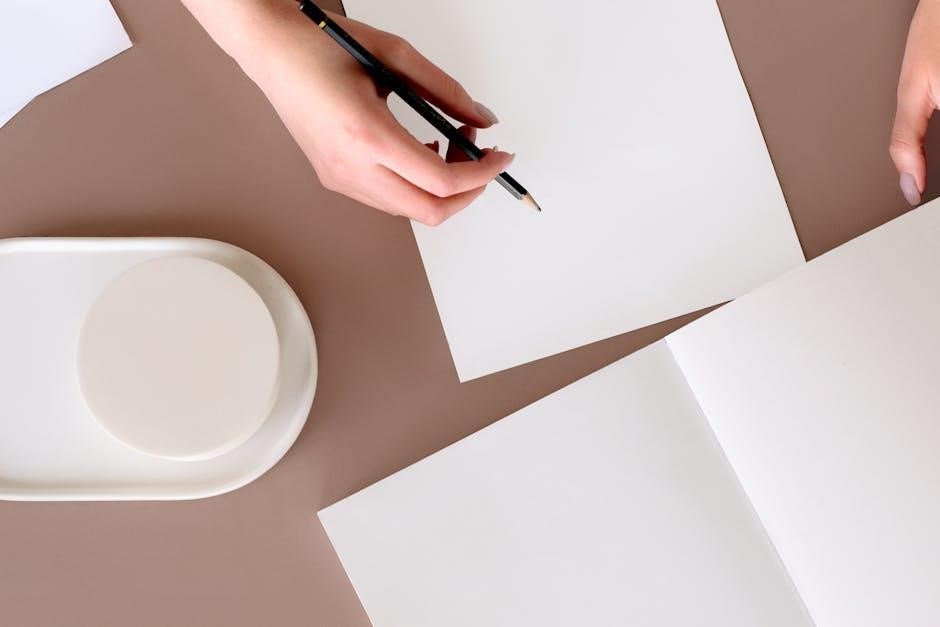
Dampen a soft, clean cloth with warm water or a pH-neutral cleaner. 2. Wipe the quartzite surface gently in circular motions, focusing on stained or soiled areas. 3. For stubborn spots, apply a mild dish soap solution, let it sit briefly, then rinse thoroughly. 4. Dry the surface with a clean towel to prevent water spots. Regular cleaning maintains the stone’s appearance and prevents damage.

2.4 Immediate Spill Cleanup

Act quickly to clean spills on quartzite surfaces to prevent absorption. Blot the spill with a clean, absorbent cloth or paper towel. Avoid rubbing, as it may damage the surface. For most spills, use a pH-neutral cleaner or mild soap solution, then rinse thoroughly with clean water. Dry the area with a soft cloth to prevent water spots. Prompt cleanup helps maintain the stone’s appearance and prevents potential stains.

Sealing Quartzite

Sealing quartzite is essential to protect it from stains and spills. It should be sealed every 1-2 years, depending on usage, to maintain its durability and appearance.

3.1 Importance of Sealing

Sealing quartzite is crucial for protecting its porous surface from stains and spills. It enhances durability, making it resistant to moisture and potential damage. Regular sealing ensures the stone maintains its luxurious appearance and extends its lifespan. Proper sealing prevents etching and stains, preserving the natural beauty of quartzite surfaces. It is a simple yet vital maintenance step.

3.2 How to Seal Quartzite

To seal quartzite, start by cleaning the surface thoroughly with a pH-neutral cleaner. Allow it to dry completely. Apply a high-quality, stone-specific sealer evenly, following the manufacturer’s instructions. Let it absorb for the recommended time, then wipe off any excess with a clean cloth. Repeat if necessary for optimal protection. Sealing every 1 to 2 years is typically advised to maintain its resistance to stains and moisture.

3.3 How Often to Reapply Sealant

Reapply sealant to quartzite every 1 to 2 years, depending on usage and exposure to spills. High-traffic areas may require more frequent sealing. Test the surface by dripping water; if it beads, the seal is still effective. If water absorbs quickly, it’s time to reseal. Regular resealing ensures long-lasting protection against stains and moisture, preserving the stone’s appearance and durability.

Stain Removal

Stains on quartzite can be removed using a poultice or stone-specific cleaners. Blot spills immediately to prevent penetration, and avoid harsh chemicals that may damage the surface.

4.1 Common Types of Stains

Quartzite surfaces are prone to stains from oil, wine, ink, and water spots. These stains occur when liquids penetrate the porous surface, causing discoloration. Oil-based stains, like those from cooking, can leave dark spots, while water marks appear as white or hazy areas. Immediate cleanup is crucial to prevent these stains from setting in and requiring more intensive removal methods. Regular sealing helps reduce the risk of staining;

4.2 Methods for Stain Removal

For oil-based stains, apply a small amount of mild dish soap or a stone-specific cleaner directly to the stain, let it sit for 10-15 minutes, then rinse with warm water. For water spots, buff the area with a dry cloth. Etching or ink stains may require specialized poultice treatments. Avoid abrasive materials, as they can scratch the surface. Regular sealing and immediate spill cleanup help prevent stains from forming.

Heat Resistance and Protection

Quartzite offers excellent heat resistance due to its dense structure, but it’s not heatproof. To protect it, always use trivets or heat pads under hot cookware to prevent damage.

5.1 Understanding Heat Resistance

Quartzite is highly heat-resistant due to its dense, quartz-based composition, making it suitable for kitchen countertops. However, it is not entirely heatproof, and direct exposure to extreme temperatures can cause damage. Prolonged contact with hot objects may lead to discoloration or cracking, especially if the stone is not properly sealed. Always use trivets or heat pads to protect the surface from heat damage and maintain its durability.

5.2 Protecting Quartzite from Heat Damage

To safeguard quartzite from heat damage, always use trivets, heat pads, or coasters when placing hot objects. Avoid direct contact with open flames or extreme temperature changes. Ensure the surface is properly sealed, as this enhances its heat resistance. Cleaners should be compatible with the sealer to maintain protection. Regular maintenance and inspections can help identify vulnerabilities, ensuring long-term durability and aesthetic preservation of your quartzite surfaces.

Scratch Prevention and Removal

To prevent scratches, use cutting boards and trivets for sharp or heavy objects. Avoid abrasive cleaners or materials that can damage the surface. For minor scratches, a stone polish or baking soda paste can be applied gently. Always test any removal method on a small, inconspicuous area first. Regular sealing also helps maintain surface resilience against wear.

6.1 Preventing Scratches

Preventing scratches on quartzite requires careful daily habits. Always use cutting boards and trivets for sharp or heavy objects. Avoid dragging appliances or utensils across the surface. Clean the countertop regularly with soft cloths or sponges to remove dust and debris that can cause friction. Placing felt pads under decorative items or heavy objects can also help prevent scratches. Regular sealing enhances durability and provides an additional layer of protection against wear.

6.2 DIY Scratch Removal

Minor scratches on quartzite can often be removed with a gentle approach. Start by cleaning the area with a mild dish soap and warm water using a soft cloth. For slightly deeper scratches, apply a specialized stone polish or a small amount of baking soda mixed with water, rubbing gently in circular motions. Avoid harsh chemicals or abrasive materials, as they can damage the surface. For deeper scratches, professional intervention may be necessary.

Etching and Prevention

Etching occurs when acidic substances like citrus or vinegar react with quartzite, causing dull marks. To prevent etching, use coasters under acidic items and clean spills immediately.

7.1 What is Etching?

Etching refers to the dull, matte marks that appear on quartzite surfaces when exposed to acidic substances like citrus, vinegar, or wine. These marks occur due to a chemical reaction that alters the stone’s finish. Unlike scratches, etching is not a physical abrasion but a chemical change, making it essential to understand and prevent to maintain quartzite’s appearance. Regular sealing can help reduce etching risks.

7.2 How to Prevent Etching

To prevent etching on quartzite, use coasters under glasses and bottles, especially those containing acidic substances like citrus or wine. Clean spills immediately with a soft cloth and pH-neutral cleaner. Regular sealing is crucial, as it creates a protective barrier against acids. Avoid placing acidic foods directly on the surface and use cutting boards to prevent contact with sharp or abrasive objects. This helps maintain the stone’s polished finish and aesthetic appeal.

Preventing Water Damage

Regularly drying quartzite surfaces after exposure to water helps prevent damage. Use absorbent cloths to wipe spills and moisture, ensuring no standing water remains to avoid discoloration or etching.

8.1 Drying Quartzite Surfaces

Drying quartzite surfaces is crucial to prevent water damage. After cleaning or exposure to moisture, use a soft, lint-free cloth or paper towel to thoroughly dry the area. Avoid letting water stand, as it can seep into the stone’s pores and cause discoloration or etching. Regular drying helps maintain the surface’s appearance and prevents mineral deposits from forming, especially in hard water areas. Always dry in sections to ensure no moisture remains.

8.2 Managing Water Exposure

Quartzite, being porous, requires careful management of water exposure to prevent damage. Regularly clean spills immediately with a pH-neutral cleaner and dry thoroughly to avoid moisture absorption. Avoid using abrasive sponges or harsh chemicals, as they can damage the surface. For prolonged water exposure, ensure the stone is sealed properly to repel moisture and protect its integrity. Sealing helps reduce the risk of discoloration and etching caused by water.

Special Care for High-Traffic Areas

In high-traffic areas, quartzite requires extra attention to withstand wear. Regularly inspect for scratches or etching and clean thoroughly. Use area rugs or mats to reduce impact and distribute weight evenly, ensuring longevity and maintaining its aesthetic appeal.

9.1 Additional Maintenance Tips

For high-traffic areas, inspect quartzite surfaces regularly for scratches or etching. Clean spills immediately and use pH-neutral cleaners to avoid damage. Re-seal quartzite annually to maintain its protective barrier. Place mats or area rugs near entryways to reduce wear from foot traffic. Avoid dragging heavy objects, as they can cause scratches. Regular maintenance ensures quartzite remains durable and retains its luxurious appearance in busy spaces;

Outdoor Quartzite Care

Quartzite’s weather resistance makes it ideal for outdoor use. Regular cleaning and annual sealing are essential to maintain its durability and appearance in outdoor settings.

10.1 Weather Resistance

Quartzite’s natural durability makes it resistant to weather conditions, including rain, temperature fluctuations, and UV exposure. Its dense composition minimizes erosion and cracking, ensuring longevity in outdoor environments. While it is robust, it is not entirely impervious to harsh weather, requiring regular sealing to maintain its resilience and appearance over time. Proper maintenance ensures quartzite remains a durable and attractive outdoor solution.

10.2 Maintenance Tips for Outdoor Quartzite

Regular sealing is essential to protect outdoor quartzite from moisture and weathering. Clean surfaces with mild soap and water, avoiding harsh chemicals. Dry the area thoroughly after cleaning to prevent water spots. Avoid exposure to acidic substances, and use protective coverings during extreme weather; Inspect for cracks or damage annually and address them promptly to maintain durability and preserve the stone’s natural beauty over time.

Annual Maintenance Routine

Annual maintenance ensures quartzite’s longevity by inspecting for damage, reapplying sealants, and performing deep cleaning. This routine preserves the stone’s appearance and enhances its durability over time.

11.1 Inspecting Quartzite Surfaces

Regularly inspect quartzite surfaces for etching, cracks, or stains. Check for areas where the sealant may have worn off, as this can expose the stone to damage. Look for discoloration or dull spots that might indicate etching or stains. Pay attention to high-traffic areas and around sinks or cooktops, where wear is most common. This proactive approach helps identify issues before they become major problems.

11.2 Scheduling Professional Maintenance

Schedule professional maintenance for your quartzite surfaces every 1-2 years to ensure long-term durability. Experts can reseal the stone, address deep stains, and restore its shine. This service is particularly beneficial for high-traffic areas or surfaces exposed to heavy use. Regular professional care complements daily maintenance and helps preserve the stone’s integrity. Always follow manufacturers’ recommendations for sealing and maintenance frequency to maintain warranty coverage and optimal appearance.

Common Mistakes to Avoid

Common mistakes include using harsh chemicals, neglecting regular sealing, and improper cleaning, which can damage the surface and reduce its durability and aesthetic appeal.

12.1 Using Harsh Chemicals

Using harsh chemicals, abrasive cleaners, or solvents like oven cleaners can damage quartzite surfaces. These substances can strip away sealants, etch the stone, or cause discoloration. Always opt for pH-neutral, stone-specific cleaners or mild dish soap to maintain the integrity and appearance of your quartzite. Regular use of inappropriate products can lead to premature wear and compromise its durability.

12.2 Neglecting Regular Sealing

Neglecting to seal quartzite regularly can lead to staining, moisture absorption, and damage. Quartzite is naturally porous and requires sealing to protect it from spills and contaminants. Failing to reapply sealant every 1-2 years exposes the surface to potential harm. Using improper cleaning products can also degrade the sealer faster. Over time, neglecting this step can result in irreversible damage, requiring costly repairs or replacements. Regular sealing is essential for maintaining durability and appearance.

Continue Reading

thule 757 compatibility list pdf

The Thule 757 compatibility list is a comprehensive guide detailing which vehicles and load bars work with the Thule Rapid System 757 roof rack.

Overview of the Thule 757 Rapid System

The Thule 757 Rapid System is a popular roof rack solution designed for vehicles with standard roof railings. Known for its ease of installation and universal compatibility, it supports various load bar types, including ProBar, SquareBar, WingBar, and SlideBar. This system is ideal for carrying luggage, bikes, and other gear, offering a robust and stylish option for outdoor enthusiasts. Its sleek design ensures a quiet ride and maximizes loading area efficiency.

Importance of Compatibility When Choosing Roof Racks

Compatibility is crucial when selecting roof racks to ensure proper fitment, safety, and functionality. The Thule 757 system is designed to work seamlessly with various vehicles and load bars, making it a versatile choice for outdoor enthusiasts. Ensuring compatibility prevents safety hazards and guarantees optimal performance. Always refer to the Thule 757 compatibility list or use their online tools to confirm fitment for your specific vehicle and load-carrying needs.

Key Features of the Thule 757 Rapid System

The Thule 757 Rapid System is known for its durable design, high load capacity, and compatibility with various load bars, ensuring a secure and versatile roof rack solution.

Design and Build Quality

The Thule 757 Rapid System is built with premium materials, ensuring durability and reliability. Its sleek, aerodynamic design minimizes wind noise and enhances vehicle aesthetics. The system features robust foot pads and adjustable claws for a secure fit on various roof types. High-quality finishes and construction ensure long-term performance, while its lightweight yet sturdy frame maximizes load capacity without compromising on strength or stability, making it a top choice for outdoor enthusiasts.

Load Capacity and Safety Features

The Thule 757 system is engineered with a maximum load capacity of 100 kg, ensuring safe and secure transport of gear. Integrated safety locks and One-Key System compatibility provide theft prevention. The robust design adheres to ISO 11154-E standards, guaranteeing durability and reliability. Features like overload protection and anti-theft mechanisms enhance user confidence, making it a trusted choice for carrying heavy loads safely and efficiently, while adhering to international safety regulations.

Compatibility with Thule Load Bars

The Thule 757 Rapid System is designed to work seamlessly with a range of Thule load bars, including ProBar, SquareBar, WingBar, and SlideBar. This versatility ensures optimal performance and customization for different vehicle setups. The system’s universal mounting kit adapts to various roof rail types, while its compatibility with Thule’s bar options enhances load-carrying capacity and functionality. Users can refer to the compatibility list PDF for specific bar-match details tailored to their vehicle.

Understanding the Thule 757 Compatibility List

The Thule 757 compatibility list is a detailed guide helping users identify which vehicles and load bars work with the Rapid System 757 roof rack.

How to Read and Interpret the PDF

The Thule 757 compatibility list PDF is structured to help users easily identify compatible vehicles and load bars. It lists vehicle makes, models, and years, alongside corresponding bar types, such as ProBar, SquareBar, WingBar, and SlideBar. Users can filter or search for their specific vehicle to find matching systems. The document also highlights load capacities and special requirements, ensuring safe and proper installation. Always cross-reference your vehicle details with the compatibility list to ensure accuracy.

Vehicle-Specific Compatibility Details

The Thule 757 compatibility list provides detailed vehicle-specific information, including supported models, years, and required components. It outlines the exact load bars and accessories compatible with each vehicle, ensuring a perfect fit. Users can find their car’s make, model, and year to verify compatibility, streamlining the selection process. This ensures that the roof rack system is tailored to their vehicle’s specifications, enhancing safety and performance.

Thule 757 Installation Requirements

The Thule 757 requires careful installation, following manufacturer guidelines to ensure proper fit and function. Tools and accessories must be used as specified for secure and safe mounting.

Tools and Accessories Needed

Installing the Thule 757 requires specific tools, such as a torque wrench and Allen key, to ensure proper fitting. Essential accessories include brackets, locks, and clips to secure the system. Always refer to the PDF guide for a detailed list of required tools and components, ensuring a seamless installation process tailored to your vehicle’s specifications. Proper preparation is key to achieving a safe and reliable setup for your roof rack system.

Step-by-Step Installation Guide

The Thule 757 installation begins with attaching the foot packs to your vehicle’s roof rails. Adjust the feet to fit snugly, ensuring proper alignment. Secure the system using the provided hardware, following the torque specifications in the PDF guide. Tighten all bolts evenly to maintain stability; Finally, test the setup by gently rocking the rack to ensure it’s firmly attached. Always double-check the installation for safety before loading gear. Proper installation ensures reliability and performance.

Thule Fit Guide and Online Compatibility Checker

Use the Thule Fit Guide and online checker to verify your vehicle’s compatibility with the 757 system, ensuring a perfect match for your roof rack needs.

Using the Thule Website for Vehicle Fit Verification

To verify compatibility, visit the Thule website and use the compatibility checker. Enter your vehicle’s make, model, and year to find a list of compatible roof racks. The tool provides detailed information on which Thule 757 systems fit your car, ensuring a secure and proper installation. This feature simplifies the process, eliminating guesswork and ensuring you select the right equipment for your vehicle.

How to Match Your Vehicle with the Right Rack System

Use the Thule Fit Guide or the compatibility checker on Thule’s website to match your vehicle with the correct rack system. Enter your car’s make, model, and year to view compatible options. The guide provides details on load bars, foot packs, and accessories tailored to your vehicle, ensuring a perfect fit. This step-by-step process guarantees a secure and reliable roof rack setup for your specific car model.

Thule 757 Load Bar Compatibility

The Thule 757 is compatible with ProBar, SquareBar, WingBar, and SlideBar, ensuring flexibility for various load-carrying needs. Check the compatibility list for specific load bar fits.

ProBar, SquareBar, WingBar, and SlideBar Compatibility

The Thule 757 is compatible with ProBar, SquareBar, WingBar, and SlideBar, offering versatile load-carrying solutions. Each bar type suits different needs, from aerodynamic designs to heavy-duty loads. The ProBar is lightweight, while the SquareBar is durable. WingBar reduces wind noise, and SlideBar adjusts for easier loading. Refer to the compatibility list to match the best bar with your vehicle and requirements.

Load Bar Lengths and Weight Limits

The Thule 757 system supports various load bar lengths and weight capacities. ProBar, SquareBar, WingBar, and SlideBar options cater to different needs. Maximum weight limits vary, with a general capacity of up to 100 kg. Proper installation and adherence to specified limits ensure safety and durability. Always consult the compatibility list or user manual for precise specifications tailored to your vehicle and load configuration.

Tips for Choosing the Right Configuration

Consider your vehicle size, load type, and frequency of use. Choose between 1-4 bar solutions for optimal space and weight distribution. Optimize for luggage, bikes, or gear to ensure a secure and balanced setup. Use the Thule Fit Guide for precise fit verification and compatibility assurance.

1-Bar, 2-Bar, 3-Bar, and 4-Bar Solutions

Thule 757 offers versatile configurations: 1-bar for small loads, 2-bar for medium needs, 3-bar for larger capacities, and 4-bar for maximum durability. Each setup ensures stability and weight distribution, catering to different vehicle sizes and load types. The 1-bar is ideal for compact cars, while 4-bar suits heavy-duty requirements. Choose based on your vehicle’s roof size and load preferences for optimal performance.

Optimizing for Luggage, Bikes, or Other Gear

Thule 757 adapts to various needs, offering solutions for luggage, bikes, or other gear. Use ProBar for heavy loads, SquareBar for versatility, or WingBar for aerodynamics. Accessories like bike racks and cargo boxes enhance functionality. Secure your gear with locks and clips, ensuring stability and safety. Customize your setup to fit your lifestyle, whether for road trips, cycling adventures, or hauling equipment, ensuring maximum efficiency and durability.

Thule 757 Accessories and Add-Ons

Enhance your Thule 757 system with locks, clips, and other essential accessories. Custom-fit solutions ensure secure and versatile load carriage, optimizing your roof rack’s functionality and durability.

Locks, Clips, and Other Essential Accessories

Thule offers a range of accessories, including locks and clips, designed to enhance the functionality of the 757 system. These items ensure secure load carriage and easy installation. Locks provide theft protection, while clips and adapters offer a perfect fit for various load types. These accessories are vehicle-specific and ensure compatibility with the Thule 757, maximizing its versatility and performance.

Enhancing Functionality with Additional Components

The Thule 757 system can be enhanced with additional components like bike racks, storage boxes, and cargo carriers. These accessories integrate seamlessly, offering versatile solutions for different needs. Load bars such as ProBar, SquareBar, and WingBar provide a sturdy base, while specialized mounts ensure secure attachment of gear. These components are designed to maximize the system’s functionality, ensuring compatibility and optimal performance for various outdoor activities.

Safety and Maintenance Tips

Regularly inspect the Thule 757 system for wear and tear, ensure secure load carriage, and clean components to maintain functionality. Always follow weight limits and installation guidelines for optimal safety and longevity.

Ensuring Secure Load Carriage

Proper installation of the Thule 757 system is critical for safe load carriage. Always tighten connections firmly and ensure the foot pack and load bars are securely attached to the vehicle. Distribute loads evenly and adhere to weight limits to prevent instability. Regularly inspect all components for wear or damage, and use Thule-recommended accessories like straps or locks for added security. Pre-trip checks are essential to ensure everything is properly secured.

Regular Maintenance for Longevity

Regular maintenance ensures the Thule 757 system remains durable and functional. Clean the load bars and feet regularly to remove dirt and debris. Lubricate moving parts to prevent corrosion and ensure smooth operation. Inspect all components for signs of wear or damage, replacing them as needed. Tighten all connections periodically to maintain stability. Proper care extends the lifespan of the system, ensuring safe and reliable performance for years to come.

The Thule 757 compatibility list is an essential resource for ensuring safe and secure load carriage. Always refer to the guide for optimal system performance and durability.

Final Thoughts on the Thule 757 Compatibility List

The Thule 757 compatibility list is a crucial tool for ensuring proper fitment and functionality. It simplifies the process of selecting the right roof rack system for your vehicle, offering detailed vehicle-specific information. By referencing the list, users can confidently choose compatible accessories and load bars, ensuring safety and optimal performance. Always consult the official Thule website or authorized dealers for the most accurate and updated resources.

Where to Find Additional Resources and Support

For further assistance, visit the official Thule website, where you can access detailed PDF guides, compatibility checkers, and customer support. The Thule Fit Guide and online compatibility checker are invaluable tools for ensuring proper fitment. Additionally, local Thule dealers offer expert advice and hands-on support to help you make informed decisions. Always refer to authorized sources for the most reliable and up-to-date information.

Continue Reading

instant pudding mix instructions

Instant pudding mix is a convenient dessert solution offering quick preparation and delicious results. It comes in various flavors, making it a versatile option for both traditional and creative recipes.

What is Instant Pudding Mix?

Instant pudding mix is a pre-measured blend of dry ingredients, including sugar, cornstarch, flavorings, and sometimes milk powder. Designed for quick desserts, it simplifies pudding preparation by eliminating the need to measure individual components. Simply combine the mix with milk, stir, and chill to create a smooth, creamy treat. It’s a convenient solution for home cooks and bakers seeking effortless desserts with consistent results.

Benefits of Using Instant Pudding Mix

Instant pudding mix offers unmatched convenience, saving time and effort in the kitchen. It eliminates the need for measuring multiple ingredients, ensuring consistent results. Perfect for last-minute desserts, it’s versatile in both traditional and creative recipes. Additionally, it’s a cost-effective option for large gatherings. The mix is shelf-stable, maintaining freshness for months, making it a practical choice for home cooks and professional bakers alike.

Ingredients Required for Instant Pudding

  • Milk (dairy or non-dairy)
  • Sugar or sweetener
  • Cornstarch for thickening
  • Vanilla extract for flavor
  • Salt to enhance taste

These essentials combine to create a smooth, creamy dessert.

Dry Ingredients in the Mix

Dry ingredients typically include sugar, cornstarch, nonfat dry milk powder, and salt. These components provide sweetness, thickness, creaminess, and balance to the pudding. Vanilla beans or flavorings are often added for aroma. These pre-measured ingredients simplify preparation, ensuring consistency and convenience. Proper storage maintains their quality and effectiveness in the pudding mix.

Liquid Ingredients Needed for Preparation

Cold milk is the primary liquid ingredient, typically requiring 2 cups for standard mixes. Whole, skim, or plant-based milks like almond or soy work well. Ensure milk is chilled for optimal texture. Some recipes suggest adding a teaspoon of vanilla extract for enhanced flavor. Accurate measurements are crucial for proper consistency and texture in the final pudding.

Step-by-Step Instructions for Preparing Instant Pudding

Pour cold milk into a bowl, add pudding mix, and whisk until smooth. Chill in the refrigerator until set, typically 5 minutes, for a quick treat.

Mixing the Dry Ingredients

To prepare the dry ingredients, combine sugar, cornstarch, and salt in a bowl. Ensure they are well-mixed for even distribution. This step is crucial for the pudding’s texture and flavor, creating a smooth base. Using a whisk or spoon, blend thoroughly to avoid lumps. Proper mixing ensures the pudding thickens evenly and tastes consistent. This mixture forms the foundation for a perfect pudding texture and sweetness. Always use fresh ingredients for the best results.

Combining with Milk and Stirring

Pour 2 cups of cold milk into a bowl and gradually add the dry pudding mix. Use a wire whisk to stir continuously for 1-2 minutes until smooth. Ensure no lumps remain. Constant stirring prevents clumping and helps the mixture thicken evenly. Whisk until the pudding reaches your desired consistency. Proper mixing ensures a creamy texture. Avoid overmixing to prevent a chalky taste. This step is key for achieving a smooth, even pudding texture. Always use cold milk for the best results.

Chilling the Pudding

Once mixed, cover the bowl with plastic wrap and refrigerate for at least 5 minutes to allow the pudding to set. Chilling ensures the pudding thickens properly and develops a smooth texture. For best results, refrigerate for 15-20 minutes. Avoid freezing, as it can alter the consistency. Let it chill until firm before serving. This step is crucial for achieving the perfect creamy texture. Always keep it refrigerated until ready to serve.

Variations and Flavor Options

Instant pudding mix comes in diverse flavors like vanilla, chocolate, and fruit varieties. Customize by adding nuts, spices, or extracts to create unique dessert experiences effortlessly.

Different Flavors of Pudding Mix

Instant pudding mixes are available in a variety of flavors, including vanilla, chocolate, strawberry, lemon, and butterscotch. Some brands offer seasonal or limited-edition flavors, while others cater to dietary preferences like sugar-free or gluten-free options. These diverse flavors allow users to create desserts tailored to their tastes, from classic vanilla puddings to rich chocolate treats or fruity variations for a refreshing twist.

Adding Extra Ingredients for Customization

Enhance your instant pudding by incorporating fresh fruits, nuts, or spices. Fold in whipped cream for a lighter texture or add cocoa powder for deeper chocolate flavor. Mix-ins like crushed cookies or caramel sauce can elevate the dessert. Even a hint of vanilla extract or citrus zest adds complexity, making each pudding unique and personalized to your taste preferences. This versatility transforms a simple mix into a gourmet treat.

Storage and Shelf Life

Store instant pudding mix in a cool, dry place in an airtight container to maintain freshness. Shelf life typically lasts up to three months when stored properly.

Storing the Pudding Mix

Store instant pudding mix in an airtight container in a cool, dry place to preserve freshness. Ensure the container is tightly sealed to prevent moisture exposure. Avoid direct sunlight and high humidity. Once opened, use within three months for optimal quality. Keep away from strong-smelling foods to prevent odor absorption. Proper storage maintains the mix’s texture and flavor for future use.

Refrigeration After Preparation

After preparing instant pudding, refrigerate it immediately to allow it to set. Chill for at least 5 minutes to achieve the desired consistency. Keep the pudding cold to maintain freshness and prevent spoilage. Cover the container to avoid contamination and other odors. For optimal taste, consume within 3 days of preparation. Always store leftovers in an airtight container and refrigerate until serving.

Common Mistakes to Avoid

Using hot milk instead of cold can prevent proper thickening, while not covering the pudding during chilling may attract odors or contaminants, affecting flavor and texture.

Overmixing the Pudding

Overmixing the pudding mix can lead to a grainy texture and reduce its creaminess. Stop stirring once the ingredients are fully incorporated to avoid breaking down the starches. This ensures a smooth, even consistency. Overmixing can also introduce air bubbles, affecting the final texture. For best results, mix gently and briefly, then allow the pudding to chill undisturbed.

Incorrect Milk Measurements

Using too little milk results in a thick, paste-like consistency, while excessive milk leads to a runny pudding. Always measure milk accurately as per the package instructions to achieve the perfect texture. The general ratio is 2 cups of milk for every 3.4 ounces of pudding mix. Ensuring precise measurements guarantees a smooth, creamy dessert every time.

Health Considerations

Instant pudding mixes may contain added sugars, artificial flavors, and preservatives. Opting for low-sugar or organic varieties can make this dessert a healthier treat option.

Nutritional Information

Instant pudding mixes typically contain around 120-150 calories per serving, with 2-3g of protein, 25-30g of carbohydrates, and 2-4g of fat. They often include added sugars, sodium, and artificial flavors. Checking the nutrition label is essential for understanding the exact content, as ingredients can vary by brand and flavor. Choosing low-sugar or organic options can help make this dessert a healthier choice.

Diet-Friendly Alternatives

For a healthier option, opt for low-sugar instant pudding mixes or make your own using natural sweeteners like stevia. Use non-dairy milks such as almond, coconut, or oat milk for a lactose-free version. Sugar-free and gluten-free pudding mixes are also available, catering to specific dietary needs. These alternatives allow you to enjoy pudding while adhering to calorie, sugar, or allergen restrictions, making it a versatile dessert choice for various lifestyles.

creative Uses for Instant Pudding Mix

Creative Uses for Instant Pudding Mix

Instant pudding mix can be incorporated into cake batters for enhanced flavor and moisture. It also serves as a versatile base for layered desserts and dips.

Using Pudding Mix in Baking

Instant pudding mix adds flavor and moisture to baked goods like cakes and cookies. It enhances texture and simplifies recipes, serving as a convenient shortcut for bakers. By incorporating pudding mix into batter, you achieve consistent results with minimal effort, making it ideal for both novice and experienced bakers alike. This versatile ingredient transforms ordinary recipes into extraordinary treats effortlessly.

Adding Pudding Mix to Desserts

Instant pudding mix can elevate desserts like pies, parfaits, and trifles by adding rich flavor and moisture. It blends seamlessly into recipes, enhancing texture and taste without extra effort. Whether layered in desserts or mixed into fillings, pudding mix offers a quick and delicious way to create impressive sweet treats with minimal preparation time.

Instant pudding mix simplifies dessert preparation, offering quick, delicious results and endless creative possibilities for both traditional and modern recipes.

Final Tips for Perfect Pudding

For flawless pudding, use cold milk and whisk thoroughly. Avoid overmixing to prevent a grainy texture. Chill until set for the best consistency. Add flavorings like vanilla extract or cocoa powder for extra taste. Experiment with toppings such as fruits or nuts for a personalized touch. Ensure all ingredients are fresh for optimal results. Always follow package instructions for precise measurements.

Exploring More Recipes with Pudding Mix

Beyond traditional pudding, the mix enhances cakes, cookies, and pies. It adds moisture to baked goods and serves as a base for no-bake desserts. Combine with yogurt or whipped cream for unique textures. Experiment with flavors like chocolate or vanilla for variety. Use it in trifles or parfaits for layered desserts. The versatility of pudding mix makes it a staple for creative cooking and baking.

Continue Reading

canadian electrical code 2024 pdf free download

The 2024 Canadian Electrical Code, Part I, is the 26th edition, published in March 2024. It enforces safety standards for electrical installations, ensuring compliance and updated practices.

What is the Canadian Electrical Code 2024?

The 2024 Canadian Electrical Code, Part I, is the 26th edition of the safety standard for electrical installations in Canada. Published by CSA Group in March 2024, it outlines minimum requirements to ensure safe electrical systems. This edition includes updates to grounding and bonding rules, new safety standards, and expanded coverage of emerging technologies. It applies to all electrical installations, providing a framework for compliance. The code is available in print, digital, and online formats, with free viewing options through the CSA Group website, though functionality is limited.

Importance of the Canadian Electrical Code 2024

The 2024 Canadian Electrical Code ensures safety and consistency in electrical installations across Canada. Published by CSA Group, it became effective in April 2025. This 26th edition sets minimum safety standards, crucial for preventing hazards and ensuring reliable electrical systems. Compliance is mandatory, making it vital for electricians and professionals to adhere to its guidelines. The code’s updates, including new safety protocols and technological advancements, enhance its role in promoting safety and efficiency in the electrical industry.

Key Changes and Updates in the 2024 Edition

The 2024 Canadian Electrical Code introduces updated safety standards, technological advancements, and revised grounding and bonding rules to enhance electrical system safety and efficiency.

New Safety Standards and Requirements

The 2024 Canadian Electrical Code introduces enhanced safety standards, including updated requirements for receptacle installations and Ground Fault Circuit Interrupter (GFCI) protection. These changes aim to reduce electrical hazards in residential and commercial settings. New regulations also address enclosures for electrical equipment, ensuring non-environmental considerations align with harmonized standards. The code now mandates specific configurations, such as CSA 14-50R receptacles in dwellings, to support modern appliance demands. These updates reflect a commitment to advancing electrical safety and adapting to technological advancements in the industry. Compliance with these standards is essential for ensuring safe electrical installations.

Technological Advancements and Their Impact

The 2024 Canadian Electrical Code incorporates technological advancements, focusing on smart devices and energy-efficient systems. New requirements for Ground Fault Circuit Interrupter (GFCI) protection and arc fault detection enhance safety in modern electrical installations. The code also addresses the integration of renewable energy sources and electric vehicle charging infrastructure. These updates reflect the growing demand for sustainable and intelligent electrical systems. By adopting these advancements, the code ensures safer, more efficient installations, aligning with global trends in electrical technology and sustainability. This evolution supports the adoption of cutting-edge innovations in the industry.

Revisions to Grounding and Bonding Rules

The 2024 Canadian Electrical Code introduces significant updates to grounding and bonding requirements to enhance safety and clarity. Key changes include revised rules for bonding in residential and industrial settings, ensuring better protection against voltage differences. New provisions for equipotential bonding in areas with sensitive equipment have been added. Additionally, the code clarifies requirements for surge protection devices and their installation. These revisions aim to improve electrical system reliability and reduce the risk of electrical hazards. They also align with modern electrical engineering practices and safety standards. Proper implementation of these updates is crucial for compliance.

Accessing the Canadian Electrical Code 2024

The 2024 Canadian Electrical Code is available through CSA Group’s official website in print, digital PDF, and mobile formats for easy access and compliance.

Official Sources for Download

The 2024 Canadian Electrical Code can be officially downloaded from the CSA Group website. They offer digital formats, including PDF, for easy access. Ensure compliance by purchasing through their platform to avoid unauthorized versions.

Availability of Digital and Print Formats

The 2024 Canadian Electrical Code is available in both digital and print formats for flexibility. Digital versions include PDF, mobile, and web app formats, while print copies offer a traditional reference option. Packages are also available, combining the Code, Handbook, and training resources; This ensures accessibility for various user preferences and needs.

Free Access and Viewing Options

The 2024 Canadian Electrical Code offers free viewing access through the CSA Group website, enabling users to review the document online without a purchase. This initiative, supported by the Western Regulators Forum, promotes accessibility for professionals and the public. However, the online viewer has limitations, such as no copying, downloading, or searching within the text. To access the Code for free, visit the CSA Group website and navigate to the specified viewing platform. This option is ideal for those needing temporary or limited access to the standards.

Training and Certification for the 2024 Code

The CSA Group offers comprehensive training programs and online courses for the 2024 Canadian Electrical Code. These resources include self-guided modules and certification options.

CSA Group Training Programs

The CSA Group provides comprehensive training programs for the 2024 Canadian Electrical Code, offering in-depth insights into new updates and safety standards. These programs include self-guided online courses and instructor-led sessions, designed to help professionals understand and implement the code effectively. Participants can access resources such as training packages, which include the code and overview modules. These programs are tailored for electricians, safety officers, and other stakeholders to ensure compliance and enhance their expertise in electrical installations. The training also covers practical applications and interpretations of the code.

Online Courses and Resources

The CSA Group offers a variety of online courses and resources to help professionals understand the 2024 Canadian Electrical Code. These include self-guided training modules, webinars, and downloadable guides that cover updates to the code. The resources focus on safety standards, compliance, and practical applications, ensuring electricians and safety officers stay informed. Many of these materials are accessible through the CSA Group’s website, providing flexible learning opportunities. These resources are designed to enhance knowledge and skills, making it easier to adhere to the new code requirements effectively.

Certification Requirements for Electricians

Master electricians and Group A safety codes officers must complete mandatory training on the 2024 Canadian Electrical Code by April 2025. This ensures compliance with updated safety standards. The CSA Group offers training programs, both online and in-person, to meet these requirements. These courses cover key changes, grounding rules, and new safety protocols. Certification is essential for electricians to work legally under the 2024 code. Successful completion of these programs ensures professionals are well-prepared to implement the latest standards effectively and safely.

Legal and Compliance Aspects

The 2024 Canadian Electrical Code, Part I, was published in March 2024 and is enforceable from April 1, 2025. Non-compliance may result in penalties.

Enforcement and Implementation Dates

The 2024 Canadian Electrical Code was published on March 4, 2024, and is set to come into force on April 1, 2025, across Canada. Some provinces may adopt it earlier, while others may follow the federal timeline. Electrical installations must comply with the new standards by the enforcement date to avoid penalties. A grace period may be allowed for projects initiated before the implementation date. Non-compliance after the deadline can result in legal consequences. Staying updated on regional enforcement dates is crucial for adherence.

Penalties for Non-Compliance

Non-compliance with the 2024 Canadian Electrical Code can result in significant penalties, including fines and legal consequences. Fines can range from several thousand to over $100,000, depending on the severity of violations. Repeated offenses may lead to additional penalties or even project shutdowns. Imprisonment is possible in extreme cases where safety negligence endangers lives. Jurisdictions enforce these penalties to ensure public safety and adherence to electrical standards. Compliance is critical to avoid financial and legal repercussions, emphasizing the importance of understanding and following the code.

Understanding Legal Notice for Standards

The 2024 Canadian Electrical Code includes legal notices protecting its content as a copyrighted document. Users must adhere to licensing agreements, as unauthorized copying, downloading, or sharing is prohibited. Violating these terms can lead to legal consequences. The code is intended for reference and compliance purposes only, with specific restrictions on redistribution. Proper use ensures respect for intellectual property rights while maintaining the integrity of the standard. Compliance with these notices is essential to avoid legal issues and uphold the code’s authority in electrical safety.

The 2024 Canadian Electrical Code is a vital resource for ensuring safety and compliance in electrical installations. Adhering to its standards is crucial for avoiding legal penalties.

Final Thoughts on the Canadian Electrical Code 2024

The 2024 Canadian Electrical Code serves as a cornerstone for safe electrical practices, offering comprehensive updates to address modern challenges. Its focus on safety, efficiency, and innovation ensures compliance with evolving technological advancements. The availability of print and digital formats, including free viewing options, makes it accessible to professionals nationwide. Training programs and certifications further enhance understanding and adherence. Embracing this code is essential for maintaining electrical safety and avoiding legal penalties, fostering a culture of compliance and excellence in the industry.

Encouragement for Adoption and Adherence

The 2024 Canadian Electrical Code is a vital tool for ensuring electrical safety and efficiency. Professionals are strongly encouraged to adopt this updated standard to stay compliant with modern safety protocols and technological advancements. The availability of free viewing options and comprehensive training programs makes it easier to understand and implement the code. Adherence not only prevents legal penalties but also fosters a culture of safety and excellence in the industry. Embrace the 2024 Canadian Electrical Code to stay updated and ensure compliance with national electrical standards.

Continue Reading

bobbie goods coloring book pdf free download

Bobbie Goods Coloring Book offers a charming collection of whimsical designs‚ perfect for relaxation and creativity․ Its cute‚ hand-drawn illustrations cater to adults and children alike‚ making it a popular choice for those seeking therapeutic art experiences․ Available as a free PDF download‚ it provides an accessible way to unwind and explore artistic expression․

Overview of Bobbie Goods and Her Art Style

Bobbie Goods is a celebrated artist known for her whimsical and charming illustrations‚ which have captivated audiences worldwide․ Her art style is characterized by cute‚ hand-drawn designs that blend simplicity with intricate details‚ making her work both accessible and engaging․ With a focus on creating therapeutic and visually appealing content‚ Bobbie’s art has become a staple in adult coloring books‚ offering a creative outlet for relaxation and self-expression․

Her unique approach to art often features playful characters‚ floral patterns‚ and seasonal themes‚ which resonate with a wide range of audiences․ By combining her passion for drawing with a knack for storytelling‚ Bobbie Goods has established herself as a leading figure in the world of coloring books and digital art․

Popularity of Adult Coloring Books Featuring Bobbie Goods

Bobbie Goods’ adult coloring books have gained immense popularity due to their unique and therapeutic appeal; Her whimsical designs‚ featuring cute characters and intricate patterns‚ attract both casual colorists and serious artists seeking relaxation․ The free PDF downloads make her books accessible to a broad audience‚ fostering a sense of community among users who share and collaborate on their creations․ This accessibility‚ combined with the stress-relieving benefits of coloring‚ has made Bobbie Goods a beloved name in the world of adult coloring․

Features of the Bobbie Goods Coloring Book

Bobbie Goods’ coloring book offers unique‚ whimsical designs with intricate details‚ perfect for relaxation․ The PDF format ensures high-quality printing‚ while its therapeutic benefits make it a favorite among colorists of all levels․

Designs and Illustrations in the Coloring Book

The Bobbie Goods Coloring Book features an array of whimsical and adorable designs․ Each illustration is meticulously crafted with intricate details‚ offering a visually appealing experience for colorists․ From cute animals to enchanting landscapes‚ the book provides a variety of themes to suit different artistic preferences․ The high-quality PDF format ensures crisp and clear images‚ making it ideal for printing and coloring․ Whether you’re a seasoned artist or a casual hobbyist‚ the designs in this book are sure to inspire creativity and relaxation․

Themes and Categories of Coloring Pages

The Bobbie Goods Coloring Book offers a diverse range of themes‚ including Spring-Summer and Fall-Winter variations․ Each category features unique and charming illustrations‚ such as floral patterns‚ cute animals‚ and whimsical landscapes․ The book also includes seasonal designs‚ like holiday-themed pages‚ to keep the coloring experience fresh and engaging․ With over 20 full-coloring pages‚ a checklist‚ and a color test page‚ it provides a structured yet creative outlet for artists of all skill levels․ The variety ensures there’s something for everyone to enjoy․

Quality of PDF Formats for Printing

The Bobbie Goods Coloring Book is available in high-quality PDF format‚ ensuring crisp and clear illustrations for printing․ The file is optimized for home printers‚ with high-resolution designs that maintain their detail․ Weighing in at 9MB‚ the PDF is easily downloadable and compatible with most devices․ Its popularity is evident‚ with over 33‚000 views and 4‚750 downloads‚ making it a reliable choice for those seeking a professional-grade coloring experience․ The format is ideal for printing on standard paper sizes‚ providing a seamless and enjoyable coloring experience for all users․

How to Download the Bobbie Goods Coloring Book for Free

Visit trusted websites like pdfcoffee․com or creative platforms offering free PDF downloads․ Follow simple steps to access high-quality files‚ ensuring a seamless and enjoyable coloring experience․

Legitimate Sources for Free PDF Downloads

Legitimate sources for the Bobbie Goods Coloring Book PDF include trusted websites like pdfcoffee․com and creative platforms offering free downloads․ These sites provide high-quality‚ printable files․ Additionally‚ platforms such as Pinterest and Google Drive host free coloring pages and complete books․ Ensure to verify the download links to avoid unofficial or unsafe sources․ Always opt for websites with positive user reviews and secure connections for a safe and legal downloading experience․

Steps to Download and Install the PDF File

To download the Bobbie Goods Coloring Book PDF‚ visit trusted sources like pdfcoffee․com or Google Drive links․ Locate the PDF file‚ click the download button‚ and select the desired format․ Once downloaded‚ open the file using a PDF reader․ Ensure your device has sufficient storage and a compatible viewer․ For a seamless experience‚ check the file size and format beforehand․ Always verify the source to avoid unauthorized downloads and maintain your device’s security․

Tips for Finding Reliable Free Download Links

To find reliable free download links for the Bobbie Goods Coloring Book PDF‚ use trusted websites like pdfcoffee․com or official platforms such as Etsy and Google Drive․ Always search for the exact title and include terms like “free PDF download” or “printable․” Verify the credibility of the source by checking user reviews and download counts․ Avoid suspicious links or redirects‚ as they may contain malware․ Ensure the file is in PDF format and compatible with your device․ For added safety‚ scan the file before opening․

Legal and Safety Considerations

Ensure you use licensed sources for downloads to avoid legal issues․ Always verify the safety of PDF files to prevent malware and respect intellectual property rights․

Importance of Using Licensed and Legal Downloads

Using licensed and legal downloads ensures compliance with copyright laws‚ supporting creators like Bobbie Goods․ It avoids legal consequences and guarantees high-quality‚ virus-free content․ Licensed downloads promote ethical consumption and protect your device from malware risks․ Always verify the source’s legitimacy to ensure a safe and lawful experience while enjoying Bobbie Goods’ artistic designs․ This approach respects intellectual property and maintains the integrity of the creative work‚ fostering a fair environment for artists and users alike․

Safety Tips for Downloading Free PDF Files Online

When downloading free PDF files like the Bobbie Goods coloring book‚ ensure the source is reputable to avoid malware․ Verify the website’s legitimacy by checking for secure connections (HTTPS) and reading user reviews․ Avoid unofficial sites offering free downloads‚ as they may contain viruses․ Use antivirus software to scan files before opening them․ Be cautious of ads and pop-ups‚ as they might redirect to harmful links․ Always check the file size and format to confirm it matches expectations․ Prioritizing safety protects your device and personal data while enjoying your coloring book․

Platforms Offering Bobbie Goods Coloring Book PDF

Etsy‚ Creative Market‚ Pinterest‚ and Google Drive offer the Bobbie Goods Coloring Book PDF․ These platforms provide legitimate and convenient access to the coloring book․

Etsy and Creative Market Listings

Etsy and Creative Market are popular platforms offering the Bobbie Goods Coloring Book PDF․ Users can find unique‚ high-quality listings featuring Bobbie Goods’ signature art style․ Listings often include exclusive designs‚ seasonal variations‚ and digital downloads․ Prices vary‚ but many start around $12․98․ These platforms ensure secure transactions and instant access to downloadable files․ They are ideal for those seeking authentic and creative content․ Both Etsy and Creative Market are trusted sources for Bobbie Goods’ coloring books‚ catering to fans of her whimsical and adorable designs․

Free Coloring Pages Available on Pinterest and Google Drive

Pinterest and Google Drive offer a variety of free Bobbie Goods coloring pages for download․ Users can explore over 147 unique designs‚ perfect for home‚ school‚ or on-the-go activities․ These platforms provide easy access to printable PDFs‚ ideal for both personal use and sharing․ Many pages feature Bobbie Goods’ iconic whimsical style‚ making them a hit among coloring enthusiasts․ With just a few clicks‚ anyone can download and start coloring these adorable designs‚ bringing creativity and relaxation to their day․

Additional Resources and Tools

Explore free printable designs‚ digital coloring tools‚ and creative resources to enhance your coloring experience with Bobbie Goods’ artwork‚ available on platforms like Pinterest and Google Drive․

Free Coloring Pages and Printable Designs

Discover a wide variety of free coloring pages and printable designs by Bobbie Goods‚ featuring whimsical illustrations and adorable artwork․ Perfect for both kids and adults‚ these designs cater to all skill levels and interests․ Available in PDF format‚ they can be easily downloaded and printed for personal use․ Many platforms like Pinterest and Google Drive offer exclusive collections‚ while websites such as coloring․top provide direct links for instant access․ These resources are ideal for relaxation‚ creativity‚ and sharing with friends or family․

Recommended Tools for Digital Coloring

Enhance your digital coloring experience with tools like Procreate‚ Adobe Illustrator‚ or free alternatives such as Krita and GIMP․ These software options offer advanced features like layers‚ customizable brushes‚ and color palettes․ For mobile users‚ apps like Pigment and Colorfy provide intuitive interfaces for on-the-go creativity․ Additionally‚ styluses such as the Apple Pencil or Wacom pens ensure precise control․ These tools are perfect for bringing Bobbie Goods’ designs to life digitally‚ allowing for endless experimentation and artistic expression․

User Reviews and Feedback

Users rave about the Bobbie Goods Coloring Book‚ calling it “super cute” and ideal for relaxation․ Many appreciate its unique designs and therapeutic benefits‚ though some note occasional issues with download links․

Community Response to the Bobbie Goods Coloring Book

The community has embraced the Bobbie Goods Coloring Book with enthusiasm‚ praising its super cute and whimsical designs․ Many users highlight its therapeutic benefits‚ finding it an excellent tool for relaxation and creative expression․ The variety of themes and seasonal editions‚ such as Spring-Summer and Fall-Winter variations‚ have been particularly well-received․ Fans appreciate the unique art style and the joy it brings to both adults and children․ Some users also share their colored pages online‚ fostering a sense of community and inspiration among enthusiasts․ The book’s popularity continues to grow‚ with many recommending it for its calming and artistic appeal․

Common Praise and Criticisms from Users

Users widely praise the Bobbie Goods Coloring Book for its adorable and unique designs‚ which are both fun and relaxing to color․ The variety of themes and seasonal editions‚ such as Spring-Summer and Fall-Winter variations‚ are particularly popular․ Many appreciate the high-quality PDF format‚ making it easy to print and use․ However‚ some users have noted that certain pages can be intricate‚ requiring fine-tip tools for details․ Despite this‚ the book remains a top choice for its charm and creative inspiration‚ with users often sharing their finished pages online to showcase their artistic skills and connect with fellow enthusiasts․

Seasonal and Special Editions

Bobbie Goods Coloring Book offers seasonal editions like Spring-Summer and Fall-Winter‚ featuring exclusive content and unique themes‚ all available for free download as high-quality PDFs online․

Spring-Summer and Fall-Winter Coloring Book Variations

Bobbie Goods Coloring Book features seasonal editions‚ including Spring-Summer and Fall-Winter variations‚ each offering unique themes and exclusive content․ The Spring-Summer edition includes vibrant floral patterns and sunny motifs‚ while the Fall-Winter version highlights cozy autumnal and snowy designs․ Both editions are available as free PDF downloads‚ ensuring accessibility for fans of all seasons․ These variations provide a refreshing change of scenery‚ catering to different artistic preferences and seasonal inspirations‚ making them a delightful addition to the Bobbie Goods collection․

Exclusive Content in Special Editions

Bobbie Goods Coloring Book’s special editions offer exclusive content‚ such as bonus pages‚ unique themes‚ and additional artistic elements․ These editions often include seasonal variations and limited-time designs‚ providing fans with fresh creative opportunities․ Available as free PDF downloads‚ the special editions are a great way to enhance your coloring experience with rare and engaging artwork that isn’t found in the standard versions‚ making them a must-have for avid colorists seeking something new and exciting․

Creative Inspiration and Uses

Bobbie Goods Coloring Book sparks creativity and relaxation‚ offering unique designs for art projects‚ personalized gifts‚ and mindfulness exercises․ Perfect for sharing and enjoying with friends!

Ways to Use the Coloring Book for Relaxation and Art

Bobbie Goods Coloring Book is a versatile tool for relaxation and artistic expression․ Its intricate yet charming designs allow users to unwind through mindful coloring․ The PDF format makes it easy to print and use anywhere‚ offering a therapeutic escape from daily stress․ Additionally‚ the book serves as a creative outlet‚ enabling individuals to experiment with colors and techniques․ Many find it ideal for personal art projects or as a calming activity during leisure time‚ fostering both relaxation and self-expression․ The downloadable nature ensures accessibility‚ making it a popular choice for those seeking artistic relaxation․ Users can also share their colored pages online‚ connecting with a community of like-minded enthusiasts․ This combination of relaxation and artistry makes the Bobbie Goods Coloring Book a cherished resource for many․ It is also a great way to explore one’s creativity while enjoying the benefits of coloring as a mindfulness practice․

Sharing and Collaborating on Coloring Projects

The Bobbie Goods Coloring Book encourages creativity and connection through sharing․ Users can print and color pages‚ then share their artwork online‚ fostering a sense of community․ Many enthusiasts post their finished designs on social media or platforms like Pinterest‚ inspiring others․ Collaboration is also possible‚ as some fans co-create or exchange ideas․ This shared experience enhances the joy of coloring‚ turning it into a social activity that bridges distances and sparks creativity․ The free PDF format makes it easy to share and collaborate‚ further enriching the artistic journey․

Continue Reading

vtech phone instruction manual

Welcome to the VTech Phone Instruction Manual! This guide provides essential information to help you safely install, operate, and troubleshoot your device․ Read it carefully to ensure optimal performance and understand all features․

Overview of the Manual

This manual is a comprehensive guide designed to help you understand and make the most of your VTech phone․ It covers essential topics such as safety precautions, setting up your device, troubleshooting common issues, and utilizing advanced features․ The manual is structured to walk you through installation, operation, and maintenance, ensuring optimal performance․ Key sections include detailed instructions for pairing handsets, managing battery care, and accessing customer support․ Tips for proper usage and care are also provided to extend the lifespan of your phone․ Reading this manual thoroughly will help you navigate all functions seamlessly․

Importance of Reading the Manual

Reading the VTech phone instruction manual is crucial for ensuring safe and effective use of your device․ It provides essential safety precautions to avoid potential risks like electric shock or damage․ The manual guides you through proper installation, helping you avoid common setup mistakes․ It also offers troubleshooting solutions for issues like no dial tone or connectivity problems․ Understanding advanced features, such as caller ID and call blocking, enhances your user experience․ By following the manual, you can maintain your phone’s performance, extend its lifespan, and make the most of its innovative capabilities․

Safety Precautions

Always follow safety guidelines to prevent risks like electric shock or damage․ Avoid using the phone during storms and ensure proper ventilation․ Use only VTech-approved power supplies․

General Safety Guidelines

Always follow safety guidelines to prevent risks like electric shock or damage․ Avoid using the phone during storms and ensure proper ventilation․ Use only VTech-approved power supplies․ Keep the phone away from water and moisture․ Do not block ventilation openings with objects like newspapers or curtains․ Place the phone on a stable surface to avoid accidental falls․ Handle the phone with care to prevent physical damage․ Follow all instructions provided in the manual for safe operation․ Regularly inspect cords and plugs for damage․ Ensure the phone is not exposed to extreme temperatures or corrosive substances․ Keep the phone out of reach of children to avoid misuse․ By adhering to these guidelines, you can ensure safe and reliable use of your VTech phone․

Specific Warnings and Cautions

Avoid using the phone during electrical storms to prevent lightning-related risks․ Only use VTech-approved power supplies to reduce fire hazards․ Ensure ventilation openings are not blocked by objects like curtains or newspapers․ Do not submerge the phone in water or expose it to corrosive liquids․ Keep the phone away from extreme temperatures and avoid unauthorized repairs․ Regularly inspect cords for damage and replace them if necessary․ Avoid overcharging the battery, as it may cause overheating․ Follow all safety instructions in the manual to prevent potential risks and ensure safe operation of your VTech phone․

Setting Up Your VTech Phone

Start by unpacking and inventorying all parts․ Connect the base unit to power and the telephone line․ Install the battery in the handset and ensure all connections are secure․

Unpacking and Inventory of Parts

Carefully unpack your VTech phone package and verify all components․ Typically included are the base unit, handset, rechargeable battery, charger, and telephone line cord․ Ensure no items are missing․ Check for the user manual, warranty information, and any additional accessories like the battery compartment cover․ Save the original packaging and receipt for future reference․ Before proceeding, review the safety instructions in the manual to ensure proper handling and installation of your device․

Connecting the Base Unit and Handset

Begin by connecting the base unit to your telephone line using the provided line cord․ Plug one end into the base unit’s phone line port and the other into the wall jack․ Next, connect the power cord to the base unit and plug it into a nearby electrical outlet․ Ensure the base is placed on a stable, flat surface away from moisture․ Once connected, turn on the base unit and allow it to power up․ Finally, insert the handset into the base cradle to charge and synchronize it with the base unit․ This ensures proper communication between the two devices․

Installing the Battery

Locate the battery compartment on the back of the handset․ Open it by sliding it downward or using a screwdriver if required․ Insert the provided rechargeable battery, ensuring the terminals align correctly․ Close the compartment securely․ Place the handset on the base unit or charger to begin charging․ Allow it to charge for at least 24 hours initially for optimal performance․ Avoid using non-VTech chargers, as they may damage the battery or handset․ Proper installation ensures reliable operation and longevity of your VTech phone․

Registering and Pairing Handsets

Registering and pairing handsets ensures proper communication between the base unit and handsets․ Follow the manual’s instructions to pair additional handsets to the base, ensuring all devices are synchronized for seamless functionality․

Pairing the Handset with the Base

To pair the handset with the base, ensure the base is powered on and the handset is fully charged․ Locate the pairing button on the base and press it until the LED flashes․ On the handset, go to the menu, select “Pairing” or “Register Handset,” and follow prompts․ Enter the default code (usually 0000) if required․ The pairing process typically takes a few seconds․ Once paired, the handset will confirm with a tone or LED indication․ Ensure only authorized handsets are paired for security․ If pairing fails, restart both devices and retry․

Registering Multiple Handsets

Registering multiple handsets to your VTech phone system allows expanded functionality․ First, ensure each handset is fully charged and the base is powered on․ Press the pairing button on the base until the LED flashes․ On each handset, navigate to the menu, select “Register” or “Pairing,” and follow the on-screen instructions․ Enter the default PIN (usually 0000) if prompted․ Repeat this process for each handset, ensuring they are registered one at a time․ Most models support up to 5 or 12 handsets, depending on the system․ Refer to your specific model’s manual for exact limits and additional guidance․

Troubleshooting Common Issues

Troubleshooting your VTech phone involves checking connections, ensuring proper power, and resetting the system if necessary․ Refer to the manual for detailed solutions to issues like no dial tone, charging problems, or poor call quality․

No Dial Tone or Service

If your VTech phone has no dial tone or service, ensure the telephone line cord is securely connected to both the base unit and the wall jack․ Verify that the power connection is stable and the base unit is properly plugged in․ Check for any physical obstructions or damage to the cord․ Reset the system by disconnecting and reconnecting the power and telephone line․ If issues persist, consult the manual for advanced troubleshooting steps or contact VTech support for assistance․

Power and Charging Problems

If your VTech phone is experiencing power or charging issues, ensure the base unit is connected to a reliable power source․ Check the power cord for damage or loose connections․ Verify that the handset battery is properly installed and charged․ Avoid exposing the phone to moisture or extreme temperatures․ If the issue persists, consult the manual for troubleshooting steps or contact VTech support for assistance․ Always use the original VTech power supply to prevent damage and ensure optimal performance․

Call Quality and Connectivity Issues

If you experience poor call quality or connectivity problems with your VTech phone, ensure the base unit is placed in an open area away from physical obstructions․ Check for interference from other electronic devices and move the base away if necessary․ Verify that the phone line cord is securely connected to both the base and the wall jack․ Ensure the handset is fully charged and paired correctly with the base․ If issues persist, reset the phone by disconnecting and reconnecting the power supply․ For persistent problems, refer to the manual or contact VTech support for further assistance․

Advanced Features of VTech Phones

VTech phones offer advanced features like Caller ID, call blocking, and Bluetooth connectivity, enhancing your communication experience with convenience and control․

Caller ID and Call Blocking

VTech phones feature advanced Caller ID and Call Blocking capabilities to enhance your communication experience․ The Caller ID function announces the caller’s name or number, allowing you to decide whether to answer․ Call Blocking enables you to manage unwanted calls by adding specific numbers to a block list․ This feature helps reduce interruptions from telemarketers or unwanted callers․ Refer to your manual for step-by-step instructions on configuring these settings to customize your call management preferences effectively․

Using the Answering System

The VTech phone’s answering system allows you to record and manage messages effortlessly․ It activates when calls go unanswered, capturing messages for later playback․ The LCD display shows the number of messages, and you can playback, delete, or save them using the handset or base controls․ For optimal performance, ensure the system is turned on and volume is adjusted․ Refer to the manual for setup instructions and troubleshooting tips to resolve issues like no message recording or playback․ This feature enhances convenience and ensures you never miss important calls․

Bluetooth and Cell Phone Connectivity

VTech phones offer seamless Bluetooth integration, enabling connection to your cell phone․ This feature allows you to make and receive calls, access contacts, and use call blocking․ Pairing your cell phone enhances convenience, ensuring you stay connected without missing calls․ The system supports hands-free conversations and integrates with your phone’s features․ For setup, refer to the manual for pairing instructions and troubleshooting tips to ensure a stable connection; This feature bridges your landline and mobile worlds, offering a unified communication experience․

Maintenance and Care

Regularly clean your VTech phone with a soft cloth to prevent dust buildup․ Avoid exposure to moisture or corrosive substances․ Store batteries properly and check for software updates․ Ensure ventilation openings are not blocked for optimal performance․ Refer to the manual for detailed maintenance guidelines․

Cleaning the Phone

Regular cleaning ensures your VTech phone’s optimal performance․ Use a soft, dry cloth to wipe the handset and base, removing dust and dirt․ Avoid harsh chemicals or liquids, as they may damage the finish or internal components․ For stubborn stains, slightly dampen the cloth but ensure no moisture seeps into openings․ Allow the phone to dry completely before use․ Cleaning the vents and grilles with compressed air can improve ventilation and prevent overheating․ Regular maintenance helps preserve functionality and extends the lifespan of your device․

Battery Care and Replacement

Proper battery care ensures longevity and performance․ Use only the provided VTech power supply to charge your phone․ Avoid overcharging, as it may reduce battery life․ Clean the battery contacts with a soft, dry cloth to maintain connectivity․ If the battery no longer holds a charge, replace it with a compatible VTech model․ When replacing, ensure the handset is powered off․ Dispose of old batteries responsibly, following local environmental guidelines․ Store spare batteries in a cool, dry place to preserve their capacity․ Regularly check battery health to avoid unexpected power issues during use․

VTech Customer Support and Resources

Access online manuals, troubleshooting tips, and FAQs at www․vtechphones․com․ For assistance, contact VTech support directly or refer to the resources provided in your product package for enhanced warranty and guidance․

Accessing Online Manuals and Guides

Visit www․vtechphones․com to access online manuals, guides, and resources for your VTech phone․ Download PDF manuals for specific models, troubleshooting tips, and setup instructions․ Enter your model number to retrieve detailed documentation․ Find helpful FAQs, warranty information, and feature explanations․ Ensure proper installation and operation by referring to these resources․ Stay updated with the latest product news and enhanced warranty support by registering your device online․ Explore user manuals, quick start guides, and additional support materials tailored to your VTech phone model․

Contacting VTech Support

For assistance with your VTech phone, visit www․vtechphones․com and navigate to the Product Support section․ Enter your model number to access FAQs, troubleshooting tips, and additional resources․ For direct help, contact VTech’s regional offices or distributors in your area․ Ensure to refer to the online manual for specific guidance․ If issues persist, reach out to customer support for personalized assistance․ Stay connected with VTech for the latest updates and support options tailored to your needs․

Continue Reading

thermo king inverter 41-7784 manual

The Thermo King Inverter 41-7784 manual provides comprehensive guidance on installation, operation, and maintenance. It is designed to ensure optimal performance and safety for users of this power inverter.

This manual is essential for both new and experienced users, offering detailed step-by-step procedures and troubleshooting tips. It covers everything from initial setup to advanced diagnostic processes.

By following the manual, users can maximize the inverter’s efficiency and extend its lifespan. It is a vital resource for anyone working with the Thermo King Inverter 41-7784 system.

1.1 Overview of the Thermo King Inverter 41-7784

The Thermo King Inverter 41-7784 is a high-performance power inverter designed for reliable operation in commercial truck applications. It provides pure sine wave output, ensuring compatibility with sensitive electronics. The device is equipped with advanced features for efficient power conversion and includes hardware, operator, and diagnostic manuals for comprehensive support. Its robust design and user-friendly interface make it a trusted choice for auxiliary power needs.

1.2 Importance of the Manual for Optimal Performance

The Thermo King Inverter 41-7784 manual is crucial for ensuring optimal performance and safety. It provides detailed instructions for installation, operation, and troubleshooting, helping users avoid common issues. The manual also includes diagnostic guides to identify and resolve faults efficiently. By following the manual, users can maximize the inverter’s efficiency, extend its lifespan, and ensure reliable operation in various applications.

Key Features of the Thermo King Inverter 41-7784

The Thermo King Inverter 41-7784 is a 2000W pure sine wave inverter, designed for high efficiency and reliability. It supports various operational modes and includes hardware, operator, and diagnostic manuals for comprehensive guidance.

2.1 Power Inverter Details and Specifications

The Thermo King Inverter 41-7784 is a 2000W pure sine wave inverter, delivering clean and stable power for sensitive electronics. It operates efficiently, supporting various AC devices with minimal harmonic distortion. The inverter is designed for reliability and durability, making it ideal for commercial and industrial applications; Its specifications include a 15-amp capacity and dual voltage support, ensuring flexibility in different power systems.

The unit features advanced thermal management and overload protection, ensuring safe operation under varying conditions. It also includes a detailed manual with diagrams and troubleshooting guides, making it user-friendly for installation and maintenance. The inverter’s compact design and robust construction ensure long-term performance and reliability in demanding environments.

2.2 Types of Manuals Included (Hardware, Operator, Diagnostic)

The Thermo King Inverter 41-7784 manual includes three essential types of guides: Hardware, Operator, and Diagnostic. The Hardware manual details components and installation requirements. The Operator manual provides step-by-step instructions for daily use and functionality. The Diagnostic manual offers troubleshooting procedures and fault code explanations. Together, these manuals ensure comprehensive understanding and maintenance of the inverter, catering to both technical and operational needs.

Installation Guidelines

The Thermo King Inverter 41-7784 manual provides detailed installation steps, ensuring proper setup and functionality. It emphasizes adherence to safety practices and technical requirements for a secure connection.

3.1 Pre-Installation Checks and Requirements

Before installing the Thermo King Inverter 41-7784, ensure the system meets all specified requirements. Verify the power source matches the inverter’s input voltage and current ratings. Check the environment for proper ventilation and temperature range compatibility. Inspect all hardware components for damage and ensure mounting surfaces are secure. Review safety guidelines and prepare necessary tools and documentation for a smooth installation process.

Additionally, confirm the availability of diagnostic tools and manuals for reference during setup. Ensure all cables and connectors are compatible and undamaged to avoid connectivity issues. Proper grounding and electrical connections are critical for safe and efficient operation. Follow the manual’s recommendations for optimal placement and alignment of the inverter unit.

Lastly, familiarize yourself with the installation sequence outlined in the manual to minimize downtime and ensure compliance with safety standards. This pre-installation preparation is essential for a successful and trouble-free setup of the Thermo King Inverter 41-7784.

3.2 Step-by-Step Installation Process

Mount the Thermo King Inverter 41-7784 securely on a stable surface using the provided hardware. Connect the DC power cables to the battery, ensuring tight connections. Attach the AC input and output cables according to the manual’s wiring diagram. Secure all connections to prevent loose contacts. Power on the inverter and test all functions to ensure proper operation. Refer to the manual for specific torque and voltage settings. Complete the installation by verifying all safety and operational guidelines are met.

Operation and Functionality

The Thermo King Inverter 41-7784 operates seamlessly, converting DC power to AC with pure sine wave technology. Its control panel offers intuitive mode selection, monitoring, and setting adjustments for optimal functionality across various applications.

4.1 Understanding the Control Panel and Its Functions

The control panel of the Thermo King Inverter 41-7784 is designed for easy navigation, featuring buttons for mode selection, an LCD display for status monitoring, and LED indicators for power and fault status. Users can adjust settings, monitor output, and troubleshoot issues directly from the panel. Its intuitive layout ensures seamless operation, making it user-friendly for both novice and experienced operators.

4.2 Operating the Inverter in Different Modes

The Thermo King Inverter 41-7784 operates in multiple modes, including standby, normal operation, and diagnostic modes. Users can switch modes using the control panel. The LCD display indicates the active mode, ensuring clear operation. Each mode serves specific functions, such as power conservation or fault detection. Refer to the manual for detailed instructions on mode selection and operation to optimize performance and troubleshooting.

Maintenance and Upkeep

Regular maintenance ensures optimal performance and extends the lifespan of the Thermo King Inverter 41-7784. Tasks include checking connections, cleaning filters, and inspecting cables for wear.

5.1 Regular Maintenance Tasks for Prolonged Lifespan

Regular maintenance is crucial for the Thermo King Inverter 41-7784. Tasks include checking battery connections, cleaning dust from vents, inspecting cables for damage, and ensuring proper ventilation. Users should also verify that all electrical connections are secure and follow the manufacturer’s recommended maintenance schedule to prevent overheating and ensure reliable operation over time.

5.2 Troubleshooting Common Issues

The Thermo King Inverter 41-7784 manual provides detailed troubleshooting steps for common issues. Users can address problems like no power output by checking connections and resetting the device. It also guides on diagnosing error codes and inspecting wires for damage. Regularly reviewing the manual ensures quick resolution of issues, minimizing downtime and ensuring reliable operation of the inverter system.

Safety Practices and Precautions

Always follow safety guidelines when handling the Thermo King Inverter 41-7784. Ensure proper grounding, avoid overloading, and use correct wiring to prevent electrical hazards and ensure safe operation.

6.1 General Safety Guidelines for Handling the Inverter

When handling the Thermo King Inverter 41-7784, always disconnect the power source before performing maintenance or repairs. Ensure proper grounding to prevent electrical shocks. Avoid overloading the inverter, as this can cause damage or fire hazards. Use appropriate wiring and follow the manufacturer’s guidelines for installation and operation. Keep the unit away from flammable materials and avoid touching hot surfaces during operation. Refer to the manual for detailed safety procedures.

6.2 Emergency Procedures and Shutdown Processes

In case of an emergency, immediately disconnect the power source and stop the inverter. Turn off the main power switch and allow the unit to cool down before inspecting. If an error code appears, refer to the diagnostic manual for fault identification. Always follow the manual’s shutdown procedures to prevent damage or safety risks. Ensure proper ventilation and avoid sudden impacts during shutdown.

Hardware and Diagnostic Manual

The Thermo King Inverter 41-7784 manual includes detailed hardware specifications and diagnostic tools, enabling users to identify and resolve issues efficiently. It provides a comprehensive guide for troubleshooting and maintenance.

7.1 Detailed Hardware Specifications and Components

The manual provides a detailed breakdown of the Thermo King Inverter 41-7784’s hardware, including its power capacity, voltage input, and output specifications. It outlines the components such as the inverter module, cooling system, and control panel. The document also includes circuit diagrams and component identification, ensuring users can understand and maintain the system effectively. This section is crucial for installation, troubleshooting, and upgrades.

7.2 Using the Diagnostic Manual for Fault Identification

The diagnostic manual provides step-by-step guidance for identifying and resolving faults in the Thermo King Inverter 41-7784. It includes detailed error codes, troubleshooting procedures, and diagnostic flowcharts. Users can pinpoint issues by referencing the manual’s fault identification tables and repair instructions. This section ensures efficient problem-solving, minimizing downtime and extending the inverter’s operational lifespan through prompt and accurate fault resolution.

Replacement Parts and Accessories

The Thermo King Inverter 41-7784 requires specific replacement parts, such as 1040741 and 82-21278-000, to ensure optimal performance and safety. Always use genuine components for reliability.

8.1 List of Replacement Parts Numbers

The Thermo King Inverter 41-7784 manual specifies essential replacement parts, including 1040741 and 82-21278-000. These components are crucial for maintaining optimal performance and safety. Always use genuine Thermo King parts to ensure reliability and compatibility. These parts are readily available through authorized distributors or Thermo King service centers, guaranteeing quality and adherence to manufacturer standards.

8.2 Where to Source Genuine Thermo King Parts

Genuine Thermo King parts for the 41-7784 inverter can be sourced directly from Thermo King’s official website or through authorized dealers. These sources ensure authenticity and compatibility, providing warranty coverage and optimal performance. Additionally, Thermo King’s customer support team can assist in locating verified suppliers, ensuring reliable and efficient service.

Comparison with Other Thermo King Inverter Models

The Thermo King Inverter 41-7784 stands out for its advanced features, higher efficiency, and superior performance compared to earlier models, making it a top choice for reliable power conversion.

9.1 Key Differences and Upgrades in the 41-7784 Model

The Thermo King Inverter 41-7784 features a pure sine wave output, enhancing compatibility with sensitive electronics. It offers a higher power capacity of 2000W and improved efficiency compared to earlier models. The inverter includes advanced diagnostic capabilities and a user-friendly control panel for easier operation. These upgrades ensure better performance, reliability, and safety, making the 41-7784 a superior choice for modern power needs.

9.2 Benefits of Choosing the 41-7784 Over Previous Models

The Thermo King Inverter 41-7784 offers superior performance with its pure sine wave output, ensuring compatibility with sensitive electronics. It provides a higher power capacity of 2000W and improved efficiency, reducing energy losses. The enhanced diagnostic features and user-friendly control panel simplify troubleshooting and operation. These advancements make the 41-7784 a more reliable and efficient choice compared to earlier models, delivering better value and performance for users.

Customer Support and Resources

Thermo King offers dedicated customer support, including online resources, troubleshooting guides, and access to expert assistance. Visit their official website for comprehensive support options.

10.1 Accessing Thermo King Customer Service

Thermo King provides accessible customer service through their official website, thermoking.com, offering resources like manuals and troubleshooting guides. Users can also contact authorized dealers or support centers for assistance. Additionally, phone and email support options are available for direct inquiries, ensuring help is reachable whenever needed.

10.2 Online Resources and Communities for Further Assistance

Thermo King offers extensive online resources, including official websites, forums, and community platforms, to assist users with the 41-7784 inverter. ManualsLib and other third-party sites provide downloadable manuals and guides. Additionally, specialized forums and technical support groups allow users to share experiences and resolutions, ensuring comprehensive assistance beyond official channels.

The Thermo King Inverter 41-7784 manual is a vital resource, ensuring optimal performance and safety. It guides users through installation, operation, and maintenance, helping them maximize efficiency and troubleshoot issues effectively.

11.1 Summary of the Thermo King Inverter 41-7784 Manual

The Thermo King Inverter 41-7784 manual is a detailed guide covering installation, operation, and maintenance. It ensures optimal performance by providing step-by-step instructions and troubleshooting tips. The manual emphasizes safety practices and the use of genuine parts for reliability. By following its guidelines, users can maximize the inverter’s efficiency, extend its lifespan, and resolve common issues effectively. It is an indispensable resource for anyone working with this power inverter system.

11.2 Final Thoughts on the Importance of the Manual

The Thermo King Inverter 41-7784 manual is a critical resource for ensuring optimal performance, safety, and longevity of the device. It provides essential guidance for installation, operation, and troubleshooting, enabling users to maximize efficiency and resolve issues promptly. Adhering to the manual’s instructions is vital for maintaining reliability and avoiding potential risks. It serves as a cornerstone for enhancing user experience and system durability.

Additional Resources

Visit Thermo King’s official website for additional documentation, troubleshooting guides, and customer support resources. Explore online forums and communities for shared experiences and expert advice.

12.1 Recommended Reading and Documentation

For deeper understanding, refer to the official Thermo King website for detailed manuals, technical bulletins, and troubleshooting guides. Review the hardware and diagnostic manuals for advanced insights. Explore online forums and communities for user experiences and expert advice. These resources provide comprehensive support for optimizing performance and addressing technical challenges effectively.

12.2 Links to Official Thermo King Websites and Portals

Visit the official Thermo King website for authentic manuals, technical support, and product updates. Explore the manuals section for detailed guides. Access diagnostic tools and troubleshooting resources through their support portal. Additionally, check their community forums for user discussions and expert advice.

Continue Reading

morse watchman keywatcher manual pdf

The Morse Watchman KeyWatcher System is a comprehensive key management solution designed to secure, track, and manage keys efficiently. It offers advanced features like modular design, illuminated key cabinets, and robust access control, ensuring optimal security and accountability for sensitive assets. This system is widely used in casinos, industrial facilities, and other high-security environments to streamline key management processes and maintain operational integrity.

Overview of the KeyWatcher System

The KeyWatcher System is a modular and scalable key management solution designed to secure, track, and manage keys efficiently. It offers a comprehensive approach to key control, combining advanced technology with user-friendly interfaces. The system is built to integrate seamlessly with existing security infrastructure, providing real-time monitoring and reporting. With illuminated key cabinets, customizable access permissions, and expandable design, the KeyWatcher System ensures that keys are stored safely and accessed only by authorized personnel. Its robust features make it ideal for industries requiring high-security standards, such as casinos, hospitals, and industrial facilities. By streamlining key management processes, the KeyWatcher System enhances operational efficiency and reduces the risk of key mismanagement.

Importance of the Manual for Effective Use

The Morse Watchman KeyWatcher Manual is essential for maximizing the system’s potential and ensuring proper operation. It provides detailed instructions on installation, configuration, and everyday use, helping users navigate features like key tracking, access control, and report generation. The manual also includes troubleshooting tips and maintenance guidelines, which are crucial for resolving issues promptly and maintaining system efficiency. By following the manual, users can customize settings, such as key permissions and user access, to meet specific security needs. Additionally, it serves as a reference for understanding advanced features like software integration and data export. Ultimately, the manual empowers users to utilize the KeyWatcher System effectively, ensuring secure and efficient key management across various industries.

Key Features of the Morse Watchman KeyWatcher

The Morse Watchman KeyWatcher offers a modular, scalable design with illuminated digital key cabinets, advanced access control, and seamless integration with security systems, ensuring secure key management.

Modular and Expandable Design

The Morse Watchman KeyWatcher system boasts a modular and expandable design, allowing users to configure the system according to their specific needs. This flexibility enables organizations to start with a basic setup and add components such as key modules, card modules, or storage lockers as their requirements grow. The system supports configurations ranging from 6 to 48 keys, ensuring scalability for both small and large facilities. Additionally, the modular design allows for easy integration with other security systems, making it a versatile solution for various industries. This adaptability ensures that the KeyWatcher system can evolve alongside an organization’s security demands, providing long-term value and efficiency. The expandable nature of the system is further enhanced by its compatibility with advanced software and hardware, ensuring seamless upgrades and updates.

Illuminated Digital Key Cabinet

The Morse Watchman KeyWatcher features an illuminated digital key cabinet, enhancing visibility and accessibility of keys. This innovative design ensures that keys are easily identifiable, even in low-light environments. The cabinet is equipped with a digital interface, providing real-time updates and notifications. Users can quickly locate specific keys, reducing the time spent on key retrieval. The illuminated system also supports advanced security features, such as key restrictions and access permissions, ensuring that only authorized personnel can access sensitive keys. This combination of technology and design makes the KeyWatcher system a reliable solution for secure key management. The illuminated digital key cabinet is a key component of the system, offering both practicality and enhanced security for organizations seeking efficient key control.

Advanced Access Control and Permissions

The Morse Watchman KeyWatcher system offers advanced access control and permissions, ensuring that keys are only accessible to authorized individuals. Users can be assigned specific permissions, allowing them to access certain keys or groups of keys while restricting others. The system supports multiple access levels, enabling organizations to enforce strict security protocols. Key restrictions can be programmed to limit access based on user roles, ensuring that sensitive keys are protected from unauthorized use. Additionally, the KeyWatcher system provides real-time monitoring and audit trails, allowing administrators to track key usage and maintain accountability. These advanced features ensure that key management is both secure and efficient, making the KeyWatcher system a robust solution for organizations requiring high-level security and control. The system’s flexibility in assigning permissions makes it adaptable to various operational needs and security requirements.

Software Overview

The Key-Pro III and TrueTouch software provide advanced key management capabilities, enabling real-time monitoring, programming, and reporting for the Morse Watchman KeyWatcher system. These tools enhance security and efficiency.

Key-Pro III Software

The Key-Pro III Software is a powerful tool designed to manage and monitor the Morse Watchman KeyWatcher system. It offers advanced features such as real-time tracking, detailed reporting, and customizable access permissions. With this software, users can program multiple KeyWatcher systems, monitor key transactions, and generate reports in various formats like PDF and CSV. It also supports up to 50 KeyWatcher units, making it ideal for large-scale applications. The software ensures seamless integration with other security systems, providing a comprehensive solution for key control and asset management. Its user-friendly interface and robust capabilities make it an essential component for enhancing security and operational efficiency in various industries.

TrueTouch Client Interface

The TrueTouch Client Interface is an intuitive and user-friendly platform designed to manage and monitor the Morse Watchman KeyWatcher system. It allows users to program, control, and access key management functions remotely, ensuring seamless oversight of key transactions. The interface supports up to 10 KeyWatcher Touch locations, enabling centralized management of multiple systems. With TrueTouch, users can add and manage global lists of personnel, synchronize settings across systems, and generate detailed reports in formats like PDF and CSV. Its advanced features include real-time monitoring, key usage tracking, and customizable alerts for enhanced security. The interface is designed to integrate effortlessly with other security systems, making it a versatile tool for modern key control needs. Its scalability and ease of use make it ideal for organizations requiring efficient and secure key management solutions.

Integration with Access Control Systems

The Morse Watchman KeyWatcher seamlessly integrates with existing access control systems, enhancing security and streamlining operations. This integration allows for synchronized user permissions, real-time monitoring, and unified security protocols, ensuring comprehensive control over keys and access points across the organization. By combining key management with access control, the system provides a robust solution for managing sensitive assets and ensuring compliance with security standards.

Compatibility with Other Security Systems

The Morse Watchman KeyWatcher system is designed to integrate seamlessly with various security platforms, ensuring enhanced functionality and streamlined operations. By supporting compatibility with access control systems, video surveillance, and other security technologies, the KeyWatcher provides a unified solution for managing keys and access points. This integration enables real-time monitoring, synchronized user permissions, and comprehensive reporting, ensuring that security protocols are maintained across all systems. The KeyWatcher’s modular architecture allows it to adapt to different security environments, making it a versatile solution for industries such as casinos, healthcare, and government facilities. This compatibility ensures that the KeyWatcher can be easily incorporated into existing security infrastructures, enhancing overall security without disrupting current operations. The system’s ability to work alongside other security technologies makes it a reliable choice for organizations seeking to improve their key management and security practices.

Advanced Security Features

The Morse Watchman KeyWatcher system incorporates advanced security features to ensure maximum protection of keys and assets. It utilizes RFID technology to track keys and monitor access, providing real-time updates and alerts for unauthorized attempts. The system also includes tamper-proof mechanisms, such as secure key slots and electronic locks, to prevent unauthorized access. Additionally, the KeyWatcher offers customizable access permissions, allowing administrators to define specific user rights and ensure that keys are only accessible to authorized personnel. The system’s audit trail capabilities enable detailed logging of all transactions, providing a comprehensive record of key movements and user activities. These features make the KeyWatcher an ideal solution for organizations requiring high-level security and accountability in their key management processes. The integration of these advanced security measures ensures that sensitive keys and assets are protected from theft or misuse, maintaining operational integrity and security.

Continue Reading

manual dock leveler

Manual dock levelers are essential tools for bridging height differences between docking bays and vehicles, ensuring efficient material handling. These devices are cost-effective solutions for aligning dock and vehicle heights, enhancing safety and operational efficiency. Preferred for their simplicity and reliability, manual dock levelers are widely used in manufacturing, logistics, and warehousing industries.

1.1 What is a Manual Dock Leveler?

A manual dock leveler is a device used to bridge the height difference between a docking bay and a vehicle, enabling safe and efficient material handling. It is a cost-effective solution designed to align the dock and vehicle heights manually, ensuring smooth loading and unloading processes. These levelers are typically simple in design, relying on mechanical or hydraulic systems, and are widely used in industrial and logistics settings to enhance operational efficiency and safety. Their reliability and ease of operation make them a preferred choice for many businesses.

1.2 Importance in Material Handling

Manual dock levelers play a crucial role in material handling by ensuring safe and efficient loading/unloading processes. They bridge height differences between docks and vehicles, preventing accidents and reducing physical strain on workers. Their durability and reliability make them indispensable in high-volume operations, while their cost-effectiveness provides long-term savings. By maintaining smooth workflows and protecting equipment, manual dock levelers are essential for optimizing logistics and enhancing overall operational efficiency in manufacturing, warehousing, and distribution industries.

Types of Manual Dock Levelers

Manual dock levelers are categorized into mechanical, hydraulic, and air-powered models, each designed for specific operational needs, offering durability and efficiency in various industrial settings.

2.1 Mechanical Dock Levelers

Mechanical dock levelers operate via a spring-based system, providing a cost-effective solution for loading and unloading operations. They are durable, easy to maintain, and ideal for low to medium traffic environments. These levelers are manually adjusted using a handle or lever, ensuring precise height alignment. Their simplicity makes them a popular choice for businesses seeking reliable performance without the need for power sources. Regular maintenance, such as lubricating springs and inspecting hinges, ensures optimal functionality and longevity.

2.2 Hydraulic Dock Levelers

Hydraulic dock levelers are highly efficient, offering smooth and precise height adjustment for heavy-duty operations. They are ideal for high-traffic loading bays due to their robust construction and fast activation. These levelers use hydraulic cylinders controlled by a panel, ensuring consistent performance. Regular maintenance, such as checking hydraulic fluid levels and inspecting seals, is crucial for longevity. Their reliability and ease of use make them a preferred choice for industries requiring frequent loading and unloading operations.

2.3 Air-Powered Dock Levelers

Air-powered dock levelers operate using compressed air, offering a clean and environmentally friendly solution. They are ideal for lighter-duty applications and provide smooth height adjustment with minimal noise. These levelers are easier to maintain compared to hydraulic systems, as they lack oil and complex mechanical components. Their installation is relatively straightforward, and they are cost-effective for facilities with moderate traffic. Air-powered dock levelers are a popular choice for industries seeking efficient, low-maintenance loading solutions.

How to Use a Manual Dock Leveler

Position the leveler, align it with the dock and vehicle, and secure it firmly. Check for obstructions, ensure proper alignment, and lower it slowly for safe operation.

3.1 Step-by-Step Operation Guide

To operate a manual dock leveler, start by positioning it correctly at the dock edge. Lower the ramp slowly using the handle until it aligns with the vehicle bed. Ensure the lip rests securely on the vehicle floor. Check for obstructions and proper alignment before loading. Once loaded, raise the ramp carefully and secure it in the upright position. Always follow safety guidelines and perform regular maintenance to ensure smooth operation.

Safety Considerations

Safety is paramount when using manual dock levelers. Ensure the area is clear of obstructions, use safety devices, and train personnel properly to avoid accidents and injuries.

4.1 Precautions and Best Practices

Safety should always be the top priority when operating manual dock levelers. Ensure the area is clear of obstructions and unauthorized personnel before use. Proper training is essential to avoid accidents. Always follow the manufacturer’s guidelines and load capacity limits. Regular maintenance checks are crucial to ensure optimal functionality. Use safety devices like barriers and warning signals to alert personnel. Never operate the leveler when it is damaged or malfunctioning. Always ensure the dock and vehicle are securely positioned before loading or unloading goods.

Installation and Setup

Proper installation of manual dock levelers ensures safe and efficient operation. Begin with thorough site preparation, ensuring the dock area is level and clear of debris. Anchoring the leveler securely to the dock frame is critical to prevent movement during use. Follow the manufacturer’s installation guide for precise measurements and alignment. Conduct a final inspection and test the leveler under controlled conditions to ensure proper functionality and safety. Consulting a professional installer is recommended to guarantee compliance with safety standards and optimal performance.

5.1 Site Preparation and Installation Tips

Ensure the dock area is clear of debris and obstructions before installing a manual dock leveler. Verify the dock floor is level and structurally sound to support the leveler’s weight. Follow the manufacturer’s installation guide for precise measurements and alignment. Properly anchor the leveler to the dock frame using high-strength fasteners. Conduct a final inspection to ensure all components are securely attached and functioning correctly. Test the leveler under controlled conditions to confirm smooth operation and safety. Professional installation is recommended for optimal performance and compliance with safety standards.

Maintenance and Repair

Regular inspections and lubrication of moving parts ensure optimal performance. Address wear and tear promptly to prevent breakdowns. Schedule professional repairs for complex issues to maintain functionality and safety.

6.1 Regular Maintenance Schedule

A well-structured maintenance schedule is crucial for extending the lifespan of manual dock levelers. Daily checks should focus on inspecting for wear and tear, while weekly routines involve lubricating hinges and springs to ensure smooth operation. Monthly, examine the lip and frame for damage, and tighten any loose bolts. Annually, perform a comprehensive inspection, including replacing worn parts and repainting if necessary. This proactive approach prevents unexpected breakdowns and ensures consistent performance, safeguarding both equipment and personnel.

Common Issues and Solutions

Common issues with manual dock levelers include mechanical failures, wear on hinges, and alignment problems. Regular inspections and timely repairs can prevent downtime and ensure smooth operations.

7.1 Troubleshooting Tips

For manual dock levelers, common issues include uneven alignment, jammed hinges, or hydraulic leaks. Regular lubrication of moving parts can prevent stiffness. Inspect springs and hinges for wear. If the leveler doesn’t adjust properly, check for obstructions or damage. Ensure the dock is clean and free from debris. For hydraulic models, monitor fluid levels and look for leaks. Always refer to the manufacturer’s guide for specific troubleshooting steps. Address issues promptly to maintain safety and efficiency in operations. Professional maintenance may be needed for complex problems.

Advantages Over Automatic Levelers

Manual dock levelers are cost-effective, easy to maintain, and reliable, offering simplicity without the need for complex automation, making them ideal for smaller operations and budget-conscious businesses.

8.1 Cost-Effectiveness and Simplicity

Manual dock levelers are highly cost-effective, offering a lower upfront investment compared to automatic models. Their simpler design reduces maintenance and energy costs, as they rely on manual operation rather than complex hydraulic or electrical systems. This makes them ideal for smaller facilities or businesses with limited budgets. Additionally, their reliability and ease of use ensure long-term cost savings, providing a practical solution for warehouses and distribution centers seeking efficient material handling without the need for advanced automation.

Factors to Consider When Choosing

Load capacity, industry type, and durability are key factors. Consider the specific needs of your facility, including frequency of use and compatibility with existing infrastructure.

9.1 Load Capacity and Industry Type

Load capacity is a critical factor, as it determines the maximum weight the dock leveler can safely accommodate. Industry type also plays a significant role, with different sectors requiring specific durability levels. For instance, manufacturing facilities may need heavier-duty levelers compared to retail warehouses. Assessing these factors ensures the chosen dock leveler meets operational demands and lasts longer, optimizing efficiency and safety in material handling operations.

Case Studies and Applications

Manual dock levelers are widely applied in manufacturing, logistics, and warehousing, with case studies showcasing their efficiency in bridging height differences and ensuring safe material handling processes.

10.1 Real-World Applications and Success Stories

Manual dock levelers have proven indispensable in various industries, including manufacturing, logistics, and retail. For instance, a leading food processing company implemented manual dock levelers to streamline loading/unloading processes, reducing downtime by 30%. Similarly, an automotive parts distributor reported enhanced safety and efficiency after installing these levelers. Their simplicity and reliability make them a preferred choice for facilities with moderate traffic, demonstrating their versatility and effectiveness in real-world applications across diverse sectors.

Future Trends and Innovations

Future trends in manual dock levelers include integration with smart technologies, IoT-enabled systems, and energy-efficient designs. Innovations like automated adjustment and sustainable materials are expected to enhance functionality.

11.1 Emerging Technologies in Dock Leveling

Emerging technologies in dock leveling include the integration of smart systems and IoT-enabled devices for real-time monitoring and automated adjustments. Energy-efficient designs and sustainable materials are gaining traction, reducing environmental impact. Advanced sensors and data analytics are being incorporated to optimize performance and predict maintenance needs. These innovations aim to enhance safety, efficiency, and operational reliability in material handling processes, ensuring manual dock levelers remain relevant in modern logistics and warehousing environments.

Manual dock levelers remain essential for efficient material handling, offering cost-effective and reliable solutions. Their simplicity ensures continued relevance in modern logistics and industrial operations.

12.1 Summary and Final Thoughts

Continue Reading

ghost pdf

Ghost PDF is a powerful tool for handling PDF files, leveraging Ghostscript’s capabilities for conversion, rendering, and document management. It offers efficient processing and supports multiple formats, making it a versatile solution under both AGPL and commercial licenses.

1.1 What is Ghost PDF?

Ghost PDF is a robust tool built on Ghostscript, a high-performance PostScript and PDF interpreter. It enables seamless document management, conversion, and rendering, supporting formats like PDF, PostScript, PCL, and XPS. Known for its versatility, Ghost PDF is widely used in printing and file conversion workflows. It is available under both the open-source AGPL license and a commercial license, making it accessible for various applications while ensuring high-quality output and reliable performance across different platforms.

1.2 Overview of Ghostscript and Its Role in PDF Processing

Ghostscript is a high-performance PostScript and PDF interpreter that plays a crucial role in PDF processing. It enables the conversion, rendering, and interpretation of PDF files, supporting various formats like PostScript, PCL, and XPS. Ghostscript’s versatility allows it to be integrated into document management systems, printing workflows, and file conversion tools. Its ability to handle complex page description languages makes it a cornerstone for applications requiring precise PDF rendering and manipulation, ensuring high-quality output and reliable performance across diverse use cases.

Key Features of Ghostscript

Ghostscript excels in PDF, PostScript, PCL, and XPS processing, offering high-quality rendering, color reproduction, and support for raster and vector formats. It provides customizable solutions for seamless document management and conversion needs.

2.1 PDF Conversion and Interpretation Capabilities

Ghostscript offers robust PDF conversion and interpretation features, enabling seamless handling of PDF files. It supports PDF rendering, conversion to raster formats like PNG and JPEG, and ensures high-quality output. The software also provides tools for converting PostScript to PDF, making it a versatile solution for document processing. Its interpretation capabilities extend to PDF/A and PDF/X-3 standards, ensuring compatibility and accuracy in various applications. This makes Ghostscript a reliable choice for businesses needing efficient PDF management and conversion processes.

2.2 Support for Multiple File Formats (PostScript, PCL, XPS)

Ghostscript excels in supporting a wide range of file formats, including PostScript, PCL, and XPS. This versatility allows users to convert and interpret documents seamlessly across different systems. PostScript is handled with precision, while PCL and XPS formats are also processed efficiently. The software’s ability to work with these formats ensures compatibility and flexibility, making it a comprehensive tool for document management. Its high-quality rendering ensures that files retain their integrity during conversion, providing reliable outcomes for both personal and professional use.

2.3 High-Quality Rendering and Color Reproduction

Ghostscript delivers exceptional rendering and color reproduction, ensuring precise and vibrant output. It supports conversion to raster formats like PNG, JPEG, TIFF, and BMP, ideal for web display. The proprietary color management system guarantees accurate color representation, making it suitable for professional printing and digital viewing. Ghostscript’s high-quality rendering ensures that converted files retain their visual integrity, whether for web use or high-resolution printing, providing a reliable solution for maintaining document fidelity across various platforms and applications.

Security and Licensing

Ghostscript ensures secure PDF handling through Ghost Trap, a sandbox-secured version, while offering flexible licensing options, including AGPL open-source and commercial licenses for diverse needs, ensuring compliance.

3.1 Ghost Trap: A Security-Hardened Version of Ghostscript

Ghost Trap is a secure version of Ghostscript, developed by PaperCut, utilizing Chrome’s sandbox technology. It enhances security for PostScript and PDF processing, reducing vulnerabilities. Ideal for environments requiring high protection, Ghost Trap ensures safe conversions without compromising performance. This tool is essential for organizations prioritizing data security, offering robust protection against potential threats. Ghost Trap is open-source and integrates seamlessly with systems needing advanced security measures for document handling.

3.2 Licensing Options: Open Source AGPL vs. Commercial License

Ghostscript is available under two licensing options: the open-source AGPL license and a commercial license. The AGPL license is free and supports open-source projects, requiring users to share modifications. It restricts SaaS deployment unless a commercial license is obtained. The commercial license, offered by Artifex Software, provides flexibility for businesses, allowing closed-source distribution and SaaS use. This option is ideal for organizations needing tailored solutions without AGPL’s copyleft requirements, ensuring compliance and adaptability for specific business needs.

Integration and Compatibility

Ghost PDF seamlessly integrates with various systems, supporting Windows, macOS, and Linux. It enhances document workflows, ensuring compatibility with diverse platforms for efficient PDF processing and management.

4.1 Embedding PDF Viewers in Ghost

Embedding PDF viewers in Ghost is straightforward, enabling seamless document integration. Users can choose from various layout options like Embed, Gallery, List, Designed List, and Grid. This feature allows for embedding PDFs directly into web pages or applications without requiring external tools. The integration supports customizations, ensuring a tailored viewing experience. With Ghost’s PDF viewer integration, users can display documents inline, enhancing accessibility and user engagement. This functionality is ideal for blogs, websites, and platforms needing to share PDF content effortlessly, while maintaining security and performance.

4.2 Compatibility with Major Operating Systems (Windows, macOS, Linux)

Ghostscript is compatible with Windows, macOS, and Linux, ensuring versatility across platforms. macOS users can install Ghostscript via a dedicated installer maintained by the University of Oregon. Linux distributions often include Ghostscript or provide easy installation through package managers. Windows users benefit from Ghost Trap, a security-enhanced version supported by PaperCut, ideal for environments requiring high security. This cross-platform compatibility makes Ghostscript a reliable choice for document processing and PDF handling across diverse operating systems, catering to both individual and enterprise needs effectively. Ghostscript runs seamlessly on all major systems, ensuring consistent performance and functionality.

Applications of Ghostscript

Ghostscript is widely used for document management, printing solutions, and PDF viewing tools. It enables efficient PDF handling, supports various formats, and integrates seamlessly with platforms like Ghost for professional publishing.

5.1 Document Management and Printing Solutions

Ghostscript excels in document management and printing solutions, offering efficient PDF handling and conversion. It supports various formats, ensuring seamless integration with professional publishing platforms like Ghost. By enabling high-quality rendering and color reproduction, Ghostscript is a reliable tool for managing and printing documents, catering to the needs of businesses and publishers alike. Its robust capabilities make it an essential component for streamlined document workflows and professional publishing environments.

5.2 PDF Viewing and Conversion Tools

Ghostscript is a versatile tool for PDF viewing and conversion, enabling seamless rendering and interpretation of PDF files. It supports conversion to raster formats like PNG, JPEG, and TIFF, making it ideal for web display. Ghostscript also ensures high-quality color reproduction and supports PDF/A and PDF/X-3 standards. With its robust security features, including Ghost Trap, it provides a reliable solution for secure PDF processing. This makes it a valuable asset for professional platforms like Ghost, enhancing document handling and viewer integration capabilities.

Development and Customization

Ghostscript offers customizable modules and a comprehensive library for tailored solutions. Its flexibility allows developers to adapt the software for specific needs, supported by extensive resources.

6.1 Customizable Modules for Specific Needs

Ghostscript provides a range of customizable modules tailored to meet specific requirements. These modules allow developers to extend functionality, enabling support for unique document processing needs. With its modular architecture, users can integrate custom features, ensuring seamless adaptation to various workflows. This flexibility makes Ghostscript a preferred choice for businesses seeking tailored solutions. Developers can modify or extend these modules to address particular challenges, enhancing the overall performance and compatibility of their applications.

6.2 Developer Resources and Community Support

Ghostscript offers extensive developer resources, including detailed documentation, APIs, and integration guides, empowering developers to maximize its capabilities. An active community provides support through forums and repositories, fostering collaboration and innovation. Artifex Software maintains robust resources to ensure developers can troubleshoot and optimize their implementations effectively. These tools and community backing enable developers to leverage Ghostscript’s full potential, creating tailored solutions for diverse needs while staying updated with the latest advancements in PDF and PDL processing technologies.

Comparison with Other PDF Tools

Ghostscript stands out among PDF tools due to its comprehensive support for multiple formats, high-performance rendering, and open-source flexibility, making it a versatile choice for advanced document processing needs.

7.1 Ghostscript vs. Other PDF Conversion Software

Ghostscript excels as a high-performance PDF conversion tool, offering unparalleled support for multiple formats like PostScript, PCL, and XPS. Unlike other software, it provides high-quality rendering and color reproduction, making it ideal for professional document management. Its customizable modules and strong community support further enhance its versatility. While other tools may focus on specific tasks, Ghostscript’s comprehensive feature set and open-source flexibility make it a superior choice for advanced PDF processing needs.

7.2 Unique Features of Ghostscript

Ghostscript stands out with its robust interpreter for PostScript and PDF, offering seamless conversion and rendering capabilities. Its advanced color management system ensures high-quality output, while native support for raster and vector formats adds versatility. Unique features include custom screening technologies and the ability to handle complex imaging tasks. Additionally, Ghostscript’s sandbox security, as seen in Ghost Trap, enhances safety, making it a top choice for secure and high-performance PDF processing in various industries.

Best Practices for Using Ghostscript

Optimize conversion settings for performance, ensure security protocols are in place, and leverage customization options to tailor Ghostscript for specific document management needs effectively.

8.1 Optimizing PDF Conversion Processes

Optimizing PDF conversion with Ghostscript involves fine-tuning settings like resolution, color modes, and compression to balance quality and file size. Use command-line options to customize conversion parameters for specific tasks, such as adjusting dpi for rasterization or enabling ICC profiles for accurate color reproduction. Validate input files to ensure compatibility and avoid errors. Additionally, leverage batch processing to handle multiple conversions efficiently. Regularly monitor performance metrics to identify bottlenecks and optimize workflows for faster processing times while maintaining output integrity.

8.2 Ensuring Security in PDF Handling

Ensuring security in PDF handling with Ghostscript involves using Ghost Trap, a security-hardened version designed to mitigate risks. It employs sandbox technology, similar to Google Chrome, to isolate processes and prevent breaches. Regular updates are crucial to patch vulnerabilities. Validate input files before processing to avoid malicious content. Use secure protocols when handling PDFs, especially in web-based applications. Implement access controls and monitor logs for suspicious activity. These practices help safeguard sensitive data and maintain compliance with security standards while using Ghostscript for PDF operations.

Future of Ghostscript and PDF Technology

Ghostscript continues to evolve, with upcoming features enhancing PDF processing and security. Its role in emerging PDF standards ensures it remains a cornerstone of document technology.

9.1 Upcoming Features and Enhancements

Ghostscript is continuously evolving, with upcoming features focusing on enhanced security, improved performance, and expanded support for emerging PDF standards. Future updates aim to strengthen its role as a leader in PDF processing, ensuring compatibility with the latest advancements in document technology. New enhancements will prioritize efficiency, scalability, and user-friendly integration, solidifying Ghostscript’s position as a cornerstone for PDF and PostScript handling in both open-source and commercial environments.

9.2 The Role of Ghostscript in Emerging PDF Standards

Ghostscript plays a pivotal role in shaping and adopting emerging PDF standards, ensuring compatibility and innovation. As PDF technology advances, Ghostscript remains at the forefront by actively participating in standard development and implementing cutting-edge features. Its robust architecture allows seamless adaptation to new specifications, making it an essential tool for industries relying on PDFs. Ghostscript’s commitment to evolving standards ensures it continues to be a reliable solution for future document processing needs, maintaining its position as a leader in the field.

Continue Reading