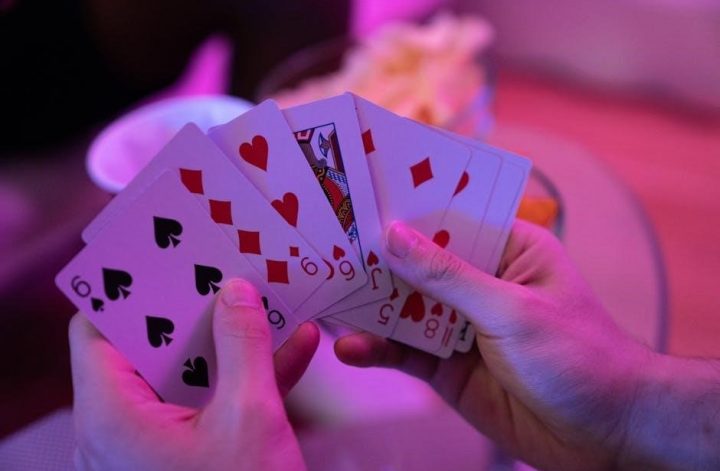
vtech phone instruction manual

Welcome to the VTech Phone Instruction Manual! This guide provides essential information to help you safely install, operate, and troubleshoot your device․ Read it carefully to ensure optimal performance and understand all features․

Overview of the Manual

This manual is a comprehensive guide designed to help you understand and make the most of your VTech phone․ It covers essential topics such as safety precautions, setting up your device, troubleshooting common issues, and utilizing advanced features․ The manual is structured to walk you through installation, operation, and maintenance, ensuring optimal performance․ Key sections include detailed instructions for pairing handsets, managing battery care, and accessing customer support․ Tips for proper usage and care are also provided to extend the lifespan of your phone․ Reading this manual thoroughly will help you navigate all functions seamlessly․

Importance of Reading the Manual

Reading the VTech phone instruction manual is crucial for ensuring safe and effective use of your device․ It provides essential safety precautions to avoid potential risks like electric shock or damage․ The manual guides you through proper installation, helping you avoid common setup mistakes․ It also offers troubleshooting solutions for issues like no dial tone or connectivity problems․ Understanding advanced features, such as caller ID and call blocking, enhances your user experience․ By following the manual, you can maintain your phone’s performance, extend its lifespan, and make the most of its innovative capabilities․

Safety Precautions

Always follow safety guidelines to prevent risks like electric shock or damage․ Avoid using the phone during storms and ensure proper ventilation․ Use only VTech-approved power supplies․

General Safety Guidelines

Always follow safety guidelines to prevent risks like electric shock or damage․ Avoid using the phone during storms and ensure proper ventilation․ Use only VTech-approved power supplies․ Keep the phone away from water and moisture․ Do not block ventilation openings with objects like newspapers or curtains․ Place the phone on a stable surface to avoid accidental falls․ Handle the phone with care to prevent physical damage․ Follow all instructions provided in the manual for safe operation․ Regularly inspect cords and plugs for damage․ Ensure the phone is not exposed to extreme temperatures or corrosive substances․ Keep the phone out of reach of children to avoid misuse․ By adhering to these guidelines, you can ensure safe and reliable use of your VTech phone․

Specific Warnings and Cautions

Avoid using the phone during electrical storms to prevent lightning-related risks․ Only use VTech-approved power supplies to reduce fire hazards․ Ensure ventilation openings are not blocked by objects like curtains or newspapers․ Do not submerge the phone in water or expose it to corrosive liquids․ Keep the phone away from extreme temperatures and avoid unauthorized repairs․ Regularly inspect cords for damage and replace them if necessary․ Avoid overcharging the battery, as it may cause overheating․ Follow all safety instructions in the manual to prevent potential risks and ensure safe operation of your VTech phone․

Setting Up Your VTech Phone

Start by unpacking and inventorying all parts․ Connect the base unit to power and the telephone line․ Install the battery in the handset and ensure all connections are secure․

Unpacking and Inventory of Parts

Carefully unpack your VTech phone package and verify all components․ Typically included are the base unit, handset, rechargeable battery, charger, and telephone line cord․ Ensure no items are missing․ Check for the user manual, warranty information, and any additional accessories like the battery compartment cover․ Save the original packaging and receipt for future reference․ Before proceeding, review the safety instructions in the manual to ensure proper handling and installation of your device․

Connecting the Base Unit and Handset

Begin by connecting the base unit to your telephone line using the provided line cord․ Plug one end into the base unit’s phone line port and the other into the wall jack․ Next, connect the power cord to the base unit and plug it into a nearby electrical outlet․ Ensure the base is placed on a stable, flat surface away from moisture․ Once connected, turn on the base unit and allow it to power up․ Finally, insert the handset into the base cradle to charge and synchronize it with the base unit․ This ensures proper communication between the two devices․

Installing the Battery

Locate the battery compartment on the back of the handset․ Open it by sliding it downward or using a screwdriver if required․ Insert the provided rechargeable battery, ensuring the terminals align correctly․ Close the compartment securely․ Place the handset on the base unit or charger to begin charging․ Allow it to charge for at least 24 hours initially for optimal performance․ Avoid using non-VTech chargers, as they may damage the battery or handset․ Proper installation ensures reliable operation and longevity of your VTech phone․

Registering and Pairing Handsets

Registering and pairing handsets ensures proper communication between the base unit and handsets․ Follow the manual’s instructions to pair additional handsets to the base, ensuring all devices are synchronized for seamless functionality․

Pairing the Handset with the Base

To pair the handset with the base, ensure the base is powered on and the handset is fully charged․ Locate the pairing button on the base and press it until the LED flashes․ On the handset, go to the menu, select “Pairing” or “Register Handset,” and follow prompts․ Enter the default code (usually 0000) if required․ The pairing process typically takes a few seconds․ Once paired, the handset will confirm with a tone or LED indication․ Ensure only authorized handsets are paired for security․ If pairing fails, restart both devices and retry․

Registering Multiple Handsets

Registering multiple handsets to your VTech phone system allows expanded functionality․ First, ensure each handset is fully charged and the base is powered on․ Press the pairing button on the base until the LED flashes․ On each handset, navigate to the menu, select “Register” or “Pairing,” and follow the on-screen instructions․ Enter the default PIN (usually 0000) if prompted․ Repeat this process for each handset, ensuring they are registered one at a time․ Most models support up to 5 or 12 handsets, depending on the system․ Refer to your specific model’s manual for exact limits and additional guidance․

Troubleshooting Common Issues

Troubleshooting your VTech phone involves checking connections, ensuring proper power, and resetting the system if necessary․ Refer to the manual for detailed solutions to issues like no dial tone, charging problems, or poor call quality․

No Dial Tone or Service

If your VTech phone has no dial tone or service, ensure the telephone line cord is securely connected to both the base unit and the wall jack․ Verify that the power connection is stable and the base unit is properly plugged in․ Check for any physical obstructions or damage to the cord․ Reset the system by disconnecting and reconnecting the power and telephone line․ If issues persist, consult the manual for advanced troubleshooting steps or contact VTech support for assistance․

Power and Charging Problems

If your VTech phone is experiencing power or charging issues, ensure the base unit is connected to a reliable power source․ Check the power cord for damage or loose connections․ Verify that the handset battery is properly installed and charged․ Avoid exposing the phone to moisture or extreme temperatures․ If the issue persists, consult the manual for troubleshooting steps or contact VTech support for assistance․ Always use the original VTech power supply to prevent damage and ensure optimal performance․

Call Quality and Connectivity Issues

If you experience poor call quality or connectivity problems with your VTech phone, ensure the base unit is placed in an open area away from physical obstructions․ Check for interference from other electronic devices and move the base away if necessary․ Verify that the phone line cord is securely connected to both the base and the wall jack․ Ensure the handset is fully charged and paired correctly with the base․ If issues persist, reset the phone by disconnecting and reconnecting the power supply․ For persistent problems, refer to the manual or contact VTech support for further assistance․

Advanced Features of VTech Phones

VTech phones offer advanced features like Caller ID, call blocking, and Bluetooth connectivity, enhancing your communication experience with convenience and control․

Caller ID and Call Blocking

VTech phones feature advanced Caller ID and Call Blocking capabilities to enhance your communication experience․ The Caller ID function announces the caller’s name or number, allowing you to decide whether to answer․ Call Blocking enables you to manage unwanted calls by adding specific numbers to a block list․ This feature helps reduce interruptions from telemarketers or unwanted callers․ Refer to your manual for step-by-step instructions on configuring these settings to customize your call management preferences effectively․

Using the Answering System

The VTech phone’s answering system allows you to record and manage messages effortlessly․ It activates when calls go unanswered, capturing messages for later playback․ The LCD display shows the number of messages, and you can playback, delete, or save them using the handset or base controls․ For optimal performance, ensure the system is turned on and volume is adjusted․ Refer to the manual for setup instructions and troubleshooting tips to resolve issues like no message recording or playback․ This feature enhances convenience and ensures you never miss important calls․

Bluetooth and Cell Phone Connectivity

VTech phones offer seamless Bluetooth integration, enabling connection to your cell phone․ This feature allows you to make and receive calls, access contacts, and use call blocking․ Pairing your cell phone enhances convenience, ensuring you stay connected without missing calls․ The system supports hands-free conversations and integrates with your phone’s features․ For setup, refer to the manual for pairing instructions and troubleshooting tips to ensure a stable connection; This feature bridges your landline and mobile worlds, offering a unified communication experience․

Maintenance and Care

Regularly clean your VTech phone with a soft cloth to prevent dust buildup․ Avoid exposure to moisture or corrosive substances․ Store batteries properly and check for software updates․ Ensure ventilation openings are not blocked for optimal performance․ Refer to the manual for detailed maintenance guidelines․

Cleaning the Phone

Regular cleaning ensures your VTech phone’s optimal performance․ Use a soft, dry cloth to wipe the handset and base, removing dust and dirt․ Avoid harsh chemicals or liquids, as they may damage the finish or internal components․ For stubborn stains, slightly dampen the cloth but ensure no moisture seeps into openings․ Allow the phone to dry completely before use․ Cleaning the vents and grilles with compressed air can improve ventilation and prevent overheating․ Regular maintenance helps preserve functionality and extends the lifespan of your device․

Battery Care and Replacement

Proper battery care ensures longevity and performance․ Use only the provided VTech power supply to charge your phone․ Avoid overcharging, as it may reduce battery life․ Clean the battery contacts with a soft, dry cloth to maintain connectivity․ If the battery no longer holds a charge, replace it with a compatible VTech model․ When replacing, ensure the handset is powered off․ Dispose of old batteries responsibly, following local environmental guidelines․ Store spare batteries in a cool, dry place to preserve their capacity․ Regularly check battery health to avoid unexpected power issues during use․

VTech Customer Support and Resources

Access online manuals, troubleshooting tips, and FAQs at www․vtechphones․com․ For assistance, contact VTech support directly or refer to the resources provided in your product package for enhanced warranty and guidance․

Accessing Online Manuals and Guides

Visit www․vtechphones․com to access online manuals, guides, and resources for your VTech phone․ Download PDF manuals for specific models, troubleshooting tips, and setup instructions․ Enter your model number to retrieve detailed documentation․ Find helpful FAQs, warranty information, and feature explanations․ Ensure proper installation and operation by referring to these resources․ Stay updated with the latest product news and enhanced warranty support by registering your device online․ Explore user manuals, quick start guides, and additional support materials tailored to your VTech phone model․

Contacting VTech Support

For assistance with your VTech phone, visit www․vtechphones․com and navigate to the Product Support section․ Enter your model number to access FAQs, troubleshooting tips, and additional resources․ For direct help, contact VTech’s regional offices or distributors in your area․ Ensure to refer to the online manual for specific guidance․ If issues persist, reach out to customer support for personalized assistance․ Stay connected with VTech for the latest updates and support options tailored to your needs․

Continue Reading

thermo king inverter 41-7784 manual

The Thermo King Inverter 41-7784 manual provides comprehensive guidance on installation, operation, and maintenance. It is designed to ensure optimal performance and safety for users of this power inverter.

This manual is essential for both new and experienced users, offering detailed step-by-step procedures and troubleshooting tips. It covers everything from initial setup to advanced diagnostic processes.

By following the manual, users can maximize the inverter’s efficiency and extend its lifespan. It is a vital resource for anyone working with the Thermo King Inverter 41-7784 system.

1.1 Overview of the Thermo King Inverter 41-7784

The Thermo King Inverter 41-7784 is a high-performance power inverter designed for reliable operation in commercial truck applications. It provides pure sine wave output, ensuring compatibility with sensitive electronics. The device is equipped with advanced features for efficient power conversion and includes hardware, operator, and diagnostic manuals for comprehensive support. Its robust design and user-friendly interface make it a trusted choice for auxiliary power needs.

1.2 Importance of the Manual for Optimal Performance

The Thermo King Inverter 41-7784 manual is crucial for ensuring optimal performance and safety. It provides detailed instructions for installation, operation, and troubleshooting, helping users avoid common issues. The manual also includes diagnostic guides to identify and resolve faults efficiently. By following the manual, users can maximize the inverter’s efficiency, extend its lifespan, and ensure reliable operation in various applications.

Key Features of the Thermo King Inverter 41-7784

The Thermo King Inverter 41-7784 is a 2000W pure sine wave inverter, designed for high efficiency and reliability. It supports various operational modes and includes hardware, operator, and diagnostic manuals for comprehensive guidance.

2.1 Power Inverter Details and Specifications

The Thermo King Inverter 41-7784 is a 2000W pure sine wave inverter, delivering clean and stable power for sensitive electronics. It operates efficiently, supporting various AC devices with minimal harmonic distortion. The inverter is designed for reliability and durability, making it ideal for commercial and industrial applications; Its specifications include a 15-amp capacity and dual voltage support, ensuring flexibility in different power systems.

The unit features advanced thermal management and overload protection, ensuring safe operation under varying conditions. It also includes a detailed manual with diagrams and troubleshooting guides, making it user-friendly for installation and maintenance. The inverter’s compact design and robust construction ensure long-term performance and reliability in demanding environments.

2.2 Types of Manuals Included (Hardware, Operator, Diagnostic)

The Thermo King Inverter 41-7784 manual includes three essential types of guides: Hardware, Operator, and Diagnostic. The Hardware manual details components and installation requirements. The Operator manual provides step-by-step instructions for daily use and functionality. The Diagnostic manual offers troubleshooting procedures and fault code explanations. Together, these manuals ensure comprehensive understanding and maintenance of the inverter, catering to both technical and operational needs.

Installation Guidelines

The Thermo King Inverter 41-7784 manual provides detailed installation steps, ensuring proper setup and functionality. It emphasizes adherence to safety practices and technical requirements for a secure connection.

3.1 Pre-Installation Checks and Requirements

Before installing the Thermo King Inverter 41-7784, ensure the system meets all specified requirements. Verify the power source matches the inverter’s input voltage and current ratings. Check the environment for proper ventilation and temperature range compatibility. Inspect all hardware components for damage and ensure mounting surfaces are secure. Review safety guidelines and prepare necessary tools and documentation for a smooth installation process.

Additionally, confirm the availability of diagnostic tools and manuals for reference during setup. Ensure all cables and connectors are compatible and undamaged to avoid connectivity issues. Proper grounding and electrical connections are critical for safe and efficient operation. Follow the manual’s recommendations for optimal placement and alignment of the inverter unit.

Lastly, familiarize yourself with the installation sequence outlined in the manual to minimize downtime and ensure compliance with safety standards. This pre-installation preparation is essential for a successful and trouble-free setup of the Thermo King Inverter 41-7784.

3.2 Step-by-Step Installation Process

Mount the Thermo King Inverter 41-7784 securely on a stable surface using the provided hardware. Connect the DC power cables to the battery, ensuring tight connections. Attach the AC input and output cables according to the manual’s wiring diagram. Secure all connections to prevent loose contacts. Power on the inverter and test all functions to ensure proper operation. Refer to the manual for specific torque and voltage settings. Complete the installation by verifying all safety and operational guidelines are met.

Operation and Functionality

The Thermo King Inverter 41-7784 operates seamlessly, converting DC power to AC with pure sine wave technology. Its control panel offers intuitive mode selection, monitoring, and setting adjustments for optimal functionality across various applications.

4.1 Understanding the Control Panel and Its Functions

The control panel of the Thermo King Inverter 41-7784 is designed for easy navigation, featuring buttons for mode selection, an LCD display for status monitoring, and LED indicators for power and fault status. Users can adjust settings, monitor output, and troubleshoot issues directly from the panel. Its intuitive layout ensures seamless operation, making it user-friendly for both novice and experienced operators.

4.2 Operating the Inverter in Different Modes

The Thermo King Inverter 41-7784 operates in multiple modes, including standby, normal operation, and diagnostic modes. Users can switch modes using the control panel. The LCD display indicates the active mode, ensuring clear operation. Each mode serves specific functions, such as power conservation or fault detection. Refer to the manual for detailed instructions on mode selection and operation to optimize performance and troubleshooting.

Maintenance and Upkeep

Regular maintenance ensures optimal performance and extends the lifespan of the Thermo King Inverter 41-7784. Tasks include checking connections, cleaning filters, and inspecting cables for wear.

5.1 Regular Maintenance Tasks for Prolonged Lifespan

Regular maintenance is crucial for the Thermo King Inverter 41-7784. Tasks include checking battery connections, cleaning dust from vents, inspecting cables for damage, and ensuring proper ventilation. Users should also verify that all electrical connections are secure and follow the manufacturer’s recommended maintenance schedule to prevent overheating and ensure reliable operation over time.

5.2 Troubleshooting Common Issues

The Thermo King Inverter 41-7784 manual provides detailed troubleshooting steps for common issues. Users can address problems like no power output by checking connections and resetting the device. It also guides on diagnosing error codes and inspecting wires for damage. Regularly reviewing the manual ensures quick resolution of issues, minimizing downtime and ensuring reliable operation of the inverter system.

Safety Practices and Precautions

Always follow safety guidelines when handling the Thermo King Inverter 41-7784. Ensure proper grounding, avoid overloading, and use correct wiring to prevent electrical hazards and ensure safe operation.

6.1 General Safety Guidelines for Handling the Inverter

When handling the Thermo King Inverter 41-7784, always disconnect the power source before performing maintenance or repairs. Ensure proper grounding to prevent electrical shocks. Avoid overloading the inverter, as this can cause damage or fire hazards. Use appropriate wiring and follow the manufacturer’s guidelines for installation and operation. Keep the unit away from flammable materials and avoid touching hot surfaces during operation. Refer to the manual for detailed safety procedures.

6.2 Emergency Procedures and Shutdown Processes

In case of an emergency, immediately disconnect the power source and stop the inverter. Turn off the main power switch and allow the unit to cool down before inspecting. If an error code appears, refer to the diagnostic manual for fault identification. Always follow the manual’s shutdown procedures to prevent damage or safety risks. Ensure proper ventilation and avoid sudden impacts during shutdown.

Hardware and Diagnostic Manual

The Thermo King Inverter 41-7784 manual includes detailed hardware specifications and diagnostic tools, enabling users to identify and resolve issues efficiently. It provides a comprehensive guide for troubleshooting and maintenance.

7.1 Detailed Hardware Specifications and Components

The manual provides a detailed breakdown of the Thermo King Inverter 41-7784’s hardware, including its power capacity, voltage input, and output specifications. It outlines the components such as the inverter module, cooling system, and control panel. The document also includes circuit diagrams and component identification, ensuring users can understand and maintain the system effectively. This section is crucial for installation, troubleshooting, and upgrades.

7.2 Using the Diagnostic Manual for Fault Identification

The diagnostic manual provides step-by-step guidance for identifying and resolving faults in the Thermo King Inverter 41-7784. It includes detailed error codes, troubleshooting procedures, and diagnostic flowcharts. Users can pinpoint issues by referencing the manual’s fault identification tables and repair instructions. This section ensures efficient problem-solving, minimizing downtime and extending the inverter’s operational lifespan through prompt and accurate fault resolution.

Replacement Parts and Accessories

The Thermo King Inverter 41-7784 requires specific replacement parts, such as 1040741 and 82-21278-000, to ensure optimal performance and safety. Always use genuine components for reliability.

8.1 List of Replacement Parts Numbers

The Thermo King Inverter 41-7784 manual specifies essential replacement parts, including 1040741 and 82-21278-000. These components are crucial for maintaining optimal performance and safety. Always use genuine Thermo King parts to ensure reliability and compatibility. These parts are readily available through authorized distributors or Thermo King service centers, guaranteeing quality and adherence to manufacturer standards.

8.2 Where to Source Genuine Thermo King Parts

Genuine Thermo King parts for the 41-7784 inverter can be sourced directly from Thermo King’s official website or through authorized dealers. These sources ensure authenticity and compatibility, providing warranty coverage and optimal performance. Additionally, Thermo King’s customer support team can assist in locating verified suppliers, ensuring reliable and efficient service.

Comparison with Other Thermo King Inverter Models

The Thermo King Inverter 41-7784 stands out for its advanced features, higher efficiency, and superior performance compared to earlier models, making it a top choice for reliable power conversion.

9.1 Key Differences and Upgrades in the 41-7784 Model

The Thermo King Inverter 41-7784 features a pure sine wave output, enhancing compatibility with sensitive electronics. It offers a higher power capacity of 2000W and improved efficiency compared to earlier models. The inverter includes advanced diagnostic capabilities and a user-friendly control panel for easier operation. These upgrades ensure better performance, reliability, and safety, making the 41-7784 a superior choice for modern power needs.

9.2 Benefits of Choosing the 41-7784 Over Previous Models

The Thermo King Inverter 41-7784 offers superior performance with its pure sine wave output, ensuring compatibility with sensitive electronics. It provides a higher power capacity of 2000W and improved efficiency, reducing energy losses. The enhanced diagnostic features and user-friendly control panel simplify troubleshooting and operation. These advancements make the 41-7784 a more reliable and efficient choice compared to earlier models, delivering better value and performance for users.

Customer Support and Resources

Thermo King offers dedicated customer support, including online resources, troubleshooting guides, and access to expert assistance. Visit their official website for comprehensive support options.

10.1 Accessing Thermo King Customer Service

Thermo King provides accessible customer service through their official website, thermoking.com, offering resources like manuals and troubleshooting guides. Users can also contact authorized dealers or support centers for assistance. Additionally, phone and email support options are available for direct inquiries, ensuring help is reachable whenever needed.

10.2 Online Resources and Communities for Further Assistance

Thermo King offers extensive online resources, including official websites, forums, and community platforms, to assist users with the 41-7784 inverter. ManualsLib and other third-party sites provide downloadable manuals and guides. Additionally, specialized forums and technical support groups allow users to share experiences and resolutions, ensuring comprehensive assistance beyond official channels.

The Thermo King Inverter 41-7784 manual is a vital resource, ensuring optimal performance and safety. It guides users through installation, operation, and maintenance, helping them maximize efficiency and troubleshoot issues effectively.

11.1 Summary of the Thermo King Inverter 41-7784 Manual

The Thermo King Inverter 41-7784 manual is a detailed guide covering installation, operation, and maintenance. It ensures optimal performance by providing step-by-step instructions and troubleshooting tips. The manual emphasizes safety practices and the use of genuine parts for reliability. By following its guidelines, users can maximize the inverter’s efficiency, extend its lifespan, and resolve common issues effectively. It is an indispensable resource for anyone working with this power inverter system.

11.2 Final Thoughts on the Importance of the Manual

The Thermo King Inverter 41-7784 manual is a critical resource for ensuring optimal performance, safety, and longevity of the device. It provides essential guidance for installation, operation, and troubleshooting, enabling users to maximize efficiency and resolve issues promptly. Adhering to the manual’s instructions is vital for maintaining reliability and avoiding potential risks. It serves as a cornerstone for enhancing user experience and system durability.

Additional Resources

Visit Thermo King’s official website for additional documentation, troubleshooting guides, and customer support resources. Explore online forums and communities for shared experiences and expert advice.

12.1 Recommended Reading and Documentation

For deeper understanding, refer to the official Thermo King website for detailed manuals, technical bulletins, and troubleshooting guides. Review the hardware and diagnostic manuals for advanced insights. Explore online forums and communities for user experiences and expert advice. These resources provide comprehensive support for optimizing performance and addressing technical challenges effectively.

12.2 Links to Official Thermo King Websites and Portals

Visit the official Thermo King website for authentic manuals, technical support, and product updates. Explore the manuals section for detailed guides. Access diagnostic tools and troubleshooting resources through their support portal. Additionally, check their community forums for user discussions and expert advice.

Continue Reading

morse watchman keywatcher manual pdf

The Morse Watchman KeyWatcher System is a comprehensive key management solution designed to secure, track, and manage keys efficiently. It offers advanced features like modular design, illuminated key cabinets, and robust access control, ensuring optimal security and accountability for sensitive assets. This system is widely used in casinos, industrial facilities, and other high-security environments to streamline key management processes and maintain operational integrity.

Overview of the KeyWatcher System

The KeyWatcher System is a modular and scalable key management solution designed to secure, track, and manage keys efficiently. It offers a comprehensive approach to key control, combining advanced technology with user-friendly interfaces. The system is built to integrate seamlessly with existing security infrastructure, providing real-time monitoring and reporting. With illuminated key cabinets, customizable access permissions, and expandable design, the KeyWatcher System ensures that keys are stored safely and accessed only by authorized personnel. Its robust features make it ideal for industries requiring high-security standards, such as casinos, hospitals, and industrial facilities. By streamlining key management processes, the KeyWatcher System enhances operational efficiency and reduces the risk of key mismanagement.

Importance of the Manual for Effective Use

The Morse Watchman KeyWatcher Manual is essential for maximizing the system’s potential and ensuring proper operation. It provides detailed instructions on installation, configuration, and everyday use, helping users navigate features like key tracking, access control, and report generation. The manual also includes troubleshooting tips and maintenance guidelines, which are crucial for resolving issues promptly and maintaining system efficiency. By following the manual, users can customize settings, such as key permissions and user access, to meet specific security needs. Additionally, it serves as a reference for understanding advanced features like software integration and data export. Ultimately, the manual empowers users to utilize the KeyWatcher System effectively, ensuring secure and efficient key management across various industries.

Key Features of the Morse Watchman KeyWatcher

The Morse Watchman KeyWatcher offers a modular, scalable design with illuminated digital key cabinets, advanced access control, and seamless integration with security systems, ensuring secure key management.

Modular and Expandable Design

The Morse Watchman KeyWatcher system boasts a modular and expandable design, allowing users to configure the system according to their specific needs. This flexibility enables organizations to start with a basic setup and add components such as key modules, card modules, or storage lockers as their requirements grow. The system supports configurations ranging from 6 to 48 keys, ensuring scalability for both small and large facilities. Additionally, the modular design allows for easy integration with other security systems, making it a versatile solution for various industries. This adaptability ensures that the KeyWatcher system can evolve alongside an organization’s security demands, providing long-term value and efficiency. The expandable nature of the system is further enhanced by its compatibility with advanced software and hardware, ensuring seamless upgrades and updates.

Illuminated Digital Key Cabinet

The Morse Watchman KeyWatcher features an illuminated digital key cabinet, enhancing visibility and accessibility of keys. This innovative design ensures that keys are easily identifiable, even in low-light environments. The cabinet is equipped with a digital interface, providing real-time updates and notifications. Users can quickly locate specific keys, reducing the time spent on key retrieval. The illuminated system also supports advanced security features, such as key restrictions and access permissions, ensuring that only authorized personnel can access sensitive keys. This combination of technology and design makes the KeyWatcher system a reliable solution for secure key management. The illuminated digital key cabinet is a key component of the system, offering both practicality and enhanced security for organizations seeking efficient key control.

Advanced Access Control and Permissions

The Morse Watchman KeyWatcher system offers advanced access control and permissions, ensuring that keys are only accessible to authorized individuals. Users can be assigned specific permissions, allowing them to access certain keys or groups of keys while restricting others. The system supports multiple access levels, enabling organizations to enforce strict security protocols. Key restrictions can be programmed to limit access based on user roles, ensuring that sensitive keys are protected from unauthorized use. Additionally, the KeyWatcher system provides real-time monitoring and audit trails, allowing administrators to track key usage and maintain accountability. These advanced features ensure that key management is both secure and efficient, making the KeyWatcher system a robust solution for organizations requiring high-level security and control. The system’s flexibility in assigning permissions makes it adaptable to various operational needs and security requirements.

Software Overview

The Key-Pro III and TrueTouch software provide advanced key management capabilities, enabling real-time monitoring, programming, and reporting for the Morse Watchman KeyWatcher system. These tools enhance security and efficiency.

Key-Pro III Software

The Key-Pro III Software is a powerful tool designed to manage and monitor the Morse Watchman KeyWatcher system. It offers advanced features such as real-time tracking, detailed reporting, and customizable access permissions. With this software, users can program multiple KeyWatcher systems, monitor key transactions, and generate reports in various formats like PDF and CSV. It also supports up to 50 KeyWatcher units, making it ideal for large-scale applications. The software ensures seamless integration with other security systems, providing a comprehensive solution for key control and asset management. Its user-friendly interface and robust capabilities make it an essential component for enhancing security and operational efficiency in various industries.

TrueTouch Client Interface

The TrueTouch Client Interface is an intuitive and user-friendly platform designed to manage and monitor the Morse Watchman KeyWatcher system. It allows users to program, control, and access key management functions remotely, ensuring seamless oversight of key transactions. The interface supports up to 10 KeyWatcher Touch locations, enabling centralized management of multiple systems. With TrueTouch, users can add and manage global lists of personnel, synchronize settings across systems, and generate detailed reports in formats like PDF and CSV. Its advanced features include real-time monitoring, key usage tracking, and customizable alerts for enhanced security. The interface is designed to integrate effortlessly with other security systems, making it a versatile tool for modern key control needs. Its scalability and ease of use make it ideal for organizations requiring efficient and secure key management solutions.

Integration with Access Control Systems

The Morse Watchman KeyWatcher seamlessly integrates with existing access control systems, enhancing security and streamlining operations. This integration allows for synchronized user permissions, real-time monitoring, and unified security protocols, ensuring comprehensive control over keys and access points across the organization. By combining key management with access control, the system provides a robust solution for managing sensitive assets and ensuring compliance with security standards.

Compatibility with Other Security Systems

The Morse Watchman KeyWatcher system is designed to integrate seamlessly with various security platforms, ensuring enhanced functionality and streamlined operations. By supporting compatibility with access control systems, video surveillance, and other security technologies, the KeyWatcher provides a unified solution for managing keys and access points. This integration enables real-time monitoring, synchronized user permissions, and comprehensive reporting, ensuring that security protocols are maintained across all systems. The KeyWatcher’s modular architecture allows it to adapt to different security environments, making it a versatile solution for industries such as casinos, healthcare, and government facilities. This compatibility ensures that the KeyWatcher can be easily incorporated into existing security infrastructures, enhancing overall security without disrupting current operations. The system’s ability to work alongside other security technologies makes it a reliable choice for organizations seeking to improve their key management and security practices.

Advanced Security Features

The Morse Watchman KeyWatcher system incorporates advanced security features to ensure maximum protection of keys and assets. It utilizes RFID technology to track keys and monitor access, providing real-time updates and alerts for unauthorized attempts. The system also includes tamper-proof mechanisms, such as secure key slots and electronic locks, to prevent unauthorized access. Additionally, the KeyWatcher offers customizable access permissions, allowing administrators to define specific user rights and ensure that keys are only accessible to authorized personnel. The system’s audit trail capabilities enable detailed logging of all transactions, providing a comprehensive record of key movements and user activities. These features make the KeyWatcher an ideal solution for organizations requiring high-level security and accountability in their key management processes. The integration of these advanced security measures ensures that sensitive keys and assets are protected from theft or misuse, maintaining operational integrity and security.

Continue Reading

manual dock leveler

Manual dock levelers are essential tools for bridging height differences between docking bays and vehicles, ensuring efficient material handling. These devices are cost-effective solutions for aligning dock and vehicle heights, enhancing safety and operational efficiency. Preferred for their simplicity and reliability, manual dock levelers are widely used in manufacturing, logistics, and warehousing industries.

1.1 What is a Manual Dock Leveler?

A manual dock leveler is a device used to bridge the height difference between a docking bay and a vehicle, enabling safe and efficient material handling. It is a cost-effective solution designed to align the dock and vehicle heights manually, ensuring smooth loading and unloading processes. These levelers are typically simple in design, relying on mechanical or hydraulic systems, and are widely used in industrial and logistics settings to enhance operational efficiency and safety. Their reliability and ease of operation make them a preferred choice for many businesses.

1.2 Importance in Material Handling

Manual dock levelers play a crucial role in material handling by ensuring safe and efficient loading/unloading processes. They bridge height differences between docks and vehicles, preventing accidents and reducing physical strain on workers. Their durability and reliability make them indispensable in high-volume operations, while their cost-effectiveness provides long-term savings. By maintaining smooth workflows and protecting equipment, manual dock levelers are essential for optimizing logistics and enhancing overall operational efficiency in manufacturing, warehousing, and distribution industries.

Types of Manual Dock Levelers

Manual dock levelers are categorized into mechanical, hydraulic, and air-powered models, each designed for specific operational needs, offering durability and efficiency in various industrial settings.

2.1 Mechanical Dock Levelers

Mechanical dock levelers operate via a spring-based system, providing a cost-effective solution for loading and unloading operations. They are durable, easy to maintain, and ideal for low to medium traffic environments. These levelers are manually adjusted using a handle or lever, ensuring precise height alignment. Their simplicity makes them a popular choice for businesses seeking reliable performance without the need for power sources. Regular maintenance, such as lubricating springs and inspecting hinges, ensures optimal functionality and longevity.

2.2 Hydraulic Dock Levelers

Hydraulic dock levelers are highly efficient, offering smooth and precise height adjustment for heavy-duty operations. They are ideal for high-traffic loading bays due to their robust construction and fast activation. These levelers use hydraulic cylinders controlled by a panel, ensuring consistent performance. Regular maintenance, such as checking hydraulic fluid levels and inspecting seals, is crucial for longevity. Their reliability and ease of use make them a preferred choice for industries requiring frequent loading and unloading operations.

2.3 Air-Powered Dock Levelers

Air-powered dock levelers operate using compressed air, offering a clean and environmentally friendly solution. They are ideal for lighter-duty applications and provide smooth height adjustment with minimal noise. These levelers are easier to maintain compared to hydraulic systems, as they lack oil and complex mechanical components. Their installation is relatively straightforward, and they are cost-effective for facilities with moderate traffic. Air-powered dock levelers are a popular choice for industries seeking efficient, low-maintenance loading solutions.

How to Use a Manual Dock Leveler

Position the leveler, align it with the dock and vehicle, and secure it firmly. Check for obstructions, ensure proper alignment, and lower it slowly for safe operation.

3.1 Step-by-Step Operation Guide

To operate a manual dock leveler, start by positioning it correctly at the dock edge. Lower the ramp slowly using the handle until it aligns with the vehicle bed. Ensure the lip rests securely on the vehicle floor. Check for obstructions and proper alignment before loading. Once loaded, raise the ramp carefully and secure it in the upright position. Always follow safety guidelines and perform regular maintenance to ensure smooth operation.

Safety Considerations

Safety is paramount when using manual dock levelers. Ensure the area is clear of obstructions, use safety devices, and train personnel properly to avoid accidents and injuries.

4.1 Precautions and Best Practices

Safety should always be the top priority when operating manual dock levelers. Ensure the area is clear of obstructions and unauthorized personnel before use. Proper training is essential to avoid accidents. Always follow the manufacturer’s guidelines and load capacity limits. Regular maintenance checks are crucial to ensure optimal functionality. Use safety devices like barriers and warning signals to alert personnel. Never operate the leveler when it is damaged or malfunctioning. Always ensure the dock and vehicle are securely positioned before loading or unloading goods.

Installation and Setup

Proper installation of manual dock levelers ensures safe and efficient operation. Begin with thorough site preparation, ensuring the dock area is level and clear of debris. Anchoring the leveler securely to the dock frame is critical to prevent movement during use. Follow the manufacturer’s installation guide for precise measurements and alignment. Conduct a final inspection and test the leveler under controlled conditions to ensure proper functionality and safety. Consulting a professional installer is recommended to guarantee compliance with safety standards and optimal performance.

5.1 Site Preparation and Installation Tips

Ensure the dock area is clear of debris and obstructions before installing a manual dock leveler. Verify the dock floor is level and structurally sound to support the leveler’s weight. Follow the manufacturer’s installation guide for precise measurements and alignment. Properly anchor the leveler to the dock frame using high-strength fasteners. Conduct a final inspection to ensure all components are securely attached and functioning correctly. Test the leveler under controlled conditions to confirm smooth operation and safety. Professional installation is recommended for optimal performance and compliance with safety standards.

Maintenance and Repair

Regular inspections and lubrication of moving parts ensure optimal performance. Address wear and tear promptly to prevent breakdowns. Schedule professional repairs for complex issues to maintain functionality and safety.

6.1 Regular Maintenance Schedule

A well-structured maintenance schedule is crucial for extending the lifespan of manual dock levelers. Daily checks should focus on inspecting for wear and tear, while weekly routines involve lubricating hinges and springs to ensure smooth operation. Monthly, examine the lip and frame for damage, and tighten any loose bolts. Annually, perform a comprehensive inspection, including replacing worn parts and repainting if necessary. This proactive approach prevents unexpected breakdowns and ensures consistent performance, safeguarding both equipment and personnel.

Common Issues and Solutions

Common issues with manual dock levelers include mechanical failures, wear on hinges, and alignment problems. Regular inspections and timely repairs can prevent downtime and ensure smooth operations.

7.1 Troubleshooting Tips

For manual dock levelers, common issues include uneven alignment, jammed hinges, or hydraulic leaks. Regular lubrication of moving parts can prevent stiffness. Inspect springs and hinges for wear. If the leveler doesn’t adjust properly, check for obstructions or damage. Ensure the dock is clean and free from debris. For hydraulic models, monitor fluid levels and look for leaks. Always refer to the manufacturer’s guide for specific troubleshooting steps. Address issues promptly to maintain safety and efficiency in operations. Professional maintenance may be needed for complex problems.

Advantages Over Automatic Levelers

Manual dock levelers are cost-effective, easy to maintain, and reliable, offering simplicity without the need for complex automation, making them ideal for smaller operations and budget-conscious businesses.

8.1 Cost-Effectiveness and Simplicity

Manual dock levelers are highly cost-effective, offering a lower upfront investment compared to automatic models. Their simpler design reduces maintenance and energy costs, as they rely on manual operation rather than complex hydraulic or electrical systems. This makes them ideal for smaller facilities or businesses with limited budgets. Additionally, their reliability and ease of use ensure long-term cost savings, providing a practical solution for warehouses and distribution centers seeking efficient material handling without the need for advanced automation.

Factors to Consider When Choosing

Load capacity, industry type, and durability are key factors. Consider the specific needs of your facility, including frequency of use and compatibility with existing infrastructure.

9.1 Load Capacity and Industry Type

Load capacity is a critical factor, as it determines the maximum weight the dock leveler can safely accommodate. Industry type also plays a significant role, with different sectors requiring specific durability levels. For instance, manufacturing facilities may need heavier-duty levelers compared to retail warehouses. Assessing these factors ensures the chosen dock leveler meets operational demands and lasts longer, optimizing efficiency and safety in material handling operations.

Case Studies and Applications

Manual dock levelers are widely applied in manufacturing, logistics, and warehousing, with case studies showcasing their efficiency in bridging height differences and ensuring safe material handling processes.

10.1 Real-World Applications and Success Stories

Manual dock levelers have proven indispensable in various industries, including manufacturing, logistics, and retail. For instance, a leading food processing company implemented manual dock levelers to streamline loading/unloading processes, reducing downtime by 30%. Similarly, an automotive parts distributor reported enhanced safety and efficiency after installing these levelers. Their simplicity and reliability make them a preferred choice for facilities with moderate traffic, demonstrating their versatility and effectiveness in real-world applications across diverse sectors.

Future Trends and Innovations

Future trends in manual dock levelers include integration with smart technologies, IoT-enabled systems, and energy-efficient designs. Innovations like automated adjustment and sustainable materials are expected to enhance functionality.

11.1 Emerging Technologies in Dock Leveling

Emerging technologies in dock leveling include the integration of smart systems and IoT-enabled devices for real-time monitoring and automated adjustments. Energy-efficient designs and sustainable materials are gaining traction, reducing environmental impact. Advanced sensors and data analytics are being incorporated to optimize performance and predict maintenance needs. These innovations aim to enhance safety, efficiency, and operational reliability in material handling processes, ensuring manual dock levelers remain relevant in modern logistics and warehousing environments.

Manual dock levelers remain essential for efficient material handling, offering cost-effective and reliable solutions. Their simplicity ensures continued relevance in modern logistics and industrial operations.

12.1 Summary and Final Thoughts

Continue Reading

ghost pdf

Ghost PDF is a powerful tool for handling PDF files, leveraging Ghostscript’s capabilities for conversion, rendering, and document management. It offers efficient processing and supports multiple formats, making it a versatile solution under both AGPL and commercial licenses.

1.1 What is Ghost PDF?

Ghost PDF is a robust tool built on Ghostscript, a high-performance PostScript and PDF interpreter. It enables seamless document management, conversion, and rendering, supporting formats like PDF, PostScript, PCL, and XPS. Known for its versatility, Ghost PDF is widely used in printing and file conversion workflows. It is available under both the open-source AGPL license and a commercial license, making it accessible for various applications while ensuring high-quality output and reliable performance across different platforms.

1.2 Overview of Ghostscript and Its Role in PDF Processing

Ghostscript is a high-performance PostScript and PDF interpreter that plays a crucial role in PDF processing. It enables the conversion, rendering, and interpretation of PDF files, supporting various formats like PostScript, PCL, and XPS. Ghostscript’s versatility allows it to be integrated into document management systems, printing workflows, and file conversion tools. Its ability to handle complex page description languages makes it a cornerstone for applications requiring precise PDF rendering and manipulation, ensuring high-quality output and reliable performance across diverse use cases.

Key Features of Ghostscript

Ghostscript excels in PDF, PostScript, PCL, and XPS processing, offering high-quality rendering, color reproduction, and support for raster and vector formats. It provides customizable solutions for seamless document management and conversion needs.

2.1 PDF Conversion and Interpretation Capabilities

Ghostscript offers robust PDF conversion and interpretation features, enabling seamless handling of PDF files. It supports PDF rendering, conversion to raster formats like PNG and JPEG, and ensures high-quality output. The software also provides tools for converting PostScript to PDF, making it a versatile solution for document processing. Its interpretation capabilities extend to PDF/A and PDF/X-3 standards, ensuring compatibility and accuracy in various applications. This makes Ghostscript a reliable choice for businesses needing efficient PDF management and conversion processes.

2.2 Support for Multiple File Formats (PostScript, PCL, XPS)

Ghostscript excels in supporting a wide range of file formats, including PostScript, PCL, and XPS. This versatility allows users to convert and interpret documents seamlessly across different systems. PostScript is handled with precision, while PCL and XPS formats are also processed efficiently. The software’s ability to work with these formats ensures compatibility and flexibility, making it a comprehensive tool for document management. Its high-quality rendering ensures that files retain their integrity during conversion, providing reliable outcomes for both personal and professional use.

2.3 High-Quality Rendering and Color Reproduction

Ghostscript delivers exceptional rendering and color reproduction, ensuring precise and vibrant output. It supports conversion to raster formats like PNG, JPEG, TIFF, and BMP, ideal for web display. The proprietary color management system guarantees accurate color representation, making it suitable for professional printing and digital viewing. Ghostscript’s high-quality rendering ensures that converted files retain their visual integrity, whether for web use or high-resolution printing, providing a reliable solution for maintaining document fidelity across various platforms and applications.

Security and Licensing

Ghostscript ensures secure PDF handling through Ghost Trap, a sandbox-secured version, while offering flexible licensing options, including AGPL open-source and commercial licenses for diverse needs, ensuring compliance.

3.1 Ghost Trap: A Security-Hardened Version of Ghostscript

Ghost Trap is a secure version of Ghostscript, developed by PaperCut, utilizing Chrome’s sandbox technology. It enhances security for PostScript and PDF processing, reducing vulnerabilities. Ideal for environments requiring high protection, Ghost Trap ensures safe conversions without compromising performance. This tool is essential for organizations prioritizing data security, offering robust protection against potential threats. Ghost Trap is open-source and integrates seamlessly with systems needing advanced security measures for document handling.

3.2 Licensing Options: Open Source AGPL vs. Commercial License

Ghostscript is available under two licensing options: the open-source AGPL license and a commercial license. The AGPL license is free and supports open-source projects, requiring users to share modifications. It restricts SaaS deployment unless a commercial license is obtained. The commercial license, offered by Artifex Software, provides flexibility for businesses, allowing closed-source distribution and SaaS use. This option is ideal for organizations needing tailored solutions without AGPL’s copyleft requirements, ensuring compliance and adaptability for specific business needs.

Integration and Compatibility

Ghost PDF seamlessly integrates with various systems, supporting Windows, macOS, and Linux. It enhances document workflows, ensuring compatibility with diverse platforms for efficient PDF processing and management.

4.1 Embedding PDF Viewers in Ghost

Embedding PDF viewers in Ghost is straightforward, enabling seamless document integration. Users can choose from various layout options like Embed, Gallery, List, Designed List, and Grid. This feature allows for embedding PDFs directly into web pages or applications without requiring external tools. The integration supports customizations, ensuring a tailored viewing experience. With Ghost’s PDF viewer integration, users can display documents inline, enhancing accessibility and user engagement. This functionality is ideal for blogs, websites, and platforms needing to share PDF content effortlessly, while maintaining security and performance.

4.2 Compatibility with Major Operating Systems (Windows, macOS, Linux)

Ghostscript is compatible with Windows, macOS, and Linux, ensuring versatility across platforms. macOS users can install Ghostscript via a dedicated installer maintained by the University of Oregon. Linux distributions often include Ghostscript or provide easy installation through package managers. Windows users benefit from Ghost Trap, a security-enhanced version supported by PaperCut, ideal for environments requiring high security. This cross-platform compatibility makes Ghostscript a reliable choice for document processing and PDF handling across diverse operating systems, catering to both individual and enterprise needs effectively. Ghostscript runs seamlessly on all major systems, ensuring consistent performance and functionality.

Applications of Ghostscript

Ghostscript is widely used for document management, printing solutions, and PDF viewing tools. It enables efficient PDF handling, supports various formats, and integrates seamlessly with platforms like Ghost for professional publishing.

5.1 Document Management and Printing Solutions

Ghostscript excels in document management and printing solutions, offering efficient PDF handling and conversion. It supports various formats, ensuring seamless integration with professional publishing platforms like Ghost. By enabling high-quality rendering and color reproduction, Ghostscript is a reliable tool for managing and printing documents, catering to the needs of businesses and publishers alike. Its robust capabilities make it an essential component for streamlined document workflows and professional publishing environments.

5.2 PDF Viewing and Conversion Tools

Ghostscript is a versatile tool for PDF viewing and conversion, enabling seamless rendering and interpretation of PDF files. It supports conversion to raster formats like PNG, JPEG, and TIFF, making it ideal for web display. Ghostscript also ensures high-quality color reproduction and supports PDF/A and PDF/X-3 standards. With its robust security features, including Ghost Trap, it provides a reliable solution for secure PDF processing. This makes it a valuable asset for professional platforms like Ghost, enhancing document handling and viewer integration capabilities.

Development and Customization

Ghostscript offers customizable modules and a comprehensive library for tailored solutions. Its flexibility allows developers to adapt the software for specific needs, supported by extensive resources.

6.1 Customizable Modules for Specific Needs

Ghostscript provides a range of customizable modules tailored to meet specific requirements. These modules allow developers to extend functionality, enabling support for unique document processing needs. With its modular architecture, users can integrate custom features, ensuring seamless adaptation to various workflows. This flexibility makes Ghostscript a preferred choice for businesses seeking tailored solutions. Developers can modify or extend these modules to address particular challenges, enhancing the overall performance and compatibility of their applications.

6.2 Developer Resources and Community Support

Ghostscript offers extensive developer resources, including detailed documentation, APIs, and integration guides, empowering developers to maximize its capabilities. An active community provides support through forums and repositories, fostering collaboration and innovation. Artifex Software maintains robust resources to ensure developers can troubleshoot and optimize their implementations effectively. These tools and community backing enable developers to leverage Ghostscript’s full potential, creating tailored solutions for diverse needs while staying updated with the latest advancements in PDF and PDL processing technologies.

Comparison with Other PDF Tools

Ghostscript stands out among PDF tools due to its comprehensive support for multiple formats, high-performance rendering, and open-source flexibility, making it a versatile choice for advanced document processing needs.

7.1 Ghostscript vs. Other PDF Conversion Software

Ghostscript excels as a high-performance PDF conversion tool, offering unparalleled support for multiple formats like PostScript, PCL, and XPS. Unlike other software, it provides high-quality rendering and color reproduction, making it ideal for professional document management. Its customizable modules and strong community support further enhance its versatility. While other tools may focus on specific tasks, Ghostscript’s comprehensive feature set and open-source flexibility make it a superior choice for advanced PDF processing needs.

7.2 Unique Features of Ghostscript

Ghostscript stands out with its robust interpreter for PostScript and PDF, offering seamless conversion and rendering capabilities. Its advanced color management system ensures high-quality output, while native support for raster and vector formats adds versatility. Unique features include custom screening technologies and the ability to handle complex imaging tasks. Additionally, Ghostscript’s sandbox security, as seen in Ghost Trap, enhances safety, making it a top choice for secure and high-performance PDF processing in various industries.

Best Practices for Using Ghostscript

Optimize conversion settings for performance, ensure security protocols are in place, and leverage customization options to tailor Ghostscript for specific document management needs effectively.

8.1 Optimizing PDF Conversion Processes

Optimizing PDF conversion with Ghostscript involves fine-tuning settings like resolution, color modes, and compression to balance quality and file size. Use command-line options to customize conversion parameters for specific tasks, such as adjusting dpi for rasterization or enabling ICC profiles for accurate color reproduction. Validate input files to ensure compatibility and avoid errors. Additionally, leverage batch processing to handle multiple conversions efficiently. Regularly monitor performance metrics to identify bottlenecks and optimize workflows for faster processing times while maintaining output integrity.

8.2 Ensuring Security in PDF Handling

Ensuring security in PDF handling with Ghostscript involves using Ghost Trap, a security-hardened version designed to mitigate risks. It employs sandbox technology, similar to Google Chrome, to isolate processes and prevent breaches. Regular updates are crucial to patch vulnerabilities. Validate input files before processing to avoid malicious content. Use secure protocols when handling PDFs, especially in web-based applications. Implement access controls and monitor logs for suspicious activity. These practices help safeguard sensitive data and maintain compliance with security standards while using Ghostscript for PDF operations.

Future of Ghostscript and PDF Technology

Ghostscript continues to evolve, with upcoming features enhancing PDF processing and security. Its role in emerging PDF standards ensures it remains a cornerstone of document technology.

9.1 Upcoming Features and Enhancements

Ghostscript is continuously evolving, with upcoming features focusing on enhanced security, improved performance, and expanded support for emerging PDF standards. Future updates aim to strengthen its role as a leader in PDF processing, ensuring compatibility with the latest advancements in document technology. New enhancements will prioritize efficiency, scalability, and user-friendly integration, solidifying Ghostscript’s position as a cornerstone for PDF and PostScript handling in both open-source and commercial environments.

9.2 The Role of Ghostscript in Emerging PDF Standards

Ghostscript plays a pivotal role in shaping and adopting emerging PDF standards, ensuring compatibility and innovation. As PDF technology advances, Ghostscript remains at the forefront by actively participating in standard development and implementing cutting-edge features. Its robust architecture allows seamless adaptation to new specifications, making it an essential tool for industries relying on PDFs. Ghostscript’s commitment to evolving standards ensures it continues to be a reliable solution for future document processing needs, maintaining its position as a leader in the field.

Continue Reading

costway mini split manual pdf

The Costway Mini Split Manual PDF is a comprehensive guide essential for understanding your AC unit’s features, operation, installation, and maintenance; Perfect for all users, it enhances your overall experience with detailed instructions and troubleshooting tips.

1.1 Overview of the Costway Mini Split Air Conditioner

The Costway Mini Split Air Conditioner is a 12000 BTU, 20 SEER2, 115V ductless system designed for energy efficiency and year-round comfort. With a 4-in-1 design and built-in heat pump, it offers cooling, heating, fan, and dehumidification modes. Ideal for rooms up to 750 sq. ft., it provides reliable performance and an 8-year compressor warranty for peace of mind.

1.2 Importance of the User Manual

The user manual is essential for safe and efficient operation of the Costway Mini Split Air Conditioner. It provides detailed instructions for installation, maintenance, and troubleshooting, ensuring optimal performance. The manual also outlines warranty details and safety precautions, making it a vital resource for users to maximize their unit’s longevity and functionality.

Key Features of the Costway Mini Split System

The Costway Mini Split System offers 12000 BTU cooling, 20 SEER2 efficiency, and a 4-in-1 design with a built-in heat pump for year-round comfort and energy savings.

2.1 Technical Specifications (BTU, SEER, Voltage)

The Costway Mini Split System features 12000 BTU cooling capacity, 20 SEER2 energy efficiency, and operates at 115V. It includes a 1-ton heat pump, ensuring reliable performance and energy savings. The system uses R-410a refrigerant, aligning with eco-friendly standards. These specifications ensure optimal cooling, heating, and efficiency for spaces up to 750 square feet.

2.2 Design and Functionality (4-in-1 Design, Heat Pump)

The Costway Mini Split boasts a 4-in-1 design, offering cooling, heating, fan, and dehumidification modes. The built-in heat pump provides efficient temperature control year-round. This compact system is wall-mounted, saving space while delivering powerful performance. Its sleek design complements any room, ensuring comfort and versatility in any season with minimal aesthetic impact and maximum functionality.

Installation Requirements and Guidelines

Installation requires a licensed HVAC installer, ensuring compliance with safety standards. Necessary tools and components are listed in the manual to guarantee proper setup and functionality. Improper installation can void the warranty.

3.1 Necessary Tools and Components

The manual specifies essential tools and components for installation, including screws, plastic expansive pipes, PVC protective straps, caps, elbow joints, and communication wires. These ensure a secure and proper setup, aligning with safety standards and optimal performance requirements. Proper assembly of these parts is crucial for efficient operation and warranty validity.

3.2 Step-by-Step Installation Instructions

The manual provides clear, step-by-step installation instructions, emphasizing the need for a licensed HVAC installer. Key steps include securing the indoor and outdoor units, connecting refrigerant lines, drainage setup, and electrical connections. Proper alignment and tight sealing are stressed for efficiency and safety, ensuring optimal performance and compliance with safety standards.

3.3 Importance of Licensed HVAC Installer

Installing a Costway Mini Split requires a licensed HVAC installer to ensure compliance with safety standards and optimal performance. Proper installation guarantees efficient operation, avoids potential hazards, and maintains warranty validity. A professional ensures correct handling of refrigerants, electrical connections, and system setup, crucial for reliability and safety.

Operating Instructions for Optimal Performance

Mastering the remote control, understanding modes, and setting timers ensures efficient operation. Explore cooling, heating, and fan modes for tailored comfort and energy savings.

4.1 Understanding the Remote Control Functions

The remote control offers intuitive buttons for ON/OFF, fan speed, and mode selection (Cool, Heat, Fan). Adjust temperature, set timers, and access ECO mode or Sleep mode. Additional buttons control air flow direction and turbo function for faster cooling or heating. Proper use enhances comfort and energy efficiency, ensuring optimal performance year-round.

4.2 Modes of Operation (Cooling, Heating, Fan)

The Costway Mini Split operates in multiple modes: Cooling for summer, Heating for winter, and Fan for air circulation. Each mode ensures optimal comfort by maintaining desired temperatures and air quality. The system also features a dehumidification function in Cooling mode, enhancing efficiency and comfort year-round with precise control through the remote or smart features.

4.3 Setting the Timer and Eco Mode

The Costway Mini Split allows you to set a timer for automatic operation and enables Eco Mode for energy efficiency. Use the remote to schedule start/stop times and activate Eco Mode, which adjusts settings to minimize energy consumption while maintaining comfort. These features ensure convenience and cost savings, optimizing performance without sacrificing comfort.

Maintenance and Care Tips

Regularly clean the air filter, inspect components, and schedule professional servicing to ensure optimal performance and longevity of your Costway Mini Split system.

5.1 Cleaning the Air Filter

Regularly cleaning the air filter is crucial for maintaining efficiency and airflow. Turn off the unit, remove the filter, and gently wash it with water or a mild detergent. Allow it to dry completely before reinstalling. A clean filter ensures better performance, energy savings, and improved air quality. Clean every 1-2 months for optimal results.

5.2 Checking and Replacing Parts

Regularly inspect the drain hose, refrigerant lines, and electrical connections for damage or wear. Replace any damaged components promptly to ensure optimal performance. Consult the user manual for specific guidelines on part replacement. Some parts may require professional assistance to avoid system damage or safety hazards.

5.3 Regular Servicing Recommendations

Schedule annual professional inspections to ensure your mini split system operates efficiently. Clean the outdoor unit regularly to maintain airflow and performance. Check refrigerant levels and ensure proper connections; Regular servicing helps prevent breakdowns, improves energy efficiency, and extends the unit’s lifespan, ensuring optimal performance throughout the year.

Troubleshooting Common Issues

Identify error codes and common problems like irregular cooling or noise. Resetting the unit or checking filters often resolves issues. Contact a professional if problems persist.

6.1 Error Codes and Their Meanings

Understand error codes like E1, E2, and E3, which indicate issues such as sensor malfunctions or refrigerant leaks. Refer to the manual for specific code meanings and troubleshooting steps to resolve problems effectively.

6.2 Resolving Common Operational Problems

Address issues like uneven cooling or unit shutdowns by checking air filters, ensuring proper installation, and verifying thermostat settings. Resetting the unit or restarting the system often resolves minor malfunctions, ensuring smooth operation.

6.3 When to Contact Professional Help

Contact a licensed HVAC technician if issues persist after troubleshooting, such as refrigerant leaks, compressor failure, or electrical malfunctions. Professional assistance is also needed for complex repairs or system-wide problems beyond basic user troubleshooting, ensuring safety and optimal performance.

Safety Precautions and Warnings

Always follow safety guidelines to avoid accidents. Handle electrical components carefully, avoid potential hazards, and ensure proper installation. Refer to emergency shutdown procedures in the manual.

7.1 Proper Handling of Electrical Components

Always handle electrical components with care to prevent accidents. Ensure the power is disconnected before servicing. Use insulated tools and avoid touching live wires. Follow the manual’s guidelines for safe installation and maintenance. Licensed professionals should handle complex electrical tasks to ensure safety and compliance with regulations.

7.2 Avoiding Potential Hazards

To avoid hazards, ensure proper installation and regular maintenance. Keep flammable materials away from the unit and avoid overheating. Secure all connections and follow safety guidelines in the manual. Prevent children from accessing electrical components and ensure the area around the unit remains unobstructed for safe operation.

7.3 Emergency Shutdown Procedures

In case of an emergency, immediately turn off the unit using the remote control or main power switch. Pull the circuit breaker if needed. Ensure all components cool down before inspecting or servicing. Always follow the manual’s guidance to safely handle unexpected situations and protect your safety and the system’s integrity.

Warranty and Support Information

The Costway Mini Split Manual PDF outlines an 8-year compressor warranty and 5-year parts warranty, ensuring coverage for defects. Contact customer support for inquiries, repairs, or additional resources to maintain your unit effectively and resolve any issues promptly.

8.1 Warranty Coverage Details

The Costway Mini Split Manual PDF provides an 8-year warranty for the compressor and 5 years for parts, ensuring coverage against manufacturing defects. This comprehensive warranty offers peace of mind, protecting your investment and ensuring reliable performance over time. Regular maintenance, as outlined in the manual, is essential to uphold warranty terms effectively always.

8.2 Customer Service and Support Contacts

The manual provides detailed customer service contacts, including phone numbers and email support, ensuring prompt assistance for any inquiries or issues. Additionally, online resources and FAQ sections are available for troubleshooting and guidance, offering comprehensive support to users of the Costway Mini Split system. Reaching out to support is encouraged for optimal assistance.

8.3 Online Resources and Manuals

The Costway Mini Split Manual PDF is readily available online, providing easy access to detailed instructions, troubleshooting guides, and technical specifications. Users can download the manual from the official website or authorized portals, ensuring they have all the necessary information at their fingertips for seamless operation and maintenance of their unit.

Encourage proper usage by reading the manual thoroughly, ensuring optimal performance, energy efficiency, and safety. Follow guidelines for installation, operation, and maintenance to enhance comfort and efficiency effectively.

9.1 Summary of Key Points

The Costway Mini Split Manual PDF provides essential guidance for installation, operation, and maintenance. It ensures optimal performance, energy efficiency, and safety. By following the manual, users can maximize comfort, troubleshoot issues, and extend the unit’s lifespan effectively, making it a vital resource for all Costway Mini Split owners.

9.2 Encouragement for Proper Usage

Properly following the Costway Mini Split Manual ensures efficient performance, safety, and longevity. By adhering to the guidelines, users can enjoy consistent comfort while minimizing energy consumption and potential risks. Regular maintenance and correct operational practices are key to maximizing the unit’s benefits and extending its lifespan for years of reliable service.

Continue Reading

aia guide to new york city

The AIA Guide to New York City is an essential reference for architecture enthusiasts, offering detailed insights into the city’s architectural landscape. Authored by Norval White, Elliot Willensky, and Fran Leadon, it provides a comprehensive directory of significant buildings across all five boroughs, blending historical context with modern critiques.

What is the AIA Guide?

The AIA Guide to New York City is a comprehensive and authoritative reference book that catalogues and critiques the architecture of New York City. Authored by Norval White, Elliot Willensky, and Fran Leadon, it provides detailed descriptions, photographs, and evaluations of significant buildings across the five boroughs. First published in 1967, the guide has become a seminal work in architectural literature, offering insights into the city’s diverse architectural styles, from historic brownstones to modern skyscrapers. It is organized by neighborhoods, making it accessible for both professionals and casual readers. The fifth edition, released in 2010, updates the guide with contemporary structures and fresh perspectives. This guide is celebrated for its meticulous research and engaging narrative, making it an indispensable resource for understanding New York City’s built environment.

Purpose and Scope

The AIA Guide to New York City serves as a detailed and authoritative catalog of the city’s architectural heritage, aiming to educate and inspire readers about its built environment. Its primary purpose is to document and critique significant buildings, landmarks, and neighborhoods across all five boroughs—Manhattan, Brooklyn, Queens, the Bronx, and Staten Island. The guide balances historical context with contemporary analysis, covering a wide range of architectural styles and periods, from 19th-century tenements to cutting-edge modern designs. By offering in-depth descriptions, photographs, and critiques, it provides a comprehensive understanding of New York City’s architectural diversity. The guide is designed for both professionals and general readers, fostering a deeper appreciation of the city’s urban landscape. Its scope extends beyond individual buildings, exploring the social, cultural, and historical factors that have shaped the city’s architecture. This makes it a vital resource for anyone interested in architecture, urban design, and the story of New York City.

History of the Guide

First published in 1967 by Norval White and Elliot Willensky, the AIA Guide to New York City was updated in 2010 with Fran Leadon, solidifying its status as the definitive architectural reference.

Publication Background

The AIA Guide to New York City was first published in 1967 by Norval White and Elliot Willensky, with the fifth edition released in 2010. This comprehensive guide was prepared for the American Institute of Architects in New York City and has since become a cornerstone for architectural exploration. It is published by Oxford University Press and is available in both hardcover and paperback formats. The guide’s creation involved meticulous research and documentation of the city’s architectural heritage, aiming to provide a detailed and accessible resource for both professionals and enthusiasts. Its publication marked a significant milestone in the documentation of New York City’s built environment, offering insights into the city’s diverse architectural styles and historical development.

Evolution Through Editions

Since its debut in 1967, the AIA Guide to New York City has undergone significant transformations through its editions. The fifth edition, published in 2010, introduced Fran Leadon as a new co-author, bringing fresh perspectives and updated content. Each edition has expanded the guide’s scope, incorporating new architectural developments and historical discoveries. The updates reflect the city’s evolving skyline and cultural shifts, ensuring the guide remains relevant. The inclusion of photographs and critiques in later editions has enhanced its utility for both architects and general readers. This evolution underscores the guide’s commitment to documenting New York’s architectural legacy while embracing change and innovation in the field.

Structure and Content

The AIA Guide to New York City is structured geographically, covering all five boroughs. It includes detailed descriptions, critiques, and photographs of significant buildings, making it a comprehensive resource for architectural exploration.

Organization by Boroughs

The AIA Guide to New York City meticulously organizes its content by the city’s five boroughs: Manhattan, Brooklyn, Queens, the Bronx, and Staten Island. Each section delves into the unique architectural character of its respective borough, offering a detailed exploration of neighborhoods, landmarks, and lesser-known structures. This approach ensures a comprehensive understanding of the city’s diverse architectural heritage, from iconic skyscrapers in Manhattan to historic brownstones in Brooklyn and Queens. The guide’s borough-by-borough structure allows readers to explore specific areas in depth, making it an invaluable tool for both locals and visitors. By focusing on each borough’s distinct architectural identity, the guide provides a rich, nuanced perspective on New York City’s built environment.

Key Architectural Highlights

The guide showcases iconic buildings like skyscrapers, historic brownstones, and modern high-rises, offering insights into the city’s architectural evolution and cultural significance across its diverse neighborhoods.

Iconic Buildings

The AIA Guide to New York City highlights a array of iconic buildings that define the city’s skyline and architectural identity. From the Art Deco splendor of the Chrysler Building to the modern glass towers like One World Trade Center, these structures exemplify engineering prowess and design innovation. The guide provides detailed descriptions of landmarks such as the Empire State Building, celebrated for its historical significance and enduring presence, and the Guggenheim Museum, renowned for its groundbreaking spiral design by Frank Lloyd Wright. Each entry offers insights into the architectural style, historical context, and cultural impact of these buildings, making them a must-explore for anyone interested in urban design. The guide also critiques lesser-known gems, showcasing the diversity of New York’s architectural heritage. By focusing on these iconic structures, the AIA Guide not only celebrates their beauty but also underscores their role in shaping the city’s identity. Its in-depth critiques and photographs bring these landmarks to life, offering readers a deeper appreciation for New York’s built environment.

Neighborhood Focus

The AIA Guide to New York City delves into the architectural diversity of the city’s neighborhoods, exploring their unique character and historical evolution. From the brownstones of Brooklyn Heights to the tenements of the Lower East Side, the guide provides a meticulous examination of the built environment. It highlights how neighborhoods like Greenwich Village, with its cobblestone streets and historic townhouses, and Harlem, with its rich cultural and architectural legacy, contribute to the city’s tapestry. The guide also sheds light on lesser-known areas, revealing hidden gems and underscoring the importance of preservation. By organizing its content borough by borough and neighborhood by neighborhood, the AIA Guide offers readers a nuanced understanding of how New York’s diverse communities have shaped its architectural identity. This approach makes it an indispensable resource for both locals and visitors seeking to explore the city’s urban fabric in depth. The guide’s detailed descriptions and critiques provide a compelling narrative of New York’s neighborhoods, celebrating their architectural and cultural heritage.

Impact and Legacy

The AIA Guide to New York City has become a standard reference for architects, historians, and enthusiasts, shaping architectural appreciation and preservation efforts. Its detailed insights have inspired countless explorations of the city’s built environment.

Influence on Architectural Appreciation

The AIA Guide to New York City has profoundly shaped the public’s understanding and appreciation of architecture, offering a detailed and accessible exploration of the city’s built environment. By cataloging iconic structures and hidden gems across the five boroughs, the guide democratizes architectural knowledge, making it accessible to both professionals and enthusiasts. Its meticulous descriptions and critiques have inspired countless walking tours, educational programs, and preservation efforts, fostering a deeper connection between New Yorkers and their urban landscape. The guide’s influence extends to academia and professional circles, where it is often referenced in architectural studies and design discussions. Its role in highlighting the city’s architectural diversity has also spurred interest in historic preservation and urban planning. As a result, the AIA Guide remains a cornerstone of architectural appreciation, bridging the gap between technical expertise and public engagement, and continues to inspire future generations of architects and city explorers.

Continue Reading

seneca the shortness of life pdf

Seneca the Younger, a Roman Stoic philosopher, statesman, and dramatist, was born in Cordoba around 4 BC and died in AD 65. His essay On the Shortness of Life, written for his friend Paulinus, explores Stoic principles, emphasizing that life is long enough if used wisely, but often wasted on meaningless pursuits.

1.1. Who Was Seneca the Younger?

Lucius Annaeus Seneca, known as Seneca the Younger, was a prominent Roman Stoic philosopher, statesman, dramatist, and humorist. Born around 4 BC in Cordoba, Hispania, he was raised in Rome, where he studied rhetoric and philosophy. Seneca’s life was marked by political involvement, including roles as a tutor and advisor to Emperor Nero. Despite facing exile and eventual death by order of Nero, Seneca left a lasting legacy through his writings, which blend Stoic principles with practical wisdom. His works, including On the Shortness of Life, remain influential in Western philosophy, offering insights into time management, morality, and the human condition.

1.2. The Context of “On the Shortness of Life”

On the Shortness of Life, written by Seneca around 49 AD, is a moral essay addressed to his father-in-law, Paulinus. The work reflects Seneca’s Stoic philosophy, addressing common complaints about life’s brevity. He argues that life is not short but is often squandered on trivial pursuits. Seneca emphasizes the importance of valuing time and living purposefully, aligning with Stoic ideals of reason and virtue. The essay is part of a collection that includes Consolation to Helvia and On Tranquility of Mind, showcasing Seneca’s ability to combine philosophical depth with accessible rhetoric. Its themes remain relevant today, offering timeless advice on making the most of life’s opportunities.

Key Themes in “On the Shortness of Life”

The essay explores the misconception of life’s brevity, emphasizing that life is long enough if used wisely, and critiques the wastefulness of time on trivial pursuits.

2.1. The Perception of Life as Too Short

Seneca challenges the common complaint that life is too short, arguing instead that life is long enough if used wisely. He asserts that people perceive life as brief because they squander it on meaningless pursuits. In On the Shortness of Life, Seneca addresses his friend Paulinus, emphasizing that life’s brevity is a misconception. He contends that individuals fail to appreciate the time they have, often prioritizing trivial matters over meaningful endeavors. This mismanagement of time leads to the illusion that life is short, while in reality, it is sufficiently long for achieving great things. Seneca’s central argument is that life’s shortness is not in its duration but in how people choose to spend it.

2.2. The Importance of Time Management

Seneca underscores the critical role of time management in maximizing life’s potential. He argues that life is not short but is often squandered on trivial pursuits, leading to a sense of scarcity. In On the Shortness of Life, Seneca advises individuals to prioritize meaningful activities and avoid distractions. He emphasizes that time is a precious resource and must be allocated wisely to achieve lasting fulfillment. By focusing on what truly matters, people can live fully despite life’s finite nature. Seneca’s teachings encourage mindfulness and intentional living, aligning with Stoic principles of valuing the present and making the most of the time one has. Effective time management, he suggests, is the key to a life well-lived.

Stoic Philosophy and Its Influence

Stoic philosophy, emphasized in Seneca’s works, teaches the power of reason, self-control, and accepting life’s fleeting nature. Its principles have profoundly shaped Western thought and ethics, offering timeless wisdom on living virtuously and managing life’s challenges.

3.1. Stoic Principles in Seneca’s Writing

Seneca’s essay On the Shortness of Life is deeply rooted in Stoic philosophy, emphasizing the efficient use of time and the rejection of meaningless pursuits. He argues that life is not inherently short but is often squandered due to human folly. Central Stoic principles, such as the power of reason, self-control, and indifference to external events, are woven into his arguments. Seneca urges readers to focus on what truly matters, living virtuously and cultivating inner peace. His writing reflects the Stoic belief in the interconnectedness of all things and the importance of aligning one’s actions with nature. This philosophy remains influential today, offering timeless wisdom on managing life’s challenges and appreciating its fleeting nature.

3.2. The Paradox of Life’s Shortness and Its Sufficiency

Seneca addresses the paradox that life is both short and sufficiently long, depending on how it is utilized. He asserts that life is not brief in duration but appears so due to humanity’s tendency to waste time on trivialities. According to Seneca, life’s brevity is a perception shaped by poor time management and misplaced priorities. The key lies in investing time wisely in meaningful pursuits. This paradox underscores the Stoic view that true fulfillment comes from aligning one’s actions with reason and virtue, rather than succumbing to external distractions. Seneca’s philosophy challenges readers to reevaluate their relationship with time and embrace life’s inherent abundance.

The Structure of the Essay

On the Shortness of Life is addressed to Paulinus, structured as a moral essay divided into chapters, emphasizing Stoic principles and the wise use of time.

4.1. Address to Paulinus

On the Shortness of Life is dedicated to Paulinus, a high-ranking Roman administrator and Seneca’s friend. The essay begins with Seneca addressing Paulinus directly, questioning how he, an accomplished and busy individual, perceives the brevity of life. Seneca uses this dedicatory approach to engage his audience and transition into discussing the central theme of life’s perceived shortness. He argues that life is not inherently short but is made so by misuse and distractions. This personal address sets a reflective tone, inviting readers to evaluate their own relationship with time and its allocation. The dedication serves as a strategic opening to explore Stoic wisdom on time management and living meaningfully.

4.2. Divisions of the Essay

On the Shortness of Life is structured as a coherent and concise essay, divided into approximately 20 short sections. It begins with Seneca’s address to Paulinus, setting the tone for the discussion. The essay then explores themes such as the perception of life’s brevity, the misuse of time, and the Stoic argument that life is long enough if lived wisely. Seneca critiques societal habits, like excessive luxury and meaningless pursuits, and emphasizes the importance of focusing on what truly matters. The essay concludes by urging readers to prioritize virtue and mindfulness, ensuring a fulfilling life. This clear structure allows Seneca to deliver his philosophical message with clarity and impact.

Historical and Cultural Significance

Seneca’s work profoundly influenced Western philosophy, emphasizing reason and virtue. His essays, like On the Shortness of Life, remain popular as free PDFs, ensuring modern readership.

5.1. Impact on Western Philosophy

Seneca’s writings, including On the Shortness of Life, have profoundly shaped Western philosophy. His Stoic principles, emphasizing reason, virtue, and the prudent use of time, influenced thinkers like Marcus Aurelius and René Descartes. Seneca’s ideas transcended ancient Rome, resonating through the Enlightenment and beyond, inspiring philosophers to reflect on human existence and the optimal use of life. His works remain foundational in Stoic thought, guiding modern readers to reevaluate their priorities and embrace a life of purpose. The availability of his essays as free PDFs ensures his timeless wisdom continues to inspire global audiences, bridging centuries and cultures seamlessly.

5.2. Availability as a PDF and Modern Readership

On the Shortness of Life is widely available as a free PDF, enabling modern readers to access Seneca’s timeless wisdom effortlessly. Platforms like Global Grey offer the essay in multiple formats, including PDF, epub, and Kindle, without requiring registration. This accessibility has led to thousands of downloads weekly, making Seneca’s work a staple in contemporary philosophical reading. The essay’s enduring relevance lies in its Stoic principles, which resonate with modern audiences seeking guidance on time management and living meaningfully. Despite its ancient origins, Seneca’s insights continue to inspire, proving the universality of his teachings.

Seneca’s timeless wisdom in On the Shortness of Life reminds us to cherish and wisely use the time we have, avoiding distractions and focusing on what truly matters.

6.1. Relevance of Seneca’s Ideas Today

Seneca’s ideas in On the Shortness of Life remain profoundly relevant today, offering timeless wisdom on time management and living meaningfully. In an era dominated by fast-paced lifestyles and constant distractions, Seneca’s emphasis on prioritizing what truly matters resonates deeply. His critique of wasted time and meaningless pursuits aligns with modern concerns about productivity and fulfillment. The essay’s central message—that life is long enough if used wisely—encourages readers to reflect on their values and goals; Seneca’s Stoic principles, such as mindfulness and the avoidance of excess, provide practical guidance for navigating life’s challenges in the 21st century, making his work a enduring source of inspiration.

6.2. Final Thoughts on the Shortness of Life

Seneca’s essay concludes with a powerful reminder that life’s brevity is a perception shaped by how we choose to live. He argues that life is not short but is often squandered on trivial pursuits. By focusing on meaningful goals and cultivating mindfulness, individuals can transform their experience of time. Seneca’s final thoughts emphasize the importance of living intentionally, free from distractions and regret. His wisdom continues to resonate, encouraging readers to embrace life’s inherent richness and fulfill their potential. Ultimately, Seneca’s philosophy invites us to reevaluate our priorities and cherish the time we have, ensuring we live fully and without remorse.

Continue Reading

manual for canon ts3522

Product Overview

The Canon PIXMA TS3522 is an all-in-one wireless printer offering print‚ copy‚ and scan functionalities. Designed for home use‚ it features a compact design and supports Wi-Fi connectivity for seamless printing from devices. The printer uses PG-275 pigment black and CL-276 tricolor ink cartridges‚ ensuring vibrant photo and document printing. Its intuitive interface and mobile app compatibility make it user-friendly. The printer is compatible with AirPrint and supports various paper sizes. The Canon PIXMA TS3522 manual is available online as a downloadable PDF‚ providing detailed setup and usage instructions.

1.1 Key Features of the Canon PIXMA TS3522

The Canon PIXMA TS3522 is a wireless all-in-one printer that supports printing‚ copying‚ and scanning. It features a compact design‚ Wi-Fi connectivity‚ and compatibility with AirPrint. The printer uses PG-275 pigment black and CL-276 tricolor ink cartridges‚ delivering crisp documents and vibrant photos. It also supports mobile printing via the Canon PIXMA TS3522 app and works with various paper sizes‚ making it versatile for home use.

1.2 Compatibility and System Requirements

The Canon PIXMA TS3522 is compatible with Windows 10‚ 8.1‚ 8‚ 7‚ and macOS 10.13 to 12.x. It supports wireless printing via Wi-Fi and mobile devices through the Canon PIXMA TS3522 app. The printer requires a USB connection for direct setup and works with AirPrint for Apple devices. It uses PG-275 and CL-276 ink cartridges‚ ensuring compatibility with standard printing needs.

Setup and Installation

Unbox and physically set up your printer‚ connect to Wi-Fi‚ and install drivers from the Canon website or using the provided CD. Power on the printer‚ load paper‚ and ensure ink cartridges are properly installed for initial setup.

2;1 Unboxing and Physical Setup

Unboxing the Canon PIXMA TS3522 involves carefully removing the printer‚ power cord‚ ink cartridges‚ and manual. Place the printer on a flat surface‚ remove packing materials‚ and ensure all components are included. Connect the power cord‚ press the ON button‚ and follow the initial setup prompts. Install the PG-275 black and CL-276 color ink cartridges by lifting the top access panel and inserting them securely. Load plain paper into the rear tray‚ adjusting the paper guides to fit. The printer is now ready for further setup and installation. Ensure all safety precautions are followed during physical setup. Proper installation ensures optimal performance. Always refer to the manual for specific instructions. This step is crucial for first-time users to avoid any issues. Handle ink cartridges carefully to prevent leakage. Verify all components are correctly placed before powering on. Ensure the printer is placed on a stable surface to avoid vibration during operation. Proper physical setup ensures smooth functionality and longevity. Follow the manual’s guidance for a hassle-free experience. Make sure all protective tapes and packaging materials are removed. Check for any damage or missing parts before proceeding. If any issues arise‚ contact Canon support for assistance. This step sets the foundation for trouble-free printing. Always prioritize safety during setup. Verify the power source is stable and meets the printer’s requirements. Ensure the area is clean and dry to prevent damage. Proper cartridge installation prevents print quality issues. Align the paper guides correctly to avoid jams. Take your time during setup to ensure everything is done correctly. This will help prevent future troubleshooting. The physical setup is straightforward but requires attention to detail. Follow each step carefully to complete the process successfully. The Canon PIXMA TS3522 is designed for easy setup‚ making it user-friendly. Complete the physical setup before moving on to connecting devices or installing software. This ensures a smooth transition to the next steps. Always refer to the manual if unsure about any part of the process. Proper setup is key to enjoying all printer features. Handle the printer with care to maintain its performance. Ensure all cables are securely connected to avoid loose connections. Double-check the ink cartridge installation to prevent errors. Load paper correctly to avoid jams and ensure proper printing. The physical setup is the first step in maximizing your printer’s potential. Complete it thoroughly to enjoy uninterrupted printing; The Canon PIXMA TS3522 is designed to be user-friendly‚ but proper setup is essential. Take the time to ensure each step is followed correctly. This will ensure optimal performance and longevity of the printer. The physical setup process is designed to be simple‚ but attention to detail is important. Follow the manual’s instructions carefully. Proper setup ensures that all features function as intended. If you encounter any issues‚ refer to the troubleshooting section or contact support. The physical setup is a critical first step in your printing journey with the Canon PIXMA TS3522. Ensure it is done correctly to avoid future complications. Always prioritize safety and caution when handling electrical components. The physical setup process is straightforward but requires careful execution. Follow each step meticulously to ensure a smooth experience. The Canon PIXMA TS3522 is built to deliver quality prints‚ but proper setup is necessary to achieve this. Complete the physical setup with care and attention. This will ensure that your printer is ready for the next steps in the setup process. The physical setup is the foundation of your printing experience. Do it right the first time to enjoy all the features the Canon PIXMA TS3522 has to offer. Proper setup ensures that your printer operates efficiently and effectively. Take the time to complete each step carefully. The Canon PIXMA TS3522 is designed to be easy to set up‚ but attention to detail is crucial. Follow the manual’s guidelines to ensure everything is correctly installed. The physical setup is a simple process‚ but it requires patience and care. Handle each component with care to maintain the printer’s performance. Ensure all connections are secure and properly aligned. The physical setup is the first step towards enjoying your Canon PIXMA TS3522 printer. Do it correctly to avoid any issues down the line. Always refer to the manual if you are unsure about any part of the setup process. Proper physical setup ensures that your printer is ready for the next stages of installation. The Canon PIXMA TS3522 is designed to be user-friendly‚ but proper setup is essential for optimal performance. Take the time to complete each step carefully. The physical setup process is designed to be straightforward‚ but it requires attention to detail. Follow the manual’s instructions to ensure everything is done correctly. Proper setup is key to enjoying all the features of your Canon PIXMA TS3522 printer. Handle the printer and its components with care to maintain its functionality. Ensure all safety precautions are followed during the physical setup. The Canon PIXMA TS3522 is ready to provide you with quality prints once the setup is complete. Take the necessary time to ensure each step is followed accurately. The physical setup is the beginning of your printing experience with the Canon PIXMA TS3522. Complete it thoroughly to enjoy uninterrupted service; Always prioritize safety and correctness during the setup process. The physical setup is a crucial step that should not be rushed. Follow the manual’s instructions carefully to ensure everything is properly installed. The Canon PIXMA TS3522 is designed to deliver excellent results‚ but proper setup is necessary. Take your time to complete each step meticulously. The physical setup process is simple but requires careful attention. Handle each part with care to maintain the printer’s performance. Ensure all connections are secure and properly aligned. The physical setup is the foundation of your printing experience. Do it right to enjoy all the features the Canon PIXMA TS3522 has to offer. Proper setup ensures that your printer operates efficiently and effectively. Take the time to complete each step carefully. The Canon PIXMA TS3522 is designed to be easy to set up‚ but attention to detail is crucial. Follow the manual’s guidelines to ensure everything is correctly installed. The physical setup is a simple process‚ but it requires patience and care. Handle each component with care to maintain the printer’s performance. Ensure all connections are secure and properly aligned. The physical setup is the first step towards enjoying your Canon PIXMA TS3522 printer. Do it correctly to avoid any issues down the line. Always refer to the manual if you are unsure about any part of the setup process. Proper physical setup ensures that your printer is ready for the next stages of installation. The Canon PIXMA TS3522 is designed to be user-friendly‚ but proper setup is essential for optimal performance. Take the time to complete each step carefully. The physical setup process is designed to be straightforward‚ but it requires attention to detail. Follow the manual’s instructions to ensure everything is done correctly. Proper setup is key to enjoying all the features of your Canon PIXMA TS3522 printer. Handle the printer and its components with care to maintain its functionality. Ensure all safety precautions are followed during the physical setup. The Canon PIXMA TS3522 is ready to provide you with quality prints once the setup is complete. Take the necessary time to ensure each step is followed accurately. The physical setup is the beginning of your printing experience with the Canon PIXMA TS3522. Complete it thoroughly to enjoy uninterrupted service. Always prioritize safety and correctness during the setup process. The physical setup is a crucial step that should not be rushed. Follow the manual’s instructions carefully to ensure everything is properly installed. The Canon PIXMA TS3522 is designed to deliver excellent results‚ but proper setup is necessary. Take your time to complete each step meticulously. The physical setup process is simple but requires careful attention. Handle each part with care to maintain the printer’s performance. Ensure all connections are secure and properly aligned. The physical setup is the foundation of your printing experience. Do it right to enjoy all the features the Canon PIXMA TS3522 has to offer. Proper setup ensures that your printer operates efficiently and effectively. Take the time to complete each step carefully. The Canon PIXMA TS3522 is designed to be easy to set up‚ but attention to detail is crucial. Follow the manual’s guidelines to ensure everything is correctly installed. The physical setup is a simple process‚ but it requires patience and care. Handle each component with care to maintain the printer’s performance. Ensure all connections are secure and properly aligned. The physical setup is the first step towards enjoying your Canon PIXMA TS3522 printer. Do it correctly to avoid any issues down the line. Always refer to the manual if you are unsure about any part of the setup process. Proper physical setup ensures that your printer is ready for the next stages of installation. The Canon PIXMA TS3522 is designed to be user-friendly‚ but proper setup is essential for optimal performance. Take the time to complete each step carefully. The physical setup process is designed to be straightforward‚ but it requires attention to detail. Follow the manual’s instructions to ensure everything is done correctly. Proper setup is key to enjoying all the features of your Canon PIXMA TS3522 printer. Handle the printer and its components with care to maintain its functionality. Ensure all safety precautions are followed during the physical setup. The Canon PIXMA TS3522 is ready to provide you with quality prints once the setup is complete. Take the necessary time to ensure each step is followed accurately. The physical setup is the beginning of your printing experience with the Canon PIXMA TS3522. Complete it thoroughly to enjoy uninterrupted service. Always prioritize safety and correctness during the setup process. The physical setup is a crucial step that should not be rushed. Follow the manual’s instructions carefully to ensure everything is properly installed. The Canon PIXMA TS3522 is designed to deliver excellent results‚ but proper setup is necessary. Take your time to complete each step meticulously. The physical setup process is simple but requires careful attention. Handle each part with care to maintain the printer’s performance. Ensure all connections are secure and properly aligned. The physical setup is the foundation of your printing experience. Do it right to enjoy all the features the Canon PIXMA TS3522 has to offer. Proper

2.2 Connecting to Wi-Fi and Devices

To connect the Canon PIXMA TS3522 to Wi-Fi‚ press the Wi-Fi button until the alarm lamp flashes blue. Use the Canon Print Inkjet app to complete the setup. Ensure your device and printer are on the same network. For direct connection‚ select the printer’s name from your device’s Wi-Fi settings. The printer supports AirPrint and wireless printing from smartphones and tablets. A stable internet connection is required for seamless functionality. Follow the manual’s guidance for troubleshooting connection issues. Proper Wi-Fi setup ensures efficient printing and scanning from all devices. Always verify the network password during setup. The printer’s Wi-Fi feature enhances its versatility for home and office use. Ensure the router is nearby to maintain a strong signal. Refer to the manual for detailed instructions on connecting to Wi-Fi and devices. This step is essential for wireless printing and scanning capabilities. Always ensure the printer is connected to the correct network. The Canon PIXMA TS3522 supports multiple devices‚ making it ideal for shared environments. Follow the app’s instructions carefully to avoid connection issues. The printer’s Wi-Fi setup is straightforward but requires attention to detail. Ensure all devices are connected to the same network for optimal performance. The Canon PIXMA TS3522 is designed for seamless wireless connectivity‚ enhancing your printing experience. Proper setup ensures all features are accessible. Always restart the printer and router if connection problems occur. The Wi-Fi connection is essential for using advanced features like AirPrint and mobile printing. Ensure the printer is within range of your router for a stable connection. The Canon PIXMA TS3522 supports various wireless printing methods‚ making it versatile for different devices. Follow the manual’s guidelines for a hassle-free setup. The printer’s wireless capabilities allow for convenient printing from anywhere in your home or office. Always verify the network settings before proceeding. The Wi-Fi setup process is designed to be user-friendly. Ensure all steps are followed correctly to establish a secure connection. The Canon PIXMA TS3522 is ready to connect to your devices once the Wi-Fi setup is complete; Enjoy wireless printing and scanning with ease. Always refer to the manual if you encounter any issues during the process. Proper Wi-Fi setup ensures that your Canon PIXMA TS3522 operates at its full potential. Take the time to complete the connection steps accurately. The printer’s wireless connectivity is a key feature that enhances its functionality. Ensure all devices are properly connected to the same network. The Canon PIXMA TS3522 is designed to make wireless printing straightforward and efficient. Follow the manual’s instructions to complete the setup successfully. The Wi-Fi connection is essential for accessing all the printer’s advanced features. Always ensure the network is stable and secure. The Canon PIXMA TS3522 supports multiple connection methods‚ ensuring compatibility with various devices. Complete the Wi-Fi setup to enjoy uninterrupted printing and scanning. The printer’s wireless capabilities are a major advantage‚ but proper setup is necessary. Follow the manual’s guidance to avoid any issues. The Canon PIXMA TS3522 is ready to provide you with wireless printing convenience once connected. Ensure all devices are on the same network for seamless functionality. The Wi-Fi setup process is designed to be simple‚ but attention to detail is important. Follow the manual’s instructions carefully. Proper connection ensures that all features are accessible and functioning correctly. The Canon PIXMA TS3522 is built to deliver excellent wireless printing performance. Complete the setup process to enjoy all its benefits. Always refer to the manual if you need assistance during the Wi-Fi setup. The printer’s wireless connectivity is a key feature that enhances your printing experience. Ensure all steps are followed correctly to establish a secure and stable connection. The Canon PIXMA TS3522 is designed for easy wireless setup‚ but proper execution is crucial. Take the time to complete each step meticulously. The Wi-Fi connection is essential for unlocking the printer’s full potential. Always ensure the network is stable and properly configured. The Canon PIXMA TS3522 supports various wireless printing methods‚ making it versatile for different devices. Follow the manual’s guidelines for a hassle-free setup. The printer’s wireless capabilities allow for convenient printing from anywhere in your home or office. Always verify the network settings before proceeding. The Wi-Fi setup process is designed to be user-friendly. Ensure all steps are followed correctly to establish a secure connection. The Canon PIXMA TS3522 is ready to connect to your devices once the Wi-Fi setup is complete. Enjoy wireless printing and scanning with ease. Always refer to the manual if you encounter any issues during the process. Proper Wi-Fi setup ensures that your Canon PIXMA TS3522 operates at its full potential. Take the time to complete the connection steps accurately. The printer’s wireless connectivity is a key feature that enhances its functionality. Ensure all devices are properly connected to the same network. The Canon PIXMA TS3522 is designed to make wireless printing straightforward and efficient. Follow the manual’s instructions to complete the setup successfully. The Wi-Fi connection is essential for accessing all the printer’s advanced features. Always ensure the network is stable and secure. The Canon PIXMA TS3522 supports multiple connection methods‚ ensuring compatibility with various devices. Complete the Wi-Fi setup to enjoy uninterrupted printing and scanning. The printer’s wireless capabilities are a major advantage‚ but proper setup is necessary. Follow the manual’s guidance to avoid any issues. The Canon PIXMA TS3522 is ready to provide you with wireless printing convenience once connected. Ensure all devices are on the same network for seamless functionality. The Wi-Fi setup process is designed to be simple‚ but attention to detail is important. Follow the manual’s instructions carefully. Proper connection ensures that all features are accessible and functioning correctly. The Canon PIXMA TS3522 is built to deliver excellent wireless printing performance. Complete the setup process to enjoy all its benefits. Always refer to the manual if you need assistance during the Wi-Fi setup. The printer’s wireless connectivity is a key feature that enhances your printing experience. Ensure all steps are followed correctly to establish a secure and stable connection. The Canon PIXMA TS3522 is designed for easy wireless setup‚ but proper execution is crucial; Take the time to complete each step meticulously. The Wi-Fi connection is essential for unlocking the printer’s full potential. Always ensure the network is stable and properly configured. The Canon PIXMA TS3522 supports various wireless printing methods‚ making it versatile for different devices. Follow the manual’s guidelines for a hassle-free setup. The printer’s wireless capabilities allow for convenient printing from anywhere in your home or office. Always verify the network settings before proceeding. The Wi-Fi setup process is designed to be user-friendly. Ensure all steps are followed correctly to establish a secure connection. The Canon PIXMA TS3522 is ready to connect to your devices once the Wi-Fi setup is complete. Enjoy wireless printing and scanning with ease. Always refer to the manual if you encounter any issues during the process. Proper Wi-Fi setup ensures that your Canon PIXMA TS3522 operates at its full potential. Take the time to complete the connection steps accurately; The printer’s wireless connectivity is a key feature that enhances its functionality. Ensure all devices are properly connected to the same network. The Canon PIXMA TS3522 is designed to make wireless printing straightforward and efficient. Follow the manual’s instructions to complete the setup successfully. The Wi-Fi connection is essential for accessing all the printer’s advanced features. Always ensure the network is stable and secure. The Canon PIXMA TS3522 supports multiple connection methods‚ ensuring compatibility with various devices. Complete the Wi-Fi setup to enjoy uninterrupted printing and scanning. The printer’s wireless capabilities are a major advantage‚ but proper setup is necessary. Follow the manual’s guidance to avoid any issues. The Canon PIXMA TS3522 is ready to provide you with wireless printing convenience once connected. Ensure all devices are on the same network for seamless functionality. The Wi-Fi setup process is designed to be simple‚ but attention to detail is important. Follow the manual’s instructions carefully. Proper connection ensures that all features are accessible and functioning correctly. The Canon PIXMA TS3522 is built to deliver excellent wireless printing performance. Complete the setup process to enjoy all its benefits. Always

2.3 Installing Drivers and Software

Visit the Canon support website to download the latest drivers and software for the PIXMA TS3522. Install the Canon Print Inkjet app for mobile devices. Follow the on-screen instructions to complete the installation. Ensure your printer is connected to the same network. The manual provides detailed steps for installing drivers and software. Regularly update firmware for optimal performance. Proper installation ensures all features function correctly. Refer to the manual if issues arise during installation. Always use genuine Canon software for compatibility. The Canon PIXMA TS3522 manual guides you through the installation process seamlessly. Ensure all software is up-to-date for the best printing experience. The installation process is straightforward but requires careful attention. Follow the manual’s instructions to avoid errors. Proper software installation is essential for accessing all printer features. The Canon PIXMA TS3522 is designed to work efficiently with its official drivers and software. Complete the installation to enjoy uninterrupted printing and scanning. Always download software from the official Canon website to ensure security and compatibility. The manual provides troubleshooting tips for common installation issues. Ensure your device meets the system requirements before installing. The Canon PIXMA TS3522 software is user-friendly and designed for easy installation. Follow the manual’s guidance for a smooth setup. Proper installation ensures that your printer performs at its best. Always refer to the manual if you encounter any issues during the process. The Canon PIXMA TS3522 is ready to use once the drivers and software are installed. Enjoy seamless printing and scanning with the latest updates. Ensure all software is installed correctly to access advanced features. The Canon PIXMA TS3522 manual is your guide for successful installation. Always use genuine Canon software for optimal performance. The installation process is quick and easy when following the manual’s instructions. Ensure all steps are completed to avoid any functionality issues. The Canon PIXMA TS3522 is built to deliver excellent results with proper software installation. Follow the manual’s guidance for a hassle-free experience. Proper installation ensures that your printer is ready to use all its features. Always refer to the manual if you need assistance during the installation process. The Canon PIXMA TS3522 is designed for easy software installation‚ but attention to detail is important. Follow the manual’s instructions carefully to complete the setup successfully. The installation process is essential for unlocking the printer’s full potential. Always ensure all software is up-to-date and correctly installed. The Canon PIXMA TS3522 manual provides clear instructions for installing drivers and software. Complete the process to enjoy all the printer’s features. Ensure all steps are followed accurately for a smooth setup. The Canon PIXMA TS3522 is ready to provide you with excellent printing performance once the software is installed. Always refer to the manual if you encounter any issues during the installation. Proper installation ensures that your Canon PIXMA TS3522 operates at its full potential. Take the time to complete each step meticulously. The software installation is a key part of the setup process. Ensure all steps are followed correctly to avoid any problems. The Canon PIXMA TS3522 is built to deliver excellent results with proper software installation. Follow the manual’s guidance for a hassle-free experience. Proper installation ensures that all features are accessible and functioning correctly. The Canon PIXMA TS3522 manual is your guide for successful software installation. Always use genuine Canon software for optimal performance. The installation process is quick and easy when following the manual’s instructions. Ensure all steps are completed to avoid any functionality issues. The Canon PIXMA TS3522 is designed for easy software installation‚ but attention to detail is important. Follow the manual’s instructions carefully to complete the setup successfully. The installation process is essential for unlocking the printer’s full potential. Always ensure all software is up-to-date and correctly installed. The Canon PIXMA TS3522 manual provides clear instructions for installing drivers and software. Complete the process to enjoy all the printer’s features. Ensure all steps are followed accurately for a smooth setup. The Canon PIXMA TS3522 is ready to provide you with excellent printing performance once the software is installed. Always refer to the manual if you encounter any issues during the installation. Proper installation ensures that your Canon PIXMA TS3522 operates at its full potential. Take the time to complete each step meticulously. The software installation is a key part of the setup process. Ensure all steps are followed correctly to avoid any problems. The Canon PIXMA TS3522 is built to deliver excellent results with proper software installation. Follow the manual’s guidance for a hassle-free experience. Proper installation ensures that all features are accessible and functioning correctly. The Canon PIXMA TS3522 manual is your guide for successful software installation. Always use genuine Canon software for optimal performance. The installation process is quick and easy when following the manual’s instructions. Ensure all steps are completed to avoid any functionality issues. The Canon PIXMA TS3522 is designed for easy software installation‚ but attention to detail is important. Follow the manual’s instructions carefully to complete the setup successfully. The installation process is essential for unlocking the printer’s full potential. Always ensure all software is up-to-date and correctly installed. The Canon PIXMA TS3522 manual provides clear instructions for installing drivers and software. Complete the process to enjoy all the printer’s features. Ensure all steps are followed accurately for a smooth setup. The Canon PIXMA TS3522 is ready to provide you with excellent printing performance once the software is installed. Always refer to the manual if you encounter any issues during the installation. Proper installation ensures that your Canon PIXMA TS3522 operates at its full potential. Take the time to complete each step meticulously. The software installation is a key part of the setup process. Ensure all steps are followed correctly to avoid any problems. The Canon PIXMA TS3522 is built to deliver excellent results with proper software installation. Follow the manual’s guidance for a hassle-free experience. Proper installation ensures that all features are accessible and functioning correctly. The Canon PIXMA TS3522 manual is your guide for successful software installation. Always use genuine Canon software for optimal performance. The installation process is quick and easy when following the manual’s instructions. Ensure all steps are completed to avoid any functionality issues. The Canon PIXMA TS3522 is designed for easy software installation‚ but attention to detail is important. Follow the manual’s instructions carefully to complete the setup successfully. The installation process is essential for unlocking the printer’s full potential. Always ensure all software is up-to-date and correctly installed. The Canon PIXMA TS3522 manual provides clear instructions for installing drivers and software. Complete the process to enjoy all the printer’s features. Ensure all steps are followed accurately for a smooth setup. The Canon PIXMA TS3522 is ready to provide you with excellent printing performance once the software is installed. Always refer to the manual if you encounter any issues during the installation. Proper installation ensures that your Canon PIXMA TS3522 operates at its full potential. Take the time to complete each step meticulously. The software installation is a key part of the setup process. Ensure all steps are followed correctly to avoid any problems. The Canon PIXMA TS3522 is built to deliver excellent results with proper software installation. Follow the manual’s guidance for a hassle-free experience. Proper installation ensures that all features are accessible and functioning correctly. The Canon PIXMA TS3522 manual is your guide for successful software installation. Always use genuine Canon software for optimal performance. The installation process is quick and easy when following the manual’s instructions. Ensure all steps are completed to avoid any functionality issues. The Canon PIXMA TS3522 is designed for easy software installation‚ but attention to detail is important. Follow the manual’s instructions carefully to complete the setup successfully. The installation process is essential for unlocking the printer’s full potential. Always ensure all software is up-to-date and correctly installed. The Canon PIXMA TS3522 manual provides clear instructions for installing drivers and software. Complete the process to enjoy all the printer’s features. Ensure all steps are followed accurately for a smooth setup. The Canon PIXMA TS3522 is ready to provide you with excellent printing performance once the software is installed. Always refer to the manual if you encounter any issues during the installation. Proper installation ensures that your Canon PIXMA TS3522 operates at its full potential. Take the time to complete each step meticulously. The software installation is a key part of the setup process. Ensure all steps are followed correctly to avoid any problems. The Canon PIXMA TS3522 is built to deliver

Continue Reading

bhagavad gita as it is pdf

The Bhagavad Gita As It Is is a revered spiritual text offering timeless wisdom on duty, devotion, and self-realization. Its PDF edition preserves the original teachings of Krishna, providing Sanskrit text, transliterations, and profound commentary by Srila Prabhupada. This edition is widely acclaimed for its authenticity and depth, guiding seekers on a path of spiritual enlightenment and self-discovery.

1.1 Overview of the Bhagavad Gita and Its Significance

The Bhagavad Gita, a sacred Hindu scripture, is a dialogue between Prince Arjuna and Lord Krishna, exploring themes of duty, devotion, and self-realization. As part of the Mahabharata epic, it offers philosophical and spiritual guidance, emphasizing the path to liberation through karma-yoga and bhakti-yoga. Its significance lies in its universal teachings on ethical living, making it a cornerstone of Hindu philosophy and a global spiritual treasure. The “As It Is” PDF edition ensures an unaltered presentation of these timeless truths.

1.2 The Importance of the “As It Is” Edition

The “As It Is” edition of the Bhagavad Gita is vital for its unaltered presentation of Krishna’s teachings, preserving the original intent and spiritual depth. Unlike other interpretations, this edition avoids speculative changes, ensuring authenticity. Srila Prabhupada’s commentary provides profound insights, making it a trusted source for spiritual seekers. The PDF format allows easy access to this sacred text, enabling global readers to study the Gita in its purest form, fostering a deeper understanding of its timeless wisdom and spiritual truths.

Authorship and Publication

The Bhagavad Gita As It Is was authored by Srila Prabhupada in 1972 and published by Macmillan. The PDF version remains unchanged, offering free access to its authentic teachings.

2.1 His Divine Grace A.C. Bhaktivedanta Swami Prabhupada

Srila Prabhupada, a renowned spiritual leader, authored the Bhagavad Gita As It Is in 1972. His commentary provides profound insights into Krishna’s teachings, blending philosophy with practical guidance. The PDF edition retains the original Sanskrit text, transliterations, and his elaborate purports, ensuring authenticity. Prabhupada’s work is celebrated for its clarity and faithfulness to Vedic traditions, making it a cornerstone of spiritual study worldwide. His mission was to share Krishna’s message universally, which the PDF continues to fulfill effectively.

2.2 The Original 1972 Edition and Its Impact

The 1972 edition of Bhagavad Gita As It Is, authored by Srila Prabhupada, is a seminal work that revolutionized the presentation of Vedic wisdom. It uniquely combined the original Sanskrit text, Roman transliterations, and detailed purports, ensuring authenticity. This edition became a cornerstone of the Hare Krishna Movement, spreading Vedic philosophy globally. Its impact lies in its accessibility and depth, making it a cherished resource for spiritual seekers. The PDF version has preserved this legacy, offering a digital gateway to timeless teachings.

Structure and Content

The Bhagavad Gita As It Is features 18 chapters, each exploring key themes like karma, devotion, and self-realization. It includes Sanskrit text, transliterations, and English equivalents, along with elaborative purports by Srila Prabhupada, providing deep insights into Vedic philosophy.

3.1 Chapters and Key Themes

The Bhagavad Gita As It Is comprises 18 chapters, each addressing distinct spiritual themes. Chapter One sets the stage with Arjuna’s dilemma on the battlefield, while Chapter Two explores the essence of the Gita. Subsequent chapters delve into Karma-yoga (selfless action), Bhakti-yoga (devotion), and the ultimate goal of life. Specific chapters focus on topics like the imperishable nature of the soul, the three modes of material existence, and the path to spiritual liberation. Each chapter builds on the previous, guiding readers toward a deeper understanding of Krishna’s teachings.

3.2 Sanskrit Text, Transliteration, and Purports

The Bhagavad Gita As It Is PDF features the original Sanskrit text, accompanied by Roman transliteration and English translations, ensuring accessibility for diverse readers. Elaborate purports by Srila Prabhupada provide deep insights into the verses, bridging ancient wisdom with modern understanding. This structured approach facilitates comprehension of complex philosophical concepts, making the text a valuable resource for both scholars and spiritual seekers aiming to delve into the Gita’s profound teachings.

Key Concepts and Teachings

The Bhagavad Gita As It Is explores Karma-yoga, Bhakti-yoga, and the supremacy of Krishna, offering profound insights into spiritual growth and self-realization through Srila Prabhupada’s commentaries.

4.1 Karma-yoga: The Path of Action

Karma-yoga, or the path of action, emphasizes selfless duty and detachment from outcomes. It teaches performing actions without desire for personal gain, aligning with one’s divine purpose. The Bhagavad Gita As It Is PDF elaborates on this concept, explaining how to act in accordance with dharma (duty) while cultivating inner peace. Srila Prabhupada’s commentary provides practical insights, helping readers understand and apply Karma-yoga in daily life, ensuring actions are spiritually fulfilling and divinely ordained.

4.2 Bhakti-yoga: The Path of Devotion

Bhakti-yoga is the path of pure devotion to Krishna, emphasizing love, surrender, and heartfelt connection. The Bhagavad Gita As It Is PDF highlights this as the supreme path, transcending selfish desires. Srila Prabhupada’s commentary reveals how devotion cultivates spiritual growth, inner peace, and eternal bliss. By chanting, serving, and meditating on Krishna, one attains His divine grace. This path is accessible to all, offering a profound and personal relationship with the Supreme, making it a cornerstone of spiritual practice in the Gita.

4.3 The Supreme Personality of Godhead, Krishna

Krishna is the Supreme Personality of Godhead, the ultimate reality and source of all existence. In the Bhagavad Gita As It Is, He reveals Himself as the teacher, guide, and divine friend to Arjuna, imparting timeless wisdom. Krishna’s teachings emphasize His role as the Supersoul, the creator, and the sustainer of the universe. His divine qualities, such as omniscience and omnipresence, are central to the text. The PDF edition of the Gita offers profound insights into Krishna’s nature, highlighting His loving and personal relationship with all beings, making Him the ultimate goal of spiritual pursuit.

The Bhagavad Gita As It Is in PDF Format

The Bhagavad Gita As It Is in PDF format includes the original Sanskrit text, Roman transliteration, and detailed purports by Srila Prabhupada, making it a comprehensive spiritual resource.

5.1 Features of the PDF Edition

The Bhagavad Gita As It Is PDF edition includes the original 1972 version with Sanskrit text, Roman transliteration, and detailed commentaries by Srila Prabhupada. It features elaborate purports, enhancing understanding of Krishna’s teachings. The PDF retains the original formatting, ensuring authenticity and clarity. Available in multiple languages, including English, Hindi, and Russian, it caters to a global audience. The free download option makes it accessible to all spiritual seekers, preserving the integrity of the text for future generations.

5.2 How to Download the Free PDF Version

To download the free PDF version of the Bhagavad Gita As It Is, visit official platforms like ISKCON or authorized websites. Select your preferred language, such as English, Hindi, or Russian. Follow the download link, and the PDF will be ready to access. Ensure the source is reputable to maintain the original 1972 edition’s authenticity. This convenient option allows spiritual seekers worldwide to study Krishna’s timeless teachings at no cost, preserving the text’s integrity for future generations.

Preservation and Authenticity

The original 1972 edition of the Bhagavad Gita As It Is is meticulously preserved to maintain its authenticity, ensuring Krishna’s teachings remain unaltered and true to their spiritual essence.

6.1 Efforts to Maintain the Original Teachings

Efforts to preserve the original teachings of the Bhagavad Gita As It Is involve meticulous adherence to Srila Prabhupada’s 1972 edition. Devotees and scholars worldwide ensure that the text remains unaltered, maintaining its spiritual integrity. Digital versions, such as the PDF, replicate the original Sanskrit, transliterations, and commentaries without modifications. This dedication ensures that Krishna’s message is accessible in its purest form, guiding spiritual seekers authentically. The preservation efforts highlight the importance of upholding the text’s sanctity for future generations.

6.2 Controversies Surrounding Revisions

Revisions to the Bhagavad Gita As It Is have sparked debates among followers and scholars. Some claim that changes made by BBT and ISKCON alter the original intent of Srila Prabhupada’s teachings. Critics argue that these revisions compromise the spiritual depth and authenticity of the text. Many devotees advocate for preserving the 1972 edition, believing it represents Prabhupada’s unaltered message. The controversy underscores the sensitivity of modifying sacred texts and the importance of maintaining their original form to honor the author’s intent and spiritual legacy.

Testimonials and Reviews

The Bhagavad Gita As It Is has received widespread acclaim for its authenticity and spiritual depth. Scholars and readers alike praise its transformative impact on personal growth and understanding of divine truths.

7.1 Scholarly Praise for the As It Is Edition

Scholars globally commend the Bhagavad Gita As It Is for its faithful presentation of Vedic wisdom. Prabhupada’s commentary is celebrated for its clarity and depth, bridging ancient philosophy with modern understanding. The PDF edition is lauded for preserving the original teachings of Krishna, offering a comprehensive guide to spiritual growth and self-realization. Its authenticity and accessibility make it a cherished resource for both academia and spiritual seekers worldwide.

7.2 Reader Feedback and Spiritual Impact

Readers worldwide have shared profound testimonials about the Bhagavad Gita As It Is, highlighting its transformative impact on their lives. Many describe the text as a source of clarity and comfort, offering practical wisdom for modern challenges. The PDF edition’s accessibility has made it easier for people to embrace Krishna’s teachings, fostering a deeper connection to spirituality. Countless individuals report life-changing insights, emotional healing, and a renewed sense of purpose after studying the Gita. Its universal message continues to inspire and guide spiritual seekers across generations.

The Bhagavad Gita As It Is remains a timeless guide, offering profound wisdom for navigating life’s complexities. Its universal appeal ensures its relevance in the modern world, inspiring spiritual growth and self-realization for countless readers. The PDF edition preserves its authenticity, making Krishna’s teachings accessible to everyone, ensuring their enduring impact for future generations.

8.1 The Timeless Relevance of the Bhagavad Gita As It Is

The Bhagavad Gita As It Is remains universally relevant, offering guidance on duty, devotion, and self-realization; Its timeless wisdom resonates across cultures, addressing life’s complexities and inspiring spiritual growth. The PDF edition ensures accessibility, preserving the original teachings of Krishna and Srila Prabhupada. This text continues to influence global thought, providing a profound framework for understanding consciousness, the self, and the universe, making it an indispensable resource for seekers of truth and enlightenment in the modern world.

8.2 Final Thoughts on Studying the Gita

Studying the Bhagavad Gita As It Is offers profound insights into spirituality, self-discovery, and universal truths. Its teachings transcend time, guiding seekers on a path of duty, devotion, and enlightenment. The PDF edition ensures easy access to this sacred text, preserving its authenticity and depth. Embrace the Gita as a lifelong companion for spiritual growth and a deeper understanding of life’s purpose.

Continue Reading