beginning crochet tutorials -youtube -pinterest

Crochet is a rewarding hobby offering endless creativity. With tutorials on YouTube and inspiration on Pinterest, beginners can easily learn stitches and projects. Start your journey today!

1.1 Why Crochet is Perfect for Beginners

Crochet is an ideal hobby for beginners due to its simplicity and versatility. It requires minimal tools, and basic stitches are easy to learn. The portability of crochet projects makes it convenient to work on anywhere. With countless free tutorials on YouTube and Pinterest, newcomers can quickly master the fundamentals. The forgiving nature of crochet allows for easy correction of mistakes, making it a stress-free craft. Its creative possibilities and therapeutic benefits make it a perfect pastime for those looking to unwind and create something meaningful.

1.2 Essential Materials and Tools for Starting Crochet

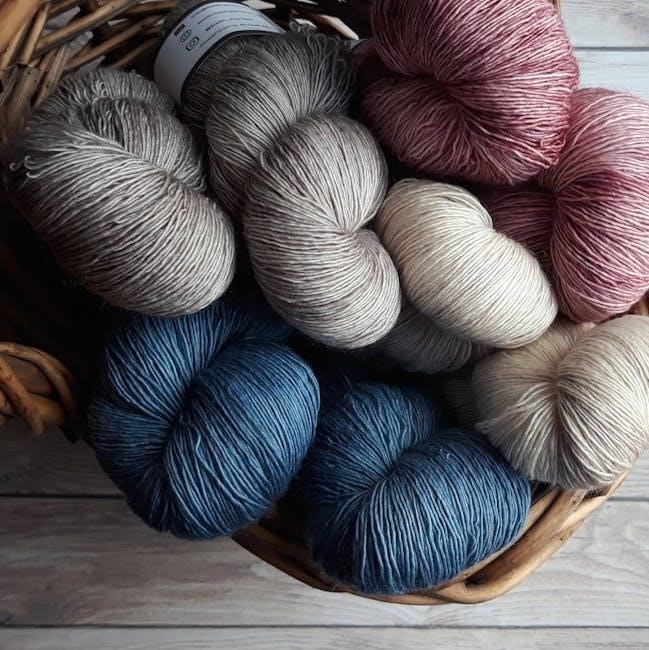
To begin crocheting, you’ll need a few basic tools. A crochet hook, available in various materials like aluminum or steel, is the primary tool. Yarn is the next essential item, with options ranging from acrylic to cotton. A tapestry needle is useful for weaving ends, while scissors are necessary for cutting yarn. Stitch markers can help track your progress. These materials are easily found in craft stores or online. Tutorials on YouTube and Pinterest often provide guidance on selecting the right tools for your projects.

Basic Crochet Stitches for Beginners

Mastering basic stitches like the slip knot, chain, single crochet, half double, and double crochet is essential. Tutorials on YouTube and Pinterest offer clear step-by-step guides.

2.1 How to Make a Slip Knot

A slip knot is the starting point for most crochet projects. To create one, loop the yarn, hook it with your crochet hook, and pull gently to secure. YouTube tutorials, like Bella Coco’s, demonstrate this clearly. Pinterest also offers step-by-step guides with photos and videos. Practice makes perfect—ensure the knot is snug but not too tight. This foundational skill is essential for all stitches, so take your time to master it before moving on.

2.2 The Chain Stitch: A Foundation for All Projects

The chain stitch is the first stitch you’ll learn in crochet, serving as the foundation for nearly every project. It’s created by yarning over and pulling the yarn through the slip knot. YouTube channels like Bella Coco offer clear tutorials, while Pinterest provides visual guides. Practice the chain stitch until it feels natural, as it’s essential for moving on to other stitches like single crochet and half double crochet. Mastery of this stitch is key to building confidence in your crochet journey.

2.3 Single Crochet (SC) Stitch: Step-by-Step Guide

The single crochet (SC) stitch is a versatile and essential stitch for beginners. It’s worked by inserting the hook into a stitch, yarning over, and pulling up a loop. YouTube tutorials, such as those by Bella Coco, provide clear step-by-step guidance. Pinterest also offers visual guides and patterns to practice the SC stitch. This stitch is perfect for creating fabric with a soft texture, making it ideal for blankets, scarves, and amigurumi toys. Practice regularly to master this fundamental stitch.

2.4 Half Double Crochet (HDC) Stitch: Tips and Tricks

The half double crochet (HDC) stitch is slightly taller than the single crochet, creating a fabric with a soft, textured look. To master it, insert the hook, yarn over, pull up a loop, yarn over again, and complete the stitch. YouTube tutorials by Moogly and Bella Coco offer clear demonstrations. On Pinterest, find step-by-step guides and project ideas to practice the HDC stitch. Keep tension even and count stitches to ensure consistency. This stitch is perfect for blankets, sweaters, and home decor items, making it a versatile addition to your crochet skills.

2.5 Double Crochet (DC) Stitch: Mastering the Basics

The double crochet (DC) stitch is a popular choice for beginners, creating a fabric with a classic texture. To work a DC, yarn over, insert the hook, pull up a loop, yarn over again, and pull through both loops. Keep tension even for consistent results. YouTube channels like Bella Coco and Moogly offer clear tutorials, while Pinterest provides patterns and tips. Practice with scrap yarn to master this versatile stitch, perfect for blankets, sweaters, and more.

Choosing the Right Crochet Project for Beginners

Beginners can find inspiration on Pinterest and YouTube for simple projects like scarves or granny squares. These platforms offer tutorials and patterns to help you start crocheting confidently.

3.1 Simple Scarf Patterns for Beginners

A simple scarf is an ideal first project, requiring basic stitches like single crochet or half double crochet. YouTube channels such as Bella Coco offer step-by-step tutorials, while Pinterest provides inspiration and free patterns. These resources guide beginners through selecting yarn, understanding stitch repeats, and completing a cozy, customizable scarf. With clear instructions and visual demos, you can confidently create your first handmade accessory, perfect for practicing your newfound skills.

3.2 Granny Square: A Classic Crochet Project

The Granny Square is a timeless crochet project perfect for beginners. It involves basic stitches like chain, double crochet, and slip stitch. YouTube tutorials, such as Bella Coco’s, provide clear guidance, while Pinterest offers countless pattern variations. This versatile project can be turned into a blanket, pillow cover, or coaster set. It’s an excellent way to practice color changes and stitch combinations, making it a fun and rewarding start to your crochet journey.

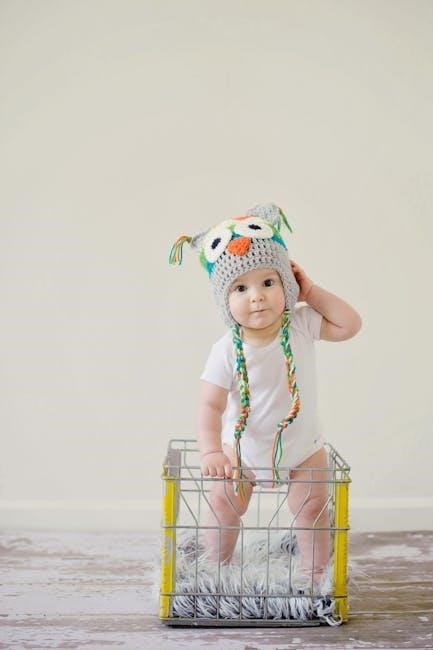
3.3 Amigurumi Toys: Cute and Easy to Make

Amigurumi toys are adorable and perfect for beginners. These small stuffed animals or characters are made using basic stitches like single crochet. YouTube tutorials, such as those by Bella Coco, offer step-by-step guides. Pinterest is a great resource for patterns and inspiration. Amigurumi projects are portable and quick to complete, making them ideal for practicing shaping and stuffing techniques. They also make thoughtful gifts or home decorations, allowing you to bring joy through your crochet creations.

Step-by-Step Crochet Tutorials for Beginners

Step-by-step crochet tutorials on YouTube and Pinterest offer clear instructions and inspiration for beginners. These platforms provide easy-to-follow guides, helping you start your crochet journey with confidence.

4.1 How to Crochet a Dishcloth: A Practical Project

Crocheting a dishcloth is a practical and easy project for beginners. Start with a slip knot, chain stitch, and single crochet stitches. Use cotton yarn for durability. Follow step-by-step YouTube tutorials or Pinterest patterns for guidance. Keep tension even and count stitches carefully. This project helps build confidence and skills, making it a great first-time crochet endeavor. Perfect for learning basic techniques while creating something useful for your home.

4.2 Crocheting a Baby Blanket: A Heartwarming Gift

Crocheting a baby blanket is a thoughtful and sentimental project for beginners. Choose soft, pastel-colored yarn and a simple stitch like single crochet. Follow step-by-step YouTube tutorials or Pinterest patterns for guidance. Ensure even tension and accurate stitch counting for a smooth finish. This project is perfect for practicing basic stitches while creating a cozy, heartfelt gift for newborns or expecting parents. Free patterns and video demos make it easy to get started.

4.3 Making a Beanie: A Perfect Winter Project

Making a beanie is a great winter project for beginners. Use soft yarn and basic stitches like single or half-double crochet. Start with a slip knot and chain, then crochet in rounds or rows. Measure the head size to ensure a perfect fit. Follow YouTube tutorials or Pinterest patterns for guidance. This quick project is ideal for practicing stitches and creating a cozy gift. Perfect for keeping warm during chilly months!

Tips for Avoiding Common Mistakes

Check tension, count stitches, and use resources like YouTube tutorials and Pinterest guides to avoid errors. Practice consistency for even results and a polished finish.

5.1 Understanding Tension: The Key to Even Stitches

Even tension is crucial for professional-looking crochet projects. Too tight, and your fabric may pucker; too loose, and it may sag. Practice with scrap yarn to find your rhythm. Watch YouTube tutorials for guidance on maintaining consistent tension. Pinterest also offers tips and visual aids to help you master this skill. Correct tension ensures your stitches lie flat, creating a smooth, polished finish for any project.

5.2 Counting Stitches: Why It Matters

Counting stitches ensures your crochet projects are symmetrical and fit properly. Missing or extra stitches can lead to misshapen items. Regularly count your stitches to maintain accuracy. For beginners, using stitch markers can help track progress. YouTube tutorials often demonstrate counting techniques, while Pinterest offers patterns with clear stitch counts. Accurate counting builds confidence and ensures your finished projects look professional and polished, making it a habit worth developing early in your crochet journey.

5.3 Fixing Mistakes: The Art of Frogging

Frogging, or ripping out stitches, is a crucial skill for crocheters. It allows you to correct mistakes early, ensuring your project looks its best. YouTube tutorials provide step-by-step guides on how to frog properly, while Pinterest offers tips to avoid common errors. Embrace frogging as a learning tool—it’s a normal part of the crochet journey. Fixing mistakes helps you improve and achieve professional results. Don’t be discouraged; frogging is key to mastering your craft.

Best YouTube Channels for Crochet Tutorials

Discover top YouTube channels like Bella Coco and Moogly for beginner-friendly crochet tutorials. These channels offer clear instructions, step-by-step guides, and inspiration to help you master the basics and beyond.

6.1 Bella Coco: A Popular Choice for Beginners

Bella Coco is a top choice for beginners, offering clear, step-by-step crochet tutorials. Her channel covers essential skills like slip knots, chain stitches, and single crochet. With a friendly teaching style, she guides newcomers through projects like granny squares and scarves. Bella Coco’s tutorials are praised for being easy to follow, making her a favorite among those just starting their crochet journey. Her videos are perfect for learning at your own pace and building confidence in your skills.

6.2 Moogly: Comprehensive Tutorials and Patterns

Moogly is a go-to resource for beginners, offering detailed tutorials and free patterns. With step-by-step guides and video demos, it’s perfect for learning basic stitches and techniques. Moogly covers a wide range of projects, from simple scarves to intricate designs like mosaic shawls. The clear instructions and variety of patterns make it an excellent choice for those looking to expand their crochet skills confidently and creatively.

6.3 The Crochet Crowd: A Community-Driven Resource

The Crochet Crowd is a top destination for beginners, offering a wealth of free tutorials, patterns, and a supportive community. With a strong focus on step-by-step guides, it’s ideal for learning new stitches and techniques. The platform also features video tutorials and active forums where crocheters can share ideas and get feedback. Its comprehensive resources and engaging community make it a must-visit for anyone looking to grow their crochet skills in a welcoming environment.

Pinterest as a Resource for Crochet Inspiration

Pinterest is a treasure trove of crochet inspiration, offering visual tutorials, patterns, and ideas. Create vision boards to organize your projects and spark creativity effortlessly.

7.1 Finding Crochet Patterns on Pinterest

Pinterest is a visual goldmine for crochet patterns, offering a wide range of designs for all skill levels. Use specific keywords like “beginner crochet patterns” or “easy crochet projects” to find tutorials. Many pins include step-by-step guides, photos, and links to free patterns. Create a vision board to organize your favorite designs and track your progress. This platform is ideal for discovering inspiration and saving tutorials for future projects.

7.2 Creating a Vision Board for Your Crochet Projects

A vision board is a powerful tool for organizing your crochet ideas. Use Pinterest to save patterns, color schemes, and inspiration. Create separate boards for different projects, like scarves or blankets. This visual tool helps you track progress and stay motivated. By collecting ideas in one place, you can easily revisit them and plan your next project. It’s a great way to stay inspired and focused on your crochet journey.

7.3 Saving and Organizing Tutorials for Later

Saving and organizing tutorials is essential for easy access. On Pinterest, create boards for specific techniques or projects, using sections to categorize by skill level or type. YouTube allows saving videos to playlists, making it easy to revisit favorites. Use keywords or tags to quickly find tutorials later. This organized approach ensures you can access tips and guides whenever inspiration strikes, keeping your crochet journey smooth and enjoyable.

Moving Beyond the Basics

Explore advanced stitches and techniques like C2C and tapestry crochet. YouTube channels offer step-by-step guides, while Pinterest provides inspiration and patterns for intricate designs and projects.

Once comfortable with basics, explore new stitches like treble crochet and moss stitch. YouTube tutorials by Bella Coco and Moogly offer clear demonstrations. Pinterest boards showcase intricate patterns and designs, inspiring creativity. Experiment with textures, colors, and shapes to enhance your projects. These techniques expand your crochet skills, allowing you to create more complex and visually appealing items. Practice regularly to master them and take your crochet journey to the next level.

8.2 Corner-to-Corner (C2C) Crochet: A Beginner-Friendly Technique

Corner-to-Corner crochet is a versatile and beginner-friendly method perfect for creating blankets, afghans, and home decor. It involves working in rows and increasing stitches to form a square or rectangle. YouTube tutorials provide step-by-step guidance, while Pinterest offers inspiring patterns. This technique is great for visual learners and allows for endless creativity with colors and designs. With practice, you can master C2C crochet and create stunning, professional-looking projects.

8.3 Tapestry Crochet: Adding Color to Your Projects

Tapestry crochet is a vibrant technique for adding color to projects. It involves carrying multiple yarns and picking up stitches in different rows, creating stunning multi-colored designs. Perfect for blankets and wall art, this method is great for beginners. YouTube tutorials offer step-by-step guides on managing yarn and seamless color changes. Pinterest provides endless inspiration and patterns to explore this creative technique.

Troubleshooting Common Crochet Issues

Fix uneven tension, gaps, or mistakes with YouTube tutorials. Pinterest offers tips and guides to resolve issues and perfect your crochet projects effortlessly.

9.1 Dealing with Uneven Tension

Uneven tension is a common issue for beginners, causing projects to look misshapen. YouTube tutorials, like Bella Coco’s, offer tips to adjust your stitch tightness. Practice gauge swatches to ensure consistency. If stitches are too loose or tight, try changing your hook size or yarn weight. Pinterest guides also provide visual aids to help identify and fix tension problems, ensuring your crochet projects look professional and even.

9.2 Fixing Gaps or Loose Stitches

Gaps or loose stitches can ruin a project’s appearance. To fix this, ensure consistent tension and use the correct hook size. YouTube tutorials, such as those by Bella Coco, demonstrate how to tighten stitches. If gaps persist, try a smaller hook or tighter yarn. Pinterest guides also offer tips, like using stitch markers to maintain even spacing. Regularly checking your work and adjusting as needed will help achieve a polished finish.

9.3 Reshaping a Crooked Project

A crooked project can be frustrating, but it’s often fixable. Blocking is a key solution—wet the item, stretch it into shape, and let it dry. YouTube tutorials, like those from Bella Coco, demonstrate this process. Pinterest guides also offer tips for reshaping, such as using pins to hold the shape while drying. Regularly checking your work and adjusting as you go can prevent crookedness. Practice makes perfect!

The Importance of Practice and Patience

Mastering crochet requires consistent practice and patience. YouTube tutorials, like Bella Coco’s, guide beginners through steady progress. Pinterest offers motivational tips to keep you inspired and committed to your craft journey.

10.1 Setting Realistic Goals for Your Crochet Journey

Setting realistic goals helps build confidence and enjoyment in crochet. Start with simple projects like scarves or dishcloths, gradually increasing complexity. YouTube tutorials offer step-by-step guidance, while Pinterest provides inspiration and organization for your projects. Celebrate small wins, like mastering a stitch, to stay motivated. Patience and steady practice are key to progressing in your crochet journey.

10.2 How to Stay Motivated as a Beginner

Stay motivated by celebrating small achievements, like completing a stitch or finishing a project. Follow YouTube channels like Bella Coco for encouraging tutorials and Pinterest for inspiration. Join crochet communities to share progress and gain support. Setting achievable goals and rewarding yourself will keep you excited about your crochet journey. Remember, practice is key, and every stitch brings you closer to mastery.

10.3 Celebrating Small Wins

Celebrating small wins is crucial for staying motivated. Recognize progress, no matter how minor, like mastering a slip knot or completing a row. Share achievements on social media or with crochet communities to gain encouragement. Use Pinterest to track your journey and inspire future projects. Every small victory builds confidence and keeps you excited about your crochet journey, fostering a lifelong love for the craft.

Joining the Crochet Community

Connect with fellow crocheters through online forums and local meetups. Share your projects and gain inspiration from others. Participate in events to enhance your crochet experience.

11.1 Online Forums and Groups for Crochet Enthusiasts

Join online forums like crochet subreddits or Facebook groups to connect with enthusiasts. These communities offer support, tutorials, and tips for beginners. Share your projects, ask questions, and learn from experienced crocheters. Platforms like Ravelry also provide patterns and inspiration. Engaging with these groups can enhance your crochet journey and help you stay motivated. Participate in discussions to gain insights and improve your skills.

11.2 Attending Local Crochet Meetups

Attending local crochet meetups is a great way to connect with fellow crafters. These gatherings offer hands-on learning, feedback, and inspiration. Beginners can gain confidence by working alongside experienced crocheters. Meetups often include tips, pattern sharing, and project guidance. Check local craft stores, libraries, or online event platforms to find nearby groups. Joining these sessions can enhance your skills and foster a sense of community in your crochet journey.

11.3 Sharing Your Projects with the Community

Sharing your crochet projects with the community fosters connection and inspiration. Platforms like Instagram, Facebook, and Pinterest are ideal for showcasing your work. Use hashtags to increase visibility and engage with fellow crocheters. Many creators share their finished projects on YouTube and blogs, gaining feedback and motivation. Sharing your journey can inspire others and build a supportive network, helping you grow as a crafter and stay connected to the crochet community worldwide.

Showcasing Your Finished Projects

Showcase your crochet creations on social media and platforms like Pinterest. Share high-quality photos, progress updates, and tips to inspire others and gain feedback from the community.

12.1 Taking Great Photos of Your Crochet Work

Capture your crochet projects beautifully by using natural light and neutral backgrounds. Experiment with angles and styling to highlight textures and details. Consider showing the scale of your work and including close-ups. Edit photos to enhance colors and clarity before sharing on social media or Pinterest. High-quality images will make your creations stand out and inspire others to try crochet. Practice makes perfect, so don’t hesitate to experiment and improve your photography skills over time.

12.2 Sharing on Social Media Platforms

Share your crochet creations on platforms like Instagram, Facebook, and Pinterest to connect with the crochet community. Use hashtags like #crochetlove or #handmade to increase visibility. Post high-quality photos and consider short videos showcasing your work. Engage with others by commenting on their projects and joining crochet groups. Sharing your progress and finished items can inspire others and help you gain feedback and motivation. Don’t forget to tag creators or patterns you’ve used for proper credit.

12.3 Gifting Your Creations to Others

Gifting your crochet creations is a thoughtful way to share your passion and bring joy to others. Consider wrapping your items beautifully or adding a personalized note for a special touch. Crocheted gifts, such as blankets, scarves, or amigurumi toys, are perfect for birthdays, holidays, or just because. They show effort and care, making them truly meaningful. Your handmade items can become cherished possessions, spreading love and warmth to those who receive them.

Continue Reading

sta-rite system 3 filter manual

The Sta-Rite System 3 Filter Manual provides essential guidance for installing‚ operating‚ and maintaining the System 3 Modular Media Filter․ It covers models like S7M120‚ S8M150‚ S7M400‚ and S8M500‚ ensuring optimal performance and safety․ Reading this manual carefully is crucial to avoid unnecessary service calls and potential injuries‚ as it details proper setup‚ maintenance‚ and troubleshooting procedures․

1․1 Overview of the Sta-Rite System 3 Filter

The Sta-Rite System 3 Filter is a modular media filter designed for swimming pools‚ spas‚ and hot tubs․ It is engineered to provide efficient water filtration‚ ensuring clean and safe water circulation․ The system is known for its durability and ease of maintenance‚ making it a popular choice for pool owners․ Available in various models‚ including S7M120‚ S8M150‚ S7M400‚ and S8M500‚ the System 3 Filter offers flexibility to suit different pool sizes and needs․ Its modular design allows for easy installation and servicing‚ while its advanced media technology captures dirt and debris effectively․ This filter is a reliable solution for maintaining crystal-clear pool water‚ backed by Sta-Rite’s reputation for quality and performance․

1․2 Key Features of the System 3 Filter

The Sta-Rite System 3 Filter is a modular media filter designed for efficient water filtration in swimming pools‚ spas‚ and hot tubs․ Its key features include a durable construction‚ easy maintenance‚ and compatibility with various pool sizes․ The filter uses advanced media technology to capture dirt and debris‚ ensuring clean and clear water․ It is available in multiple models‚ such as S7M120‚ S8M150‚ S7M400‚ and S8M500‚ catering to different filtration needs․ The modular design allows for easy installation and servicing‚ while its robust build ensures long-lasting performance․ Additionally‚ the System 3 Filter comes with a one-year limited warranty‚ providing peace of mind for users․ These features make it a reliable and efficient choice for pool owners seeking high-quality filtration solutions․

Installation Guide for Sta-Rite System 3 Filter

This guide provides step-by-step instructions for installing the Sta-Rite System 3 Filter‚ covering models S7M120‚ S8M150‚ S7M400‚ and S8M500․ It ensures proper setup and safety․

2․1 Step-by-Step Installation Instructions

Begin by preparing the installation site‚ ensuring it is level and accessible․ Connect the plumbing according to the manual’s specifications‚ using compatible pipes and fittings․ Install the filter unit securely‚ following the manufacturer’s guidelines for alignment and stability․ Next‚ connect the pump and other pool equipment‚ ensuring all connections are tight and leak-free․ Turn on the system and test for proper operation‚ checking for leaks or unusual noises․ Refer to the manual for specific instructions tailored to your model‚ such as S7M120 or S8M150․ Always follow safety precautions and manufacturer recommendations to ensure a successful installation․

2․2 Pre-Installation Considerations

Before installing the Sta-Rite System 3 Filter‚ ensure the installation site is level‚ clear of debris‚ and accessible for maintenance․ Read the Sta-Rite System 3 Filter Manual thoroughly to understand safety guidelines and installation requirements․ Verify that all local plumbing and electrical codes are met․ Check compatibility of the filter with your pool or spa system‚ including pump size and plumbing connections․ Ensure the filter model‚ such as S7M120 or S8M150‚ matches your pool’s specifications․ Inspect all components for damage and completeness before starting․ Plan the layout to minimize pipe runs and ensure proper flow rates․ Consider consulting a professional if you are unsure about any aspect of the installation process․ Proper pre-installation planning ensures a smooth and safe setup․

2․3 Tools and Materials Required

To install the Sta-Rite System 3 Filter‚ you will need a set of basic tools and materials․ These include a wrench‚ pliers‚ screwdrivers‚ Teflon tape‚ and plumbing adapters․ Ensure you have the correct pipe sizes and fittings to match your pool’s plumbing system․ Refer to the Sta-Rite System 3 Filter Manual for specific requirements‚ as models like the S7M120 or S8M150 may have unique needs․ Additionally‚ gather safety gear such as gloves and goggles to protect yourself during installation․ Double-check the manual for any additional materials or tools recommended for your particular filter model․ Having all necessary items ready will streamline the installation process and ensure compliance with safety guidelines․

Operating the Sta-Rite System 3 Filter

Operating the Sta-Rite System 3 Filter involves starting it up‚ monitoring performance‚ and ensuring proper water circulation․ Follow the manual’s guidelines for smooth and efficient operation․

3․1 Starting Up the Filter for the First Time

Starting up the Sta-Rite System 3 Filter for the first time requires careful preparation․ Begin by unpacking and inspecting the filter for any damage․ Ensure the filter is placed on a level surface and properly connected to the pool system․ Connect the inlet and outlet pipes according to the manual’s instructions․ Prime the filter by filling it with water before turning it on․ Once powered up‚ allow the system to run through its initial cycle to ensure proper water circulation․ For models like the S7M120 or S8M150‚ refer to the manual for specific startup procedures․ Proper initialization ensures optimal performance and longevity of the filter․

3․2 Normal Operation and Maintenance

For normal operation‚ ensure the Sta-Rite System 3 Filter runs continuously during pool use․ Monitor the pressure gauge to maintain optimal water flow․ Clean the filter media regularly‚ typically every 1-2 weeks‚ by backwashing or rinsing‚ depending on usage․ Check for leaks around connections and tighten as needed․ Lubricate O-rings periodically to prevent drying out․ For models like the S7M120 or S8M500‚ refer to the manual for specific maintenance intervals․ Regularly inspect the filter grid and manifold for blockages․ Maintain proper water levels in the pool to ensure consistent flow rates․ Keep the surrounding area clean to avoid debris accumulation․ By following these steps‚ you can ensure efficient filtration and extend the lifespan of your Sta-Rite System 3 Filter․

3․3 Monitoring the Filter’s Performance

Regularly monitoring the Sta-Rite System 3 Filter ensures optimal performance and water quality․ Check the pressure gauge daily to ensure it stays within the recommended range (usually 10-20 PSI)․ If the pressure exceeds this range‚ backwash the filter immediately․ Look for signs of reduced water flow or cloudy pool water‚ which indicate the need for maintenance․ Inspect the filter media for dirt buildup and clean or replace it as necessary․ Monitor the system for unusual noises or vibrations‚ which could signal issues like clogged ports or worn-out parts․ Keep track of the filter’s run time and backwash frequency to maintain efficiency․ By consistently monitoring these factors‚ you can ensure the Sta-Rite System 3 Filter operates effectively and provides clean‚ safe water for swimming․

Maintenance and Care of the Sta-Rite System 3 Filter

Regular cleaning‚ inspections‚ and proper winterization are essential for maintaining the Sta-Rite System 3 Filter․ Ensure all components are free from debris and wear for optimal performance․

4․1 Cleaning the Filter Media

Cleaning the filter media is crucial for maintaining the Sta-Rite System 3 Filter’s efficiency․ Regularly inspect and remove debris from the media to ensure proper water flow and filtration․ Backwashing is the primary method for cleaning‚ but for deeper cleaning‚ use a garden hose to rinse the media thoroughly․ For stubborn dirt‚ a mild chemical cleaner can be applied‚ followed by a thorough rinse․ Always check for damaged or worn-out media and replace it if necessary․ Cleaning frequency depends on usage and water conditions‚ but it is recommended to clean the media at least once a month during peak use․ Proper cleaning extends the life of the filter and ensures optimal performance․ Refer to the manual for specific cleaning instructions tailored to your System 3 model․

4․2 Replacing the Filter Media

Replacing the filter media in your Sta-Rite System 3 Filter is essential to maintain its efficiency and performance․ The media typically needs to be replaced every 1 to 2 years‚ depending on usage and water conditions․ To replace the media‚ first‚ turn off the filter system and drain the tank․ Remove the old media carefully‚ taking note of its position and orientation․ Inspect the tank and internal components for any debris or damage․ Install the new media according to the manufacturer’s instructions‚ ensuring it is properly seated and aligned․ After replacement‚ restart the system and check for leaks or improper function․ Always dispose of the old media responsibly and refer to the manual for specific guidance tailored to your System 3 model․ Regular replacement ensures clean and safe water circulation in your pool or spa․

4․3 Winterizing the Filter System

Winterizing the Sta-Rite System 3 Filter is crucial to protect it from freezing temperatures and ensure optimal performance in the next season․ Start by turning off the power to the filter and draining the tank completely․ Disconnect and drain all hoses and pipes connected to the system․ Clean the filter media and internal components to remove any debris or contaminants․ Apply a winterizing kit or lubricate moving parts to prevent corrosion․ Store the filter in a dry‚ protected area to avoid exposure to harsh weather conditions․ Before restarting in the spring‚ inspect the system for any damage or wear and tear․ Proper winterization extends the lifespan of your filter and ensures it operates efficiently when you resume use․ Always refer to the manual for specific winterizing instructions tailored to your System 3 model․

4․4 Regular Maintenance Checks

Regular maintenance checks are essential to ensure the Sta-Rite System 3 Filter operates efficiently and effectively․ Start by inspecting the pressure gauge to ensure it is within the recommended range․ Check the filter media for dirt or debris and clean or replace it as needed․ Inspect all hoses and connections for leaks or damage‚ and tighten any loose fittings․ Lubricate O-rings and other moving parts to maintain proper sealing and operation․ Additionally‚ monitor the system’s flow rate and backwash regularly to prevent clogging․ Always refer to the manual for specific maintenance schedules and procedures tailored to your System 3 model․ Regular checks help prevent unexpected issues‚ extend the filter’s lifespan‚ and ensure clean‚ safe water for swimming pools‚ spas‚ or hot tubs․

Troubleshooting Common Issues

The Sta-Rite System 3 Filter Manual helps identify and resolve common issues‚ such as low pressure‚ leaks‚ or clogged media‚ with DIY solutions and error code explanations․

5․1 Common Problems and Solutions

Common issues with the Sta-Rite System 3 Filter include low water pressure‚ leaks‚ and clogged filter media․ To address low pressure‚ check for blockages in the media or pipes and ensure the pump is functioning correctly․ Leaks often occur at connections‚ so inspect and tighten all fittings․ If the filter media is clogged‚ clean or replace it as needed․ Error codes may indicate specific issues‚ such as high pressure or system malfunctions․ Refer to the manual for code meanings and follow troubleshooting steps․ Regular maintenance‚ like cleaning the media and checking for wear‚ can prevent many problems․ Always turn off the system before attempting repairs to ensure safety․

5․2 Understanding Error Codes

The Sta-Rite System 3 Filter may display error codes to indicate specific issues․ These codes help diagnose problems quickly․ Common error codes include those for high pressure‚ low flow‚ or system malfunctions․ For example‚ an error code may signal a clogged filter media or a faulty pressure gauge․ Refer to the manual for a detailed list of codes and their meanings․ Understanding these codes allows you to address issues promptly‚ ensuring optimal performance․ If an error code appears‚ turn off the system and follow the recommended troubleshooting steps․ In some cases‚ cleaning or replacing the filter media may resolve the issue․ Always consult the manual for specific guidance‚ as improper repairs can void the warranty or cause further damage․ Regular maintenance can help prevent errors and keep the system running smoothly․

5․3 DIY Repair and Maintenance Tips

Performing DIY repairs and maintenance on the Sta-Rite System 3 Filter can save time and money․ Regularly clean the filter media to ensure optimal water flow and filtration․ Inspect and replace worn-out O-rings or gaskets to prevent leaks․ If the pressure gauge shows high readings‚ backwash the filter or replace the media if necessary․ For minor issues‚ consult the troubleshooting section in the manual․ Always turn off the power before attempting any repairs․ Use genuine Sta-Rite replacement parts to maintain warranty validity․ Keep the system clean and well-maintained to extend its lifespan․ If unsure about a repair‚ contact a professional to avoid further damage․ DIY maintenance is cost-effective and ensures the filter operates efficiently‚ providing clean and safe water for swimming pools‚ spas‚ or hot tubs․

Technical Specifications of the Sta-Rite System 3 Filter

The Sta-Rite System 3 Filter includes models like S7M120‚ S8M150‚ S7M400‚ and S8M500‚ designed for swimming pools‚ spas‚ and hot tubs․ Specifications ensure optimal flow rates and compatibility․

6․1 Filter Types and Models

The Sta-Rite System 3 Filter is available in several models‚ including the S7M120‚ S8M150‚ S7M400‚ and S8M500․ These models vary in flow rates and capacities‚ catering to different pool sizes and needs․ The S7M120 and S8M150 are ideal for smaller pools‚ while the S7M400 and S8M500 are designed for larger pools or heavier use․ Each model features modular media technology‚ ensuring efficient filtration and easy maintenance․ The filters are compatible with a wide range of swimming pool systems‚ making them versatile for various applications․ By selecting the appropriate model‚ users can ensure optimal performance and longevity of their pool filtration system․

6․2 Flow Rates and Compatibility

The Sta-Rite System 3 Filter models‚ such as the S7M120‚ S8M150‚ S7M400‚ and S8M500‚ offer varying flow rates to suit different pool sizes and requirements․ The flow rates range from 120 to 500 gallons per minute (GPM)‚ ensuring compatibility with a wide range of swimming pool systems․ These filters are designed to work seamlessly with both single and two-speed pumps‚ making them versatile for various pool configurations․ Their compatibility extends to different pool types‚ including above-ground and in-ground pools‚ as well as spas and hot tubs․ The modular design allows for easy integration with existing pool equipment‚ ensuring efficient water circulation and filtration․ By selecting the correct model based on flow rate and pool size‚ users can achieve optimal water clarity and system performance․

6․3 Dimensions and Weight

The Sta-Rite System 3 Filter models vary in dimensions and weight‚ ensuring compatibility with different installation spaces․ The S7M120 measures approximately 21 inches in height and 15 inches in width‚ weighing around 45 pounds․ The S8M150 is slightly larger‚ at 24 inches tall and 18 inches wide‚ with a weight of about 55 pounds․ The S7M400 and S8M500 models are more robust‚ with the S8M500 being the largest at 30 inches tall and 22 inches wide‚ weighing 75 pounds․ These dimensions make the filters compact and suitable for various pool setups․ The weight of each model is manageable for installation and maintenance‚ ensuring ease of handling․ The modular design allows for flexibility in placement‚ making the System 3 filters adaptable to different pool configurations and spaces․

Safety Guidelines and Precautions

Always read the manual carefully to avoid injuries and ensure proper filter operation․ Wear protective gear when handling electrical or sharp components․ Follow installation and maintenance procedures precisely to prevent accidents and system damage․

7․1 Safety Precautions During Installation

Before installing the Sta-Rite System 3 Filter‚ ensure all power to the pool equipment is turned off․ Always read and understand the manual thoroughly to avoid potential hazards; Wear protective gear‚ including gloves and safety glasses‚ when handling sharp or heavy components․ Ensure the system is properly grounded to prevent electrical shocks․ Use only authorized tools and materials to avoid damaging the filter or related components․ Follow the installation steps precisely to maintain safety and system integrity․ Never attempt to modify the filter or its parts‚ as this could lead to malfunctions or injuries․ Keep children and pets away from the installation area․ Properly secure all connections to prevent leaks or electrical issues․ Adhere to local safety codes and manufacturer guidelines for a safe and correct setup․

7․2 Safe Operation and Maintenance Practices

Always follow the Sta-Rite System 3 Filter manual for safe operation and maintenance․ Regularly inspect the filter and its components for wear or damage‚ addressing issues promptly to prevent system failure․ Ensure the filter is turned off before performing any maintenance tasks‚ and never attempt repairs while the system is operational․ Use only authorized replacement parts to maintain safety and performance․ Keep the area around the filter clean and clear of debris to avoid hazards․ Monitor the system’s pressure gauge and flow rates to ensure optimal function․ Avoid overloading the filter beyond its recommended capacity‚ as this can lead to inefficiency or damage․ Always adhere to the manufacturer’s guidelines for cleaning and replacing filter media․ By following these practices‚ you can ensure the longevity and safe operation of your Sta-Rite System 3 Filter․

7․3 Emergency Procedures

In case of an emergency involving the Sta-Rite System 3 Filter‚ immediately turn off the power supply and disconnect the electrical connections․ Evacuate the area and ensure no one approaches the system until it is deemed safe․ If a leak or system failure occurs‚ wear protective gear‚ including gloves and safety goggles‚ before attempting any repairs․ Never attempt to operate the filter if it is damaged or malfunctioning; If you notice unusual noises‚ excessive pressure‚ or water leakage‚ shut down the system and contact a qualified technician․ Do not restart the filter until all issues are resolved․ Keep emergency contact information handy‚ including the manufacturer’s support and local pool professionals․ Always prioritize safety to prevent accidents and ensure the system operates correctly․

Warranty Information

The Sta-Rite System 3 Filter is covered by a limited warranty‚ ensuring defect-free materials and workmanship for one year from installation․ Proper installation is required․

8․1 Sta-Rite Limited Warranty Details

The Sta-Rite System 3 Filter is backed by a limited warranty‚ ensuring protection against defects in materials and workmanship․ This warranty is valid for one year from the date of installation․ It covers pumps‚ filters‚ skimmers‚ underwater lights (excluding bulbs)‚ and other accessories manufactured by Sta-Rite․ Proper installation is required to maintain warranty validity․ Damage resulting from misuse‚ improper installation‚ or failure to follow the manual’s guidelines is not covered․ Additionally‚ labor costs for repairs or replacements are only covered if performed by a Sta-Rite authorized service representative․ This warranty provides peace of mind‚ ensuring your investment in the System 3 Filter is protected against manufacturing defects for a full year․

8․2 Conditions and Exclusions

The Sta-Rite System 3 Filter warranty excludes coverage for damages caused by misuse‚ improper installation‚ or failure to adhere to the manual’s guidelines․ Additionally‚ the warranty does not cover normal wear and tear‚ corrosion‚ or damage resulting from environmental factors such as extreme weather conditions․ Labor costs for repairs or replacements are only covered if performed by a Sta-Rite authorized service representative․ The warranty also excludes coverage for third-party modifications or unauthorized repairs․ Proper installation and maintenance‚ as outlined in the manual‚ are essential to uphold the warranty’s terms․ Failure to comply with these conditions may result in voiding the warranty․ Understanding these exclusions ensures users maintain their System 3 Filter effectively and avoid unnecessary financial burdens․

Continue Reading

true colors assessment pdf

The True Colors Assessment is a widely recognized personality evaluation tool designed to help individuals understand their core traits and improve interpersonal interactions. It serves as a common language for personal development and team collaboration, often introduced within educational and professional settings to foster mutual understanding and effective communication.

1.1 What is the True Colors Assessment?

The True Colors Assessment is a personality evaluation tool that helps individuals identify their core traits and preferences. It categorizes personalities into four primary colors—Orange, Gold, Green, and Blue—each representing distinct characteristics. This framework simplifies understanding individual differences, fostering self-awareness and interpersonal connections. Widely used in educational and professional settings, it encourages personal growth and collaboration. By recognizing one’s dominant color, individuals can align their behaviors and strengths with their goals. The assessment is accessible through various formats, including PDF guides, making it a versatile resource for self-discovery and team-building initiatives.

1.2 Importance of Personality Assessments in Modern Contexts

Personality assessments like the True Colors Assessment play a vital role in modern contexts by fostering self-awareness and improving interpersonal interactions. In today’s diverse workplaces and educational environments, understanding individual differences is crucial for effective collaboration. These tools help individuals recognize their strengths and weaknesses, enabling personal growth and better decision-making. They also promote inclusivity by encouraging empathy and understanding among team members. In educational settings, such assessments aid educators in tailoring teaching methods to meet diverse learning styles. By providing insights into personality types, these assessments empower individuals to navigate complex social dynamics and build stronger relationships. Their relevance continues to grow as organizations seek to create cohesive and productive environments.

Origins and Development of the True Colors Model

The True Colors Assessment was established as a tool to promote self-awareness and collaboration, evolving into a widely adopted framework for understanding personality differences.

2.1 History of the True Colors Personality Assessment

The True Colors Personality Assessment has its roots in the study of personality types, evolving over time to become a user-friendly tool for self-discovery. Originally designed to simplify complex personality theories, it gained popularity in educational settings as a method to enhance interpersonal understanding. The assessment was further refined to cater to diverse audiences, including students, educators, and professionals. Its accessible format and practical insights have made it a widely adopted resource for personal and team development. Over the years, it has become a cornerstone in many programs focused on fostering collaboration and emotional intelligence, helping individuals align their strengths with their roles.

2.2 Key Contributors to the Model

The True Colors Personality Assessment was developed by Don Lowry, an educator and psychologist, who aimed to create a practical tool for understanding personality differences. His work built on earlier personality theories, simplifying them into a user-friendly framework. Lowry’s approach emphasized simplicity and accessibility, making the model appealing for educational and professional settings. Over time, contributions from educators, psychologists, and organizational development experts have further refined the assessment, ensuring its relevance and effectiveness. The collaborative efforts of these contributors have helped shape True Colors into a widely recognized and impactful tool for personal and team development, fostering improved communication and collaboration across diverse groups.

Core Color Personalities in the True Colors Framework

The True Colors framework categorizes personalities into four core colors: Orange, Gold, Green, and Blue. Each color represents distinct traits, guiding behavior, and communication styles.

3.1 Orange: The Social and Adventurous Personality

Individuals with an Orange personality are known for their sociable, energetic, and spontaneous nature. They thrive in dynamic environments, seeking excitement and opportunities for social interaction. Oranges are naturally outgoing, often serving as the life of the party or the catalyst for group activities. Their adventurous spirit drives them to explore new experiences and take risks, making them adaptable and resilient. In team settings, Oranges often act as motivators, bringing enthusiasm and creativity to collaborative efforts. Their strengths include fostering camaraderie and breaking down social barriers, which aligns with the True Colors framework’s goal of enhancing interpersonal connections and communication.

3.2 Gold: The Structured and Responsible Personality

Gold personalities are characterized by their structured, responsible, and detail-oriented nature. They value order, organization, and reliability, often taking on leadership roles to ensure tasks are completed efficiently. Golds are goal-oriented, thrive on setting and achieving deadlines, and prioritize quality and precision in their work. Their strong sense of duty and commitment makes them dependable in both personal and professional settings. In team environments, Golds often act as planners and organizers, ensuring everyone stays on track. Their preference for clear guidelines and structured environments helps maintain stability, aligning with the True Colors framework’s emphasis on understanding and leveraging individual strengths for collective success.

3.3 Green: The Analytical and Logical Personality

Green personalities are known for their analytical and logical nature, excelling in problem-solving and critical thinking. They approach life with a methodical mindset, valuing knowledge and data-driven decisions. Greens are independent thinkers who prefer autonomy in their work and decision-making processes. Their calm and composed demeanor allows them to navigate complex situations with ease. They thrive in environments where they can analyze information, identify patterns, and develop innovative solutions. Greens are often seen as the “brain” of a team, providing objective insights and maintaining a focus on long-term goals. Their ability to remain neutral and factual makes them invaluable in resolving conflicts and making rational choices.

3.4 Blue: The Emotional and Compassionate Personality

Blue personalities are characterized by their emotional depth, empathy, and strong interpersonal skills. They thrive in environments where they can connect with others, fostering trust and harmony. Blues are natural communicators, excelling in active listening and understanding others’ perspectives. Their compassionate nature makes them supportive friends, colleagues, and leaders, often taking on roles that involve mentoring or counseling. Blues value authenticity and meaningful relationships, prioritizing emotional well-being over material success. While their sensitivity can make them vulnerable to stress, their ability to empathize and inspire others creates a positive impact in both personal and professional settings. Their strength lies in building strong, heartfelt connections that drive collaboration and understanding.

Practical Applications of the True Colors Assessment

The True Colors Assessment is practically applied in educational settings to enhance team-building, improve communication, and foster collaboration among students and staff, promoting a harmonious and productive environment.

4.1 Enhancing Personal Growth and Self-Awareness

The True Colors Assessment is a valuable tool for fostering personal growth by helping individuals gain insights into their personality traits and behavioral tendencies. By identifying their core colors, participants can better understand their strengths, weaknesses, and motivations, which empowers them to make informed decisions. This self-awareness enables individuals to set realistic goals, develop emotional intelligence, and cultivate healthier relationships. The assessment also encourages introspection, allowing people to recognize areas for improvement and work on personal development. Through this process, individuals can align their actions and aspirations with their true potential, leading to a more fulfilling and purpose-driven life. This personalized approach makes the True Colors Assessment a powerful resource for self-improvement and lifelong growth.

4.2 Improving Team Dynamics and Communication

The True Colors Assessment plays a significant role in enhancing team dynamics by fostering mutual understanding and respect among members. By identifying individual color personalities, teams can adapt their communication styles to align with others’ preferences, reducing misunderstandings and conflicts. This framework encourages collaboration by highlighting diverse strengths, such as Gold’s organizational skills, Blue’s empathy, Green’s analytical thinking, and Orange’s creativity. Workshops and exercises based on the assessment help teams develop strategies to leverage these differences, leading to more cohesive and productive group efforts. Improved communication and appreciation for varied perspectives create a harmonious environment, enabling teams to achieve shared goals more effectively.

4.3 Resolving Conflicts Through Color Insights

The True Colors Assessment offers valuable insights for resolving conflicts by understanding personality differences. By identifying individual color traits, participants can recognize how others approach disagreements. Gold personalities often focus on rules and fairness, while Blue individuals prioritize emotional harmony. Green personalities may seek logical solutions, and Orange types might aim for quick, action-oriented resolutions. This understanding allows for tailored communication strategies, reducing misunderstandings. Workshops based on the True Colors framework teach conflict resolution skills, encouraging empathy and collaboration. By addressing conflicts through the lens of color insights, teams can address issues more effectively, fostering a culture of respect and cooperation. This approach promotes constructive dialogue and mutual understanding.

Advantages and Limitations of the True Colors Assessment

Advantages and Limitifications of the True Colors Assessment

The True Colors Assessment offers a user-friendly approach to understanding personality types, enhancing teamwork and communication. However, critics argue it oversimplifies complex personalities.

5.1 Benefits of Using the True Colors Assessment

The True Colors Assessment provides a practical framework for understanding individual personalities, fostering empathy, and improving interpersonal relationships. It helps individuals identify their strengths and areas for growth, promoting self-awareness and personal development. The assessment also enhances team dynamics by encouraging collaboration and reducing misunderstandings. Its simplicity makes it accessible to a wide audience, while its insights support effective communication and conflict resolution. By providing a common language, True Colors bridges gaps between diverse personalities, enabling individuals to work more cohesively toward shared goals. These benefits make it a valuable tool for both personal and professional settings, contributing to overall success and harmony in various environments.

5.2 Potential Drawbacks and Criticisms

While the True Colors Assessment is widely used, it has faced criticism for its lack of scientific rigor and limited depth compared to other personality frameworks. Some argue that its simplicity oversimplifies complex personality traits, potentially leading to stereotyping or inaccurate self-perception. Additionally, critics note that the assessment may not account for the full spectrum of human behavior, as individuals often exhibit traits from multiple color categories. The reliance on self-reporting can also lead to biased results, as participants may answer based on idealized versions of themselves rather than their true behaviors; Despite its practical applications, these limitations suggest the tool should be used cautiously and in conjunction with other methods for a more comprehensive understanding.

The Assessment Process and Interpretation

The True Colors Assessment involves a simple quiz identifying personality traits linked to color profiles. Results offer insights into strengths, behaviors, and communication styles, aiding personal and professional growth.

6.1 How to Take the True Colors Assessment

The True Colors Assessment is typically administered as a quiz-based tool, available in both physical and digital formats. Participants are presented with a series of questions designed to identify their personality traits and preferences, which are then mapped to one of the four primary color profiles: Orange, Gold, Green, or Blue. The process is straightforward and usually takes about 10–15 minutes to complete. Once the quiz is finished, individuals receive a detailed report outlining their primary and secondary colors, along with insights into their strengths, communication styles, and potential areas for growth. The assessment is often facilitated by trained professionals who guide participants through the process and help interpret the results.

6.2 Understanding and Interpreting the Results

The True Colors Assessment provides a detailed report highlighting an individual’s primary and secondary color profiles. These profiles reveal dominant personality traits, such as Orange for sociability, Gold for organization, Green for analysis, and Blue for empathy. The results also outline strengths, communication preferences, and potential challenges. Participants learn how their colors influence interactions and decision-making. Interpretation often includes strategies for personal growth, like leveraging strengths and addressing weaknesses. Understanding these insights helps individuals adapt their behaviors in various contexts, fostering better relationships and collaboration. Trained facilitators may assist in decoding the results, ensuring participants gain actionable knowledge for self-improvement and effective teamwork.

6.3 Applying the Insights in Real-Life Scenarios

Applying the insights from the True Colors Assessment can significantly enhance daily interactions and decision-making. By understanding their color profile, individuals can adapt their communication style to better connect with others, fostering collaboration and reducing misunderstandings. For instance, a Gold personality may focus on structuring meetings, while a Blue personality might prioritize emotional support in team discussions; In educational settings, students can use their color insights to improve study habits and group dynamics. Professionally, these insights help in conflict resolution and leadership development. The practical application of True Colors fosters a more harmonious and productive environment, enabling individuals to leverage their strengths while addressing potential blind spots.

The True Colors Assessment is a valuable tool for understanding personality traits, enhancing communication, and improving teamwork in educational and professional settings. It fosters personal and professional growth through self-awareness and effective interactions.

7.1 Final Thoughts on the True Colors Assessment

The True Colors Assessment is a highly effective tool for understanding personality traits and fostering meaningful connections in both personal and professional settings. By providing insights into individual preferences and behaviors, it enables people to communicate more effectively and collaborate seamlessly. Its practical applications make it a valuable resource for teams, educators, and individuals seeking self-awareness and personal growth. The assessment’s simplicity and accessibility have made it a popular choice for organizations aiming to build a harmonious and productive environment. Ultimately, the True Colors Assessment serves as a powerful catalyst for understanding oneself and others, promoting empathy and cooperation in diverse contexts.

7.2 Encouragement to Explore the True Colors Framework

Exploring the True Colors framework offers a transformative opportunity for personal and professional growth. By gaining insight into individual preferences and behaviors, participants can enhance their communication skills, build stronger relationships, and foster collaboration. The framework’s accessible and engaging approach makes it an excellent tool for educational institutions, workplaces, and personal development initiatives. Encouraging others to embrace the True Colors Assessment can lead to a more empathetic and harmonious environment, where diversity is celebrated and leveraged for collective success. Take the first step by engaging with the assessment and uncover the potential to create meaningful connections and lasting positive change in your life and the lives of those around you.

Continue Reading

executive assessment practice test pdf

Executive Assessment practice tests are essential for EMBA applicants‚ offering a realistic exam experience. They cover quantitative‚ verbal‚ and analytical skills‚ improving time management and strategy. Free PDF resources from providers like Manhattan Review provide sample questions and detailed explanations‚ helping candidates identify weaknesses and enhance performance effectively.

What is the Executive Assessment (EA)?

The Executive Assessment (EA) is a 90-minute standardized exam designed for Executive MBA (EMBA) applicants. It evaluates core skills such as quantitative‚ verbal‚ and analytical reasoning. Developed for experienced professionals‚ the EA measures readiness for rigorous graduate-level coursework. Unlike traditional exams‚ it emphasizes problem-solving and critical thinking‚ reflecting real-world business challenges. Practice tests‚ including PDF resources‚ are widely recommended to familiarize candidates with the format and improve performance. The EA is often required alongside or instead of the GMAT or GRE for EMBA admissions‚ making it a crucial step in the application process for aspiring executive students.

Why is the EA Required for Executive MBA Applicants?

The Executive Assessment (EA) is required for many Executive MBA applicants to evaluate their readiness for advanced coursework. It assesses critical skills like quantitative reasoning‚ verbal reasoning‚ and analytical thinking‚ essential for success in an EMBA program. The exam is designed for experienced professionals‚ often with significant work experience‚ to measure their ability to handle the academic rigor of an EMBA. By requiring the EA‚ schools ensure candidates are prepared for the demands of the program. Practice tests‚ such as those available in PDF format‚ help applicants prepare and demonstrate their capabilities‚ making the EA a vital component of the EMBA application process.

Key Skills Assessed in the Executive Assessment

The Executive Assessment (EA) evaluates three core competencies: quantitative reasoning‚ verbal reasoning‚ and analytical thinking. Quantitative reasoning tests problem-solving skills with data interpretation‚ arithmetic‚ and algebra. Verbal reasoning assesses critical reading and comprehension abilities‚ including analyzing arguments and evaluating information. Analytical thinking involves integrating data from multiple sources to solve complex problems. These skills are crucial for success in an Executive MBA program‚ where professionals must apply analytical and decision-making abilities in real-world scenarios; Practice tests‚ such as PDF resources‚ offer realistic questions to help candidates familiarize themselves with these sections‚ improving their performance and readiness for the exam.

Key Features of the Executive Assessment

The Executive Assessment is a 90-minute exam featuring quantitative‚ verbal‚ and integrated reasoning sections. Practice test PDFs provide realistic question formats‚ enhancing familiarity with the test structure.

Key features include detailed answer explanations‚ time management strategies‚ and adaptive difficulty levels. These resources help candidates identify weaknesses and improve their performance effectively for the exam.

Test Format and Structure

The Executive Assessment consists of three sections: Quantitative‚ Verbal‚ and Integrated Reasoning. Each section is timed‚ with 14‚ 14‚ and 12 questions respectively. The total duration is 90 minutes‚ including breaks. Practice test PDFs mirror this structure‚ offering realistic simulations. The Quantitative section tests math skills‚ while Verbal assesses reading comprehension and critical reasoning. Integrated Reasoning evaluates data interpretation across multiple formats. These practice tests include answer explanations‚ helping candidates understand their mistakes. The format ensures familiarity with question types‚ such as multi-source reasoning and graph interpretation. By replicating the actual test structure‚ practice PDFs enable focused preparation and strategic time management‚ ensuring readiness for the exam.

Time Management Strategies

Mastering time management is crucial for success in the Executive Assessment. Practice tests help candidates develop strategic approaches to allocate time effectively across sections. Allocate 1.5-2 minutes per question in the Quantitative and Verbal sections‚ and 2-3 minutes for Integrated Reasoning. Prioritize questions by difficulty‚ tackling easier ones first to secure foundational points. Use the “skip and return” technique to avoid wasting time on challenging questions. Practice tests reveal pacing issues‚ enabling adjustments to ensure all sections are completed. Regularly reviewing time management strategies during practice helps build efficiency and reduces stress on test day‚ leading to improved focus and higher scores.

Question Types and Difficulty Levels

The Executive Assessment features question types that mirror real-world business scenarios‚ testing critical thinking and problem-solving skills. The test includes multiple-choice questions‚ with difficulty levels ranging from foundational to advanced. Quantitative questions cover arithmetic‚ algebra‚ and geometry‚ while Verbal sections focus on grammar‚ reading comprehension‚ and critical reasoning. Integrated Reasoning tests the ability to analyze data from multiple sources. Difficulty levels increase progressively‚ ensuring a thorough assessment of skills. Practice tests highlight the varying question types and their challenges‚ allowing candidates to understand the exam’s structure and prepare effectively. Regular practice helps candidates adapt to the test’s complexity and improve their performance across all sections.

The Importance of Practice Tests

Practice tests are crucial for building confidence and reducing anxiety. They familiarize candidates with the test format and content‚ improving readiness and performance. Essential for success.

How Practice Tests Improve Familiarity with the Test Format

Practice tests play a vital role in helping candidates become familiar with the Executive Assessment format. By simulating real test conditions‚ they expose individuals to the structure‚ question types‚ and timing. This familiarity reduces anxiety and allows candidates to focus on content rather than navigating the test interface. Regular practice helps identify patterns in question formats‚ such as quantitative‚ verbal‚ and integrated reasoning sections. Additionally‚ it enables candidates to understand how to allocate time effectively and apply strategies for tackling each section. Familiarity with the format enhances confidence‚ ensuring candidates can approach the actual test with a clear mindset and strategic thinking. This preparation is essential for optimizing performance.

Identifying Weaknesses Through Practice

Practice tests are instrumental in identifying weaknesses by providing insights into performance across different sections. They reveal areas where candidates struggle‚ such as quantitative reasoning‚ verbal skills‚ or integrated reasoning. Detailed feedback highlights specific question types or concepts that require improvement. Regular practice allows candidates to track progress and pinpoint persistent challenges. This targeted approach enables the creation of a focused study plan‚ addressing gaps in knowledge or problem-solving strategies. By understanding weaknesses‚ candidates can allocate study time more effectively‚ ensuring a balanced improvement across all test sections. This process fosters a deeper understanding of the test content and enhances overall readiness for the Executive Assessment.

Enhancing Time Management Skills

Practice tests are crucial for refining time management skills‚ a critical factor in excelling on the Executive Assessment. By simulating real test conditions‚ practice tests help candidates adapt to the strict timing of each section. Regular practice fosters discipline‚ enabling candidates to allocate time effectively to each question. Strategies such as setting timers during practice and prioritizing questions can significantly improve pacing. Additionally‚ practice tests reveal areas where time is often wasted‚ allowing candidates to adjust their approach. Enhanced time management leads to reduced anxiety and improved focus‚ ensuring candidates can attempt all questions confidently. This skill is essential for maximizing scores in a time-constrained environment.

Preparing for the Executive Assessment

Effective preparation involves self-assessment‚ identifying gaps‚ and creating a tailored study plan. Utilize practice tests to refine strategies and build confidence in tackling the exam successfully.

Developing a Study Plan

A well-structured study plan is essential for success in the Executive Assessment. Start by setting clear‚ realistic goals and allocating time for each section of the test. Prioritize areas where improvement is needed‚ using practice tests to identify weaknesses. Incorporate regular practice with official materials‚ such as the Executive Assessment practice test PDF‚ to simulate real test conditions. Break down your preparation into manageable chunks‚ focusing on quantitative‚ verbal‚ and integrated reasoning skills separately. Schedule regular review sessions to analyze mistakes and track progress. Consistency is key; dedicate a specific time each day to studying and stick to your schedule. Flexibility is also important—adjust your plan as needed based on performance and feedback. By following a structured approach‚ you can build confidence and readiness for test day.

Focus on Weaknesses

Identifying and addressing weaknesses is crucial for improving performance on the Executive Assessment. Use practice tests‚ such as the Executive Assessment practice test PDF‚ to pinpoint areas where you struggle; Analyze your mistakes to understand common patterns or gaps in knowledge. For example‚ if you consistently score lower on quantitative reasoning‚ dedicate extra time to reviewing those concepts. Focus on improving fundamental skills rather than just completing questions. Break down complex problems into simpler steps to build confidence. Regularly track your progress to measure improvement. By targeting weaknesses‚ you can allocate study time more effectively and develop a stronger foundation for test day. Consistent effort will help turn weaknesses into strengths over time.

Mastering Quantitative‚ Verbal‚ and Integrated Reasoning

Mastering the quantitative‚ verbal‚ and integrated reasoning sections of the Executive Assessment requires focused preparation. The Executive Assessment practice test PDF provides realistic questions to help you refine your skills. Quantitative reasoning involves solving math problems‚ so practice algebra‚ geometry‚ and data interpretation. Verbal reasoning tests reading comprehension and critical thinking‚ so focus on analyzing complex texts. Integrated reasoning combines quantitative and verbal skills‚ requiring you to synthesize data from multiple sources. Use practice tests to identify areas needing improvement and develop strategies for each section. Regular review of concepts and consistent practice will enhance your performance. By mastering these sections‚ you’ll build confidence and achieve a higher score. Dedication to these areas ensures comprehensive preparation for the exam.

Executive Assessment Practice Test Content

The Executive Assessment practice test PDF includes sample questions‚ detailed answer explanations‚ and realistic test formats. It simulates the actual exam environment‚ helping candidates prepare effectively.

Sample Questions and Answer Explanations

The Executive Assessment practice test PDF provides a wide range of sample questions that mirror the actual exam. These questions cover quantitative‚ verbal‚ and integrated reasoning topics‚ ensuring comprehensive preparation. Each question is accompanied by detailed answer explanations‚ breaking down problem-solving methods and highlighting common pitfalls. Candidates can analyze their performance by reviewing correct and incorrect answers‚ gaining insights into strengths and areas needing improvement. The explanations also offer strategies for tackling similar problems‚ helping candidates refine their approaches. This resource is invaluable for understanding the test format and improving problem-solving efficiency‚ making it a key tool for achieving a high score.

Realistic Question Formats

The Executive Assessment practice test PDF features realistic question formats that closely resemble those found on the actual exam. This includes multiple-choice questions‚ data interpretation‚ and critical reasoning prompts‚ all presented in a format identical to the real test. The PDF mirrors the digital interface‚ allowing candidates to familiarize themselves with the layout‚ timing‚ and question types. This realism helps reduce test-day anxiety and builds confidence. By replicating the exact structure‚ candidates can practice navigating the test seamlessly‚ ensuring they understand how to approach each section effectively. This authenticity enables focused preparation‚ helping candidates refine their strategies and improve their performance. Realistic formats ensure a smooth transition to the actual exam.

Simulated Test Environment

The Executive Assessment practice test PDF offers a simulated test environment that mirrors the actual exam experience. This replication allows candidates to familiarize themselves with the digital interface‚ question distribution‚ and time constraints. The PDF mimics the exact format‚ enabling candidates to practice under conditions similar to the real test. This simulation helps build comfort with the test setup‚ reducing anxiety and allowing focused preparation. By experiencing the exam environment beforehand‚ candidates can better manage their time and adjust their strategies. The simulated environment ensures a seamless transition to the actual test‚ boosting confidence and readiness. This realistic simulation is a critical tool for achieving peak performance.

Tips for Taking the Executive Assessment

Stay calm‚ manage your time wisely‚ and thoroughly read each question. Eliminate incorrect options‚ make educated guesses‚ and review answers if time permits. Prioritize accuracy over speed.

Strategies for Tackling Each Section

To excel in the Executive Assessment‚ tailor your approach to each section. For Verbal Reasoning‚ focus on skimming passages quickly and identifying key details. In Quantitative Reasoning‚ prioritize mental calculations and estimate where possible. For Integrated Reasoning‚ break down complex data sets and tackle table and graph questions systematically. Practice under timed conditions to refine these strategies. Use the process of elimination to narrow down answer choices‚ and avoid spending too much time on a single question. Reviewing sample questions from official Executive Assessment practice test PDFs can help you refine these section-specific strategies and improve your overall performance. Consistent practice ensures these methods become second nature.

Best Practices for Test Day

On test day‚ ensure you are well-prepared and calm. Start by getting a good night’s sleep and eating a nutritious meal. Arrive early at the test center to avoid last-minute stress. Bring all required materials‚ including valid ID and any permitted items. During the test‚ manage your time wisely‚ allocating equal attention to each section. Use the preview feature to glance at upcoming questions but avoid spending too much time on any single one. Stay hydrated and take short breaks if needed. Practice deep breathing to maintain focus and reduce anxiety. Familiarize yourself with the test format using Executive Assessment practice test PDFs to build confidence and minimize surprises. Stay positive and trust your preparation.

How to Review and Learn from Mistakes

Reviewing mistakes is crucial for improvement. After taking an Executive Assessment practice test‚ analyze each incorrect answer to understand the error. Categorize mistakes by type‚ such as time management or conceptual gaps. Focus on identifying patterns in your weaknesses to target specific areas for improvement. Use the explanations provided in the Executive Assessment practice test PDF to learn from errors and avoid repeating them. Prioritize understanding the reasoning behind correct answers rather than just the outcome. Simulate test conditions during practice to reduce mistakes on the actual test day. Regularly review your progress and adjust your study plan to address persistent issues. Learning from mistakes is key to achieving a higher score.

Recommended Resources for Preparation

Official practice tests‚ comprehensive guides‚ and online resources are essential for effective preparation. Utilize the Executive Assessment practice test PDF for realistic exam simulations and focused study.

Free Executive Assessment Practice Questions

Accessing free Executive Assessment practice questions is a great way to begin preparation. These questions are available online and cover all test sections. The executive assessment practice test PDF is a valuable resource‚ offering realistic questions and answer explanations. It helps candidates understand the test format and identify areas for improvement. Many websites provide free EA practice questions‚ allowing candidates to assess their skills in quantitative‚ verbal‚ and integrated reasoning. Utilizing these free resources enables candidates to refine their test-taking strategies and build confidence. Additionally‚ they can help in creating a focused study plan by highlighting weaknesses. Free practice questions are an essential tool for maximizing score potential without additional costs.

Comprehensive Study Guides

Comprehensive study guides are indispensable for preparing for the Executive Assessment. These guides provide in-depth insights into the test format‚ question types‚ and strategies for success. They often include detailed explanations of quantitative‚ verbal‚ and integrated reasoning sections‚ helping candidates master each skill. Many guides align with the executive assessment practice test PDF‚ ensuring a structured approach to learning. They offer practice problems‚ case studies‚ and time management techniques tailored to the EA. By leveraging these resources‚ candidates can gain a deeper understanding of challenging topics and develop effective test-taking strategies. Comprehensive study guides are a cornerstone for building a robust preparation plan and achieving a high score.

Official Prep Materials

Official preparation materials are the most reliable resources for excelling on the Executive Assessment. These materials are created by the test developers‚ ensuring authenticity and relevance. The Executive Assessment Practice Test PDF is a key resource‚ offering realistic questions and formats that mirror the actual test. Official guides provide detailed explanations‚ scoring insights‚ and strategies tailored to the EA. They cover quantitative‚ verbal‚ and integrated reasoning sections‚ helping candidates understand the test structure and improve their skills. Accessing these materials through the Graduate Management Admission Council (GMAC) or authorized providers ensures candidates receive the most accurate and up-to-date information. Official prep materials are essential for a targeted and effective preparation strategy.

The Role of Practice Tests in Achieving Success

Executive Assessment practice tests are pivotal in achieving success. They refine skills‚ boost confidence‚ and familiarize candidates with the test format. Consistent practice ensures peak performance.

Executive Assessment practice tests play a crucial role in helping candidates achieve success. By simulating real test conditions‚ they enable individuals to assess their readiness‚ identify gaps in knowledge‚ and refine their strategies. Regular practice fosters familiarity with the test format‚ question types‚ and time constraints‚ reducing anxiety on test day. Additionally‚ practice tests allow candidates to track progress‚ reinforcing strengths and addressing weaknesses; They also enhance problem-solving skills and strategic thinking‚ which are essential for tackling complex questions. Ultimately‚ consistent practice with authentic materials‚ such as the Executive Assessment practice test PDF‚ builds confidence and equips candidates with the tools needed to perform at their best.

Final Tips for Maximizing Your Score

To maximize your score on the Executive Assessment‚ maintain consistency in your preparation and stay focused during practice. Regularly review mistakes from practice tests to understand areas needing improvement. Develop a time management strategy‚ ensuring you allocate sufficient time to each section. Prioritize questions you can answer confidently to secure foundational points before tackling tougher ones. Utilize official Executive Assessment practice test PDFs to familiarize yourself with the real test format. Stay calm and focused on test day‚ avoiding unnecessary stress. By combining strategic planning with consistent practice‚ you can optimize your performance and achieve a competitive score. Confidence and careful execution are key to success.

Continue Reading

manual steel

The AISC Steel Construction Manual is a premier reference for structural steel design and construction, updated every 5-6 years. It provides comprehensive guidance on steel design, including material grades, design provisions, and construction practices, serving as a critical resource for engineers and professionals in the field.

1.1 What is Manual Steel?

Manual Steel refers to the AISC Steel Construction Manual, a comprehensive guide for structural steel design and construction. It is published by the American Institute of Steel Construction (AISC) and serves as a primary resource for engineers, architects, and construction professionals. The manual provides detailed design provisions, material specifications, and construction practices, ensuring compliance with industry standards. It covers topics such as tension members, compression members, bolted and welded connections, load and resistance factor design (LRFD), and corrosion protection methods. The manual is regularly updated, with recent editions incorporating advancements in steel technology and design methodologies. It is available in hardbound editions, featuring thumb-cut sections for easy navigation. The AISC Steel Construction Manual is indispensable for professionals involved in steel structure design, offering practical guidance and reference materials. Its updates ensure alignment with current engineering practices, making it a cornerstone of structural steel construction.

1.2 Importance of the AISC Steel Construction Manual

The AISC Steel Construction Manual is a cornerstone for structural steel design and construction, offering comprehensive guidance for professionals. It provides detailed design provisions, material specifications, and construction practices, ensuring adherence to industry standards. The manual is updated every 5-6 years, incorporating the latest advancements in steel technology and design methodologies. Each edition, such as the 15th and 16th, introduces updated load and resistance factor tables, enhanced detailing guidelines, and revised design provisions. These updates ensure the manual remains a vital resource for engineers, architects, and contractors. Its practical examples and tables facilitate efficient design calculations, while its focus on safety and quality control makes it indispensable for ensuring the integrity of steel structures. The manual also serves as a key educational tool, supporting students and professionals preparing for exams like the Civil PE. By aligning with current engineering practices, the AISC Steel Construction Manual promotes innovation, efficiency, and compliance in the construction industry.

Historical Overview of the Manual

The AISC Steel Construction Manual has evolved significantly since its inception, with updates every 5-6 years. Early editions combined ASD and LRFD methods, while later versions introduced new specifications and revised load tables, ensuring alignment with advancing steel design and construction practices.

2.1 Evolution of the AISC Manual

The AISC Steel Construction Manual has undergone significant transformations since its first publication in 1927. Initially, it focused on basic steel design principles and allowable stress design (ASD) methods. Over the years, the manual has adapted to advances in materials, design approaches, and construction techniques. A major milestone was the introduction of Load and Resistance Factor Design (LRFD) in the 1980s, marking a shift from traditional ASD. This change reflected a more rational and probabilistic approach to structural design, enhancing safety and efficiency.

In the 1990s, the manual began incorporating provisions for hollow structural sections (HSS) and seismic design, addressing the growing demand for complex steel structures. The 2005 edition marked a pivotal moment, as it transitioned entirely to LRFD, aligning with modern engineering practices. Recent updates have emphasized sustainability, high-performance steels, and digital tools for design optimization. This evolution underscores AISC’s commitment to advancing steel construction standards while meeting the needs of a changing industry.

2.2 Key Updates in Recent Editions

Recent editions of the AISC Steel Construction Manual have introduced significant updates to align with advancements in steel construction technology and design practices. The 15th edition, published in 2017, incorporated provisions for new steel materials, such as A1065 steel, which offers enhanced toughness and weldability. This edition also updated design tables and introduced revised section properties to reflect modern manufacturing standards.

The 16th edition, released in 2022, further expanded on these improvements, with a focus on seismic design provisions and the inclusion of new connection details. It also aligned more closely with the ASCE 7-16 standard for load and resistance factor design (LRFD). Additionally, the manual now includes enhanced guidance on the use of high-strength steels, such as A992 and A572 Grade 65, to optimize structural efficiency. These updates ensure that engineers have access to the most current and reliable design criteria, enabling safer and more cost-effective steel structures.

Key Specifications in the Manual

The AISC manual outlines essential specifications for steel construction, including material standards, design provisions, and safety factors. It covers ASTM standards, fabrication guidelines, and quality control measures to ensure structural integrity and compliance with industry codes.

3.1 Material Grades and Properties

The AISC Steel Construction Manual provides detailed specifications for various steel material grades, ensuring their suitability for structural applications; Common grades include A36, A992, A572, and A514, each with defined mechanical properties such as yield strength, tensile strength, and elongation. These properties are critical for determining a material’s behavior under different loads. The manual also addresses chemical composition limits, ensuring consistency and reliability in steel production. Designers rely on these specifications to select appropriate materials that meet project requirements and safety standards. The inclusion of material properties allows for precise calculations in structural design, optimizing both performance and cost. Understanding these specifications is essential for engineers to ensure compliance with building codes and achieve durable, safe steel structures. The manual’s focus on material grades and properties underscores their importance in the foundation of steel construction practices. By adhering to these guidelines, professionals can confidently specify materials that align with project demands. This section is vital for anyone involved in steel design, fabrication, or construction.

3.2 Design Provisions and Limit States

The AISC Steel Construction Manual outlines specific design provisions and limit states to ensure the safety and reliability of steel structures. These provisions govern the behavior of structural components under various loads, focusing on both strength and serviceability. Limit states define critical conditions that a structure must not exceed during its lifespan, such as plastic deformation, fracture, or excessive deflection. The manual categorizes limit states into ultimate and serviceability limit states, with ultimate limit states addressing collapse prevention and serviceability limit states ensuring acceptable performance under normal usage. Design provisions provide equations, safety factors, and detailing requirements to satisfy these limit states. Engineers use these guidelines to determine member sizes, connections, and other structural elements. The manual also incorporates load and resistance factor design (LRFD) principles, ensuring that designs are both efficient and safe. By adhering to these provisions, designers can achieve structurally sound and durable steel constructions. This section is fundamental for understanding how to apply the manual’s specifications in real-world engineering scenarios. Proper application of these principles ensures compliance with industry standards and enhances the reliability of steel structures.

Design Fundamentals

Design fundamentals form the cornerstone of steel construction, focusing on basic principles and methodologies. These include load analysis, material behavior, and structural system selection. Proper application ensures safety, efficiency, and compliance with design standards, laying the groundwork for successful steel projects.

4.1 Tension Members and Compression Members

Tension and compression members are fundamental components in steel structures, each serving distinct roles. Tension members, such as cables, rods, and bracing, resist pulling forces, while compression members, like columns and beams, withstand compressive loads. The design of these elements requires careful consideration of material properties, cross-sectional geometry, and load conditions.

For tension members, the primary design criteria involve yielding and ultimate strength. The AISC Manual provides formulas for calculating the nominal tensile strength, considering factors like net section fracture and block shear failure. Compression members, however, are governed by buckling behavior, which depends on slenderness ratios and the Euler formula for elastic buckling. The Manual also addresses inelastic buckling for non-slender sections using the Johnson-Pomilio theory.

Both member types must adhere to specific limits on width-to-thickness ratios to ensure ductility and avoid brittle failure. The Manual provides tables for maximum allowable slenderness ratios and minimum bracing requirements. Proper design of tension and compression members ensures structural stability, load-carrying capacity, and compliance with safety standards. These principles are essential for engineers to achieve efficient and reliable steel designs.

4.2 Bolted Connections and Welded Connections

Bolted and welded connections are critical components in steel construction, ensuring structural integrity and load transfer between members. Bolted connections are widely used due to their ease of installation and adjustability, while welded connections offer superior rigidity and load-carrying capacity. The AISC Manual provides detailed guidelines for both types, addressing design, materials, and execution.

Bolted connections rely on friction and bearing to resist loads, with high-strength bolts being the most common. Design considerations include bolt spacing, edge distances, and prying forces. Welded connections, on the other hand, rely on fusion between steel elements, requiring proper joint preparation and material compatibility. The Manual specifies minimum weld sizes and techniques to ensure strength and ductility.

Both connection types must comply with material specifications, such as ASTM standards for bolts and welding electrodes. Safety factors and inspection criteria are also outlined to prevent failures. Engineers must carefully select and design these connections to meet project requirements, ensuring reliability and compliance with codes. Proper execution of bolted and welded connections is vital for the overall performance of steel structures.

Load and Resistance Factor Design (LRFD)

Load and Resistance Factor Design (LRFD) is a reliability-based approach ensuring steel structures withstand loads safely. It balances load factors and material resistance, optimizing design efficiency and reliability while adhering to safety standards.

5.1 Principles of LRFD

Load and Resistance Factor Design (LRFD) is a design philosophy that ensures steel structures are designed to withstand specified loads with an appropriate level of reliability and safety. The method is based on the principles of probability and statistics, where both loads and resistances are treated as random variables. This approach considers the inherent uncertainties in material properties, load magnitudes, and structural behavior.

The core idea of LRFD is to ensure that the factored design strength of a component or connection is greater than or equal to the factored load effect. This is expressed mathematically as:

φRₙ ≥ γQₙ

where:

  • φ = resistance factor (accounts for material and fabrication uncertainties)
  • Rₙ = nominal resistance (capacity) of the member
  • γ = load factor (accounts for load uncertainties)
  • Qₙ = nominal load effect (demand)

LRFD provides a balanced approach to design, ensuring that both safety and efficiency are optimized. By explicitly addressing uncertainties, it allows for more precise and economical designs compared to traditional allowable strength design methods.

5.2 Load Combinations and Resistance Factors

Load combinations are critical in the LRFD approach, as they define the various scenarios of loads a structure may experience. These combinations account for different types of loads, such as dead load (D), live load (L), wind load (W), and seismic load (E). Common load combinations specified in the AISC Manual include:

  • 1.4D: For structures subjected to dead load only.
  • 1.2D + 1.6L: For dead and live loads in buildings.
  • 1.2D + 1.0L + 1.6W: For dead, live, and wind loads.

Resistance factors (φ) are applied to the nominal strength of steel members or connections to account for uncertainties in material properties and fabrication. Common resistance factors include:

  • 0.9: For yielding, elastic buckling, and shear.
  • 0.85: For compression flanges of beams and girders.
  • 0.75: For fracture in tension members and certain fastener-related failures.

These factors ensure that the design strength of a component is reduced appropriately, providing a consistent and reliable margin of safety across all design cases. Proper application of load combinations and resistance factors is essential for achieving a balanced and safe design in steel construction.

Construction Practices and Safety

Proper construction practices and safety protocols are essential for successful steel construction projects. Adhering to codes, using appropriate equipment, and ensuring worker training are critical. Safety measures include fall protection, proper lifting techniques, and regular inspections to prevent accidents and ensure compliance with standards.

6.1 Fabrication and Erection Guidelines

Fabrication and erection are critical phases in steel construction, requiring precise adherence to guidelines to ensure structural integrity and safety. Fabrication involves cutting, drilling, and welding steel components to meet design specifications, while erection focuses on assembling these components on-site. Proper planning and sequencing are essential to avoid delays and ensure fit-up accuracy.

Key fabrication guidelines include using certified materials, maintaining dimensional accuracy, and applying appropriate welding techniques. Erection requires careful handling to prevent damage to components, ensuring proper alignment, and securing connections with bolts or welds. Safety measures, such as using proper lifting equipment and fall protection, are paramount during erection. Adherence to codes and standards ensures compliance and minimizes risks. Regular inspections and documentation are also vital to verify quality and compliance. By following these guidelines, projects can achieve durability, safety, and long-term performance.

6.2 Quality Control and Inspection

Quality control and inspection are essential to ensure that steel structures meet specified standards and safety requirements. These processes involve systematic checks and tests to verify that materials, fabrication, and erection comply with design and code specifications. Regular inspections help identify defects or deviations early, preventing costly repairs and ensuring structural integrity.

Inspection typically includes visual examinations, dimensional checks, and non-destructive testing (NDT) methods such as ultrasonic testing or magnetic particle testing to detect internal or surface flaws. Proper documentation of inspection results is critical for maintaining records and demonstrating compliance with regulatory standards. Certified inspectors, often holding qualifications like Certified Welding Inspector (CWI), conduct these evaluations to ensure reliability and accuracy.

Safety is a key focus of quality control, as defective components can pose significant risks. Inspections also verify that all connections, welds, and bolts meet load-bearing requirements. By implementing rigorous quality control measures, projects can achieve long-term durability and reliability, ensuring that steel structures perform safely under various conditions.

Resources and References

The AISC Steel Construction Manual is a primary resource, offering detailed guidelines and standards for steel design and construction. Supplementary materials, such as design guides and technical bulletins, provide additional insights and best practices for specific applications.

Online forums and professional organizations, like AISC and ASCE, provide updated information, case studies, and expert discussions. These resources help engineers and fabricators stay informed about advancements and compliance with current codes and standards in the field.

7.1 Supplementary Materials and Guides

Supplementary materials and guides complement the AISC Steel Construction Manual, offering in-depth insights into specialized topics. These resources include detailed design examples, case studies, and technical notes that elaborate on specific aspects of steel construction. Engineers often rely on these materials to address complex design challenges and ensure compliance with industry standards.

Among these supplementary resources are design guides focused on seismic design, fatigue and fracture, and advanced analysis methods. These guides provide practical approaches and worked examples, helping professionals apply theoretical concepts to real-world projects. Additionally, technical bulletins and advisories are periodically released to clarify specific design issues or introduce new technologies.

These materials are typically developed by industry experts and are peer-reviewed to maintain high standards of accuracy and relevance. They serve as invaluable tools for both experienced engineers and those new to the field, fostering continuous learning and adaptation to evolving design practices in steel construction.

7.2 Online Resources and Forums

Online resources and forums play a crucial role in supporting professionals working with the AISC Steel Construction Manual. The AISC website itself offers a wealth of digital resources, including downloadable PDFs of the manual, design aids, and reference materials. Additionally, online forums such as the AISC Forum and structural engineering communities like Eng-Tips provide platforms for professionals to discuss challenges, share knowledge, and seek advice from experts.

These online spaces are particularly beneficial for resolving complex design issues or interpreting specific provisions of the manual. Many universities and professional organizations also host webinars and online courses that complement the manual’s content. YouTube channels and blogs dedicated to steel design often feature tutorials and explanations of key concepts, making them accessible to a broader audience.

Furthermore, software tools like STAAD.Pro and ETABS frequently include resources and help sections that reference the AISC manual, aiding engineers in applying its provisions during analysis and design. Online design calculators and technical FAQs further enhance the accessibility of the manual’s guidelines, ensuring that engineers can efficiently apply its principles in their work.

Maintenance and Protection of Steel Structures

Maintenance and protection are vital for extending the lifespan of steel structures. Regular inspection, protective coatings, and corrosion mitigation ensure durability. Proper care prevents deterioration, ensuring safety and structural integrity over time.

8.1 Corrosion Protection Methods

Corrosion protection is essential to ensure the longevity and integrity of steel structures. One of the most common methods is the application of protective coatings, such as paints or epoxy, which act as a barrier against moisture and chemicals. These coatings must be applied to clean, dry surfaces to ensure proper adhesion and effectiveness.

Cathodic protection is another widely used technique. It involves applying a small electrical current to reverse the natural corrosion process, making the steel the cathode of an electrochemical cell. This method is particularly effective in harsh environments, such as marine or industrial settings.

Weathering steel, which develops a protective oxide layer when exposed to the atmosphere, is also a popular choice. While it requires minimal maintenance, it is best suited for specific conditions where the formation of a stable patina is possible.

Galvanization, the process of applying a zinc coating to steel, offers excellent corrosion resistance. Zinc acts as a sacrificial anode, protecting the steel from rust even if the coating is damaged.

These methods can be used individually or in combination, depending on the environmental conditions and the structure’s requirements. Regular inspection and maintenance are crucial to ensure the continued effectiveness of these corrosion protection systems.

8.2 Inspection and Maintenance Practices

Regular inspection and maintenance are critical to ensuring the durability and safety of steel structures. Inspections should be conducted periodically to identify potential issues before they escalate. These inspections typically involve visual examinations, non-destructive testing (NDT), and structural assessments. Visual checks can reveal signs of corrosion, wear, or damage to connections and welds.

Non-destructive testing methods, such as ultrasonic testing or magnetic particle testing, are used to detect internal or surface defects without damaging the steel. These techniques are especially useful for identifying cracks, voids, or other flaws in welds and joints.

Maintenance activities include cleaning surfaces, repainting protective coatings, and tightening bolts or connections that may have loosened over time. Proper documentation of inspections and maintenance is essential for tracking the condition of the structure and planning future work.

A well-structured maintenance schedule, based on environmental conditions and usage, helps prevent premature degradation. Trained personnel should perform these tasks to ensure compliance with safety standards and best practices.

By prioritizing inspection and maintenance, structural integrity is preserved, and the lifespan of steel structures is extended, reducing the risk of failures and ensuring public safety.

Continue Reading