plantronics savi 8200 manual

The Plantronics Savi 8200 Series offers a versatile wireless headset solution designed for seamless call management across desk phones, computers, and mobile devices, ensuring superior audio quality and comfort.

Product Overview

The Plantronics Savi 8200 Series is a high-performance wireless headset system designed for professionals seeking seamless communication across multiple devices. Available in both Office and UC variants, it supports desk phones, computers, and mobile devices via DECT and Bluetooth connectivity. The headset delivers crystal-clear audio with advanced noise cancellation and hi-fi stereo sound. Its ergonomic design ensures all-day comfort, while the long-lasting battery provides up to 13 hours of talk time. The system includes a sleek base station for managing connections and LED indicators for call status. Compatible with Plantronics Hub software, it allows customization of settings for an enhanced user experience. Whether for office or remote work, the Savi 8200 Series excels in providing reliable, high-quality communication solutions.

Series Variants: Office and UC Models

The Plantronics Savi 8200 Series is available in two distinct variants: the Office model and the UC model. The Office variant is specifically designed for use with desk phones, offering seamless integration and advanced call management features. It supports DECT wireless technology, ensuring reliable and secure connections. The UC (Unified Communications) variant, on the other hand, is optimized for use with computer-based communication platforms, such as Microsoft Teams, Zoom, and Skype. Both models share core features like noise-canceling audio, long battery life, and ergonomic design but cater to different workplace needs. The UC model includes additional Bluetooth connectivity for pairing with mobile devices, making it ideal for remote workers and collaboration environments. Together, these variants provide flexible solutions for professionals requiring high-quality audio and connectivity across various platforms.

Key Features

The Plantronics Savi 8200 Series offers advanced DECT wireless technology, long-lasting battery life, noise-canceling audio, ergonomic design, and seamless connectivity options for enhanced productivity and comfort.

Advanced Audio Quality

The Plantronics Savi 8200 Series delivers exceptional audio clarity with its advanced noise-canceling technology, ensuring crisp and clear communication in noisy environments. The headset features wideband audio, providing a more natural and immersive sound experience. With its precision-tuned speakers and dual-microphone setup, it effectively minimizes background noise and enhances voice clarity for both the wearer and the caller. The active noise-canceling (ANC) function further reduces ambient distractions, making it ideal for open-office settings. Additionally, the headset supports DECT 6.0 wireless technology, which offers a secure and interference-free connection, ensuring uninterrupted audio performance. These features combined create a professional-grade audio experience, perfect for business communications and collaboration.

Compatibility with Multiple Devices

The Plantronics Savi 8200 Series is designed to seamlessly connect with a variety of devices, offering unparalleled flexibility for professionals. It supports desk phones, computers, and mobile devices through Bluetooth or the included USB adapter. The headset is compatible with multiple platforms, including Microsoft Teams, Zoom, and other UC applications, ensuring smooth integration into your workflow. With the ability to connect to up to two USB devices and one Bluetooth device, users can effortlessly switch between calls on their desk phone, computer, or smartphone. This versatility makes the Savi 8200 Series an ideal choice for professionals who need to manage multiple communication channels efficiently and maintain productivity across different environments.

Ergonomic Design and Comfort

The Plantronics Savi 8200 Series is crafted with an emphasis on ergonomic design to ensure long-lasting comfort. Featuring a lightweight over-the-head frame, the headset is built to distribute weight evenly, reducing pressure points. The soft, cushioned ear cups and adjustable headband provide a secure fit, while the pivoting ear cups adapt to the shape of your ears for optimal comfort. Designed to be worn all day, the headset minimizes fatigue and ensures a natural feel. The noise-canceling microphone and audio settings further enhance the user experience, allowing you to focus on calls without discomfort. This blend of durability and ergonomic excellence makes the Savi 8200 Series an excellent choice for professionals seeking both functionality and comfort.

Battery Life and Charging Options

The Plantronics Savi 8200 Series offers an impressive battery life of up to 13 hours of talk time on a single charge, ensuring uninterrupted performance throughout the day. The headset supports micro USB charging, making it easy to recharge at your desk or on the go. A full charge typically takes around 3 hours, providing reliable all-day use. The headset also features a low-battery alert via voice prompts, notifying you when it’s time to recharge. Additionally, the LED indicator on the base or headset provides visual cues for charging status. With its long-lasting battery and convenient charging options, the Savi 8200 Series is designed to keep up with your busy workday, offering seamless connectivity and minimal downtime.

Setup and Installation

Setting up the Plantronics Savi 8200 Series is straightforward with the included quick start guide. Visit the official website for detailed installation guides and video tutorials to ensure a smooth setup process. The system is compatible with various UC platforms, making it easy to integrate into your existing workflow.

Unboxing and Preparing the Components

Begin by carefully unboxing the Plantronics Savi 8200 Series headset and its accessories. Inside the package, you’ll find the headset, charging base, USB cable, power adapter, and a quick start guide. Inspect all components for any visible damage. Place the headset and charging base on a flat, stable surface. Ensure the USB cable is securely connected to the charging base and the power adapter is plugged into a nearby outlet. Take a moment to review the quick start guide to familiarize yourself with the layout and functionality of the headset. This step ensures a smooth setup process and helps you prepare for the next stages of installation and configuration.

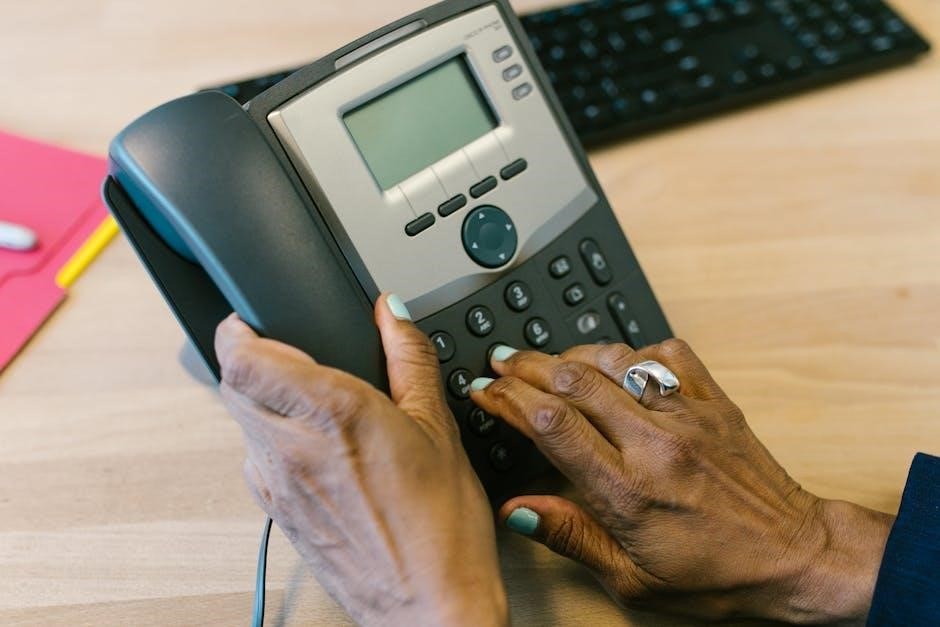
Connecting to a Desk Phone

To connect the Plantronics Savi 8200 Series headset to your desk phone, locate the appropriate ports on both the headset base and your telephone. Use the provided phone cable to connect the base to the desk phone’s headset or handsets port. Ensure the cable is securely plugged into the correct jack to avoid connectivity issues. If your phone requires a lifter, attach the HL10 or HL10i lifter to the base and position it near the phone’s cradle. Pair the lifter with the headset base by following the pairing instructions in the manual. Once connected, test the setup by making a call to confirm proper functionality. Refer to the manual for specific instructions tailored to your desk phone model for optimal results.

Connecting to a Computer via USB

To connect the Plantronics Savi 8200 Series headset to your computer via USB, first locate the USB port on your computer. Insert the USB cable into the port and connect the other end to the headset base. Ensure the USB cable is securely plugged in to establish a stable connection. Your computer should automatically detect the device and prompt you to install the necessary drivers. If prompted, follow the on-screen instructions to complete the installation. Once connected, you can use the Plantronics Hub software to customize settings, update firmware, and manage audio preferences. For optimal performance, ensure your computer’s audio settings recognize the headset as the default audio device. This setup allows seamless voice calls and multimedia audio through your computer.

Pairing with Mobile Devices via Bluetooth

To pair the Plantronics Savi 8200 Series headset with your mobile device via Bluetooth, start by ensuring Bluetooth is enabled on your mobile device. On the headset base, press and hold the Bluetooth pairing button until the LED flashes blue rapidly. Open your device’s Bluetooth settings and select the headset from the list of available devices. If prompted, enter the default passcode “0000” or “1234” to complete the pairing process. Once connected, the LED will stop flashing, and you’ll hear an audio confirmation. Your headset is now ready to handle calls and audio from your mobile device. For optimal performance, ensure the headset is within the recommended Bluetooth range of up to 50 meters (164 feet). If issues arise, restart both devices and retry the pairing process.

Using the Headset

The Plantronics Savi 8200 Series offers seamless call handling, audio source switching, and setting adjustments, designed for intuitive use and enhanced productivity effortlessly.

Powering On and Basic Controls

To power on the Plantronics Savi 8200 headset, press and hold the power button until the LED indicator lights up. The headset will automatically enter pairing mode if no device is connected. Use the volume controls on the headset to adjust sound levels during calls or audio playback. The multifunction button allows you to answer or end calls, while the mute button ensures privacy during conversations. The power button also serves as a play/pause control for media. Voice prompts guide you through key functions, making operation intuitive. LED indicators provide visual feedback for power, pairing, and mute statuses, ensuring easy monitoring of headset functions.

Making, Answering, and Ending Calls

To make a call using the Plantronics Savi 8200, press the multifunction button until you hear a confirmation tone. For desk phone calls, ensure the headset is connected and dial using your phone. To answer an incoming call, press the multifunction button or say “Answer” if voice commands are enabled. The LED indicator will flash to signal an incoming call. To end a call, press the multifunction button again or use voice commands like “End Call.” The headset will return to standby mode. For calls via computer, use the softphone controls to initiate or answer calls. The headset’s intuitive design ensures seamless call management, with voice prompts guiding you through actions. This feature enhances productivity and provides a hassle-free communication experience.

Switching Between Audio Sources

The Plantronics Savi 8200 allows seamless switching between audio sources, such as desk phones, computers, and mobile devices. To switch sources, press and hold the multifunction button until you hear a tone, then release it. The headset will automatically connect to the next available audio source. If connected to a computer, you can also use the Plantronics Hub software to manually select the audio source. Additionally, you can use voice commands like “Switch source” to cycle through connected devices. The headset will announce the active source, ensuring you stay informed. This feature is ideal for multitasking, enabling you to manage calls and audio from multiple devices effortlessly. The intuitive design ensures smooth transitions, enhancing your overall communication experience.

Adjusting Volume and Settings

The Plantronics Savi 8200 allows easy volume adjustment directly from the headset. Use the volume control wheel on the earpiece to increase or decrease the sound level during calls or audio playback. For mute functionality, press and hold the multifunction button while adjusting the volume wheel. You can also customize settings like sidetone, which lets you hear your own voice during calls, using the Plantronics Hub software. To access advanced settings, connect the headset to your computer via USB and open the Hub software. From there, you can adjust audio equalizer settings, customize button functions, and set up call notifications. These features ensure a personalized and optimal audio experience tailored to your preferences. The intuitive design makes it easy to fine-tune settings for seamless communication and productivity.

Customization and Settings

Customize your Savi 8200 experience with the Plantronics Hub software. Adjust settings, personalize audio preferences, and optimize performance for a tailored experience that meets your needs. Settings made easy. Always.

Using Plantronics Hub Software

The Plantronics Hub software enhances your Savi 8200 experience by allowing you to customize settings, update firmware, and optimize performance. Download and install the software from the official Plantronics website. Once installed, connect your headset to your computer via USB or Bluetooth. The software provides a user-friendly interface to adjust settings like sidetone, noise cancellation, and audio equalizer. You can also enable call notifications, customize button functions, and manage firmware updates. Real-time device status and detailed analytics help you monitor usage. Regular updates ensure your headset stays current with the latest features. Use Plantronics Hub to tailor your Savi 8200 to your preferences for a seamless and personalized experience.

Adjusting Sidetone and Audio Settings

Adjusting sidetone and audio settings on the Plantronics Savi 8200 allows for a personalized listening experience. Sidetone refers to the sound of your own voice you hear while wearing the headset. Use the Plantronics Hub software to fine-tune sidetone levels, ensuring calls feel natural and comfortable. Audio settings can also be customized, such as noise cancellation, microphone sensitivity, and equalizer preferences. These adjustments optimize call clarity and reduce background noise. Access these settings via the software or directly on the headset. Customizing these features enhances overall audio quality, ensuring a seamless communication experience tailored to your preferences. Proper calibration of these settings is key to maximizing the headset’s performance and user satisfaction.

Customizing Headset Buttons

Customizing the headset buttons on the Plantronics Savi 8200 allows users to tailor functionality to their preferences. The headset features programmable buttons that can be assigned to specific functions such as call answer/end, volume control, mute, and switching between audio sources. Using the Plantronics Hub software, users can easily reconfigure these buttons to suit their workflow. For instance, the multifunction button can be set to toggle between desk phone and computer audio. Additionally, users can customize the button layout to prioritize frequently used actions, enhancing productivity. This feature ensures a personalized experience, making it easier to manage calls and audio seamlessly. Customization options empower users to optimize their headset for specific tasks, improving overall efficiency and convenience in various work environments.

Troubleshooting Common Issues

Troubleshooting the Plantronics Savi 8200 involves resolving connectivity, audio quality, or firmware update issues. Restarting the headset, checking connections, and using Plantronics Hub for diagnostics often resolve these problems.

Resolving Connectivity Problems

Connectivity issues with the Plantronics Savi 8200 can often be resolved by restarting the headset and base. Ensure the headset is paired correctly to the base or Bluetooth device. If the connection drops, check the distance between the headset and base, as it should be within the recommended range. Resetting the base by unplugging and replugging it can also resolve issues. For Bluetooth connections, put the headset in pairing mode and retry the connection. If problems persist, update the firmware using Plantronics Hub software. Finally, resetting the headset to factory settings may resolve deep connectivity issues. Always refer to the manual for detailed steps.

Addressing Sound Quality Concerns

To address sound quality issues with the Plantronics Savi 8200, start by ensuring the headset is properly fitted and the microphone is not obstructed. Check the volume levels on both the headset and connected device. If muffled sound or static occurs, clean the earpiece and microphone with a soft cloth. Resetting the headset by turning it off and on can also resolve audio glitches. Use Plantronics Hub software to adjust settings like sidetone and equalizer for clearer sound. If issues persist, update the firmware or reset the headset to factory settings. For persistent problems, consult the user manual or contact support for further assistance.

Updating Firmware and Software

Regular firmware and software updates are essential for optimal performance of the Plantronics Savi 8200. To update, download and install the latest version of Plantronics Hub software from the official website. Connect the headset to your computer via USB and launch the software. It will automatically detect and prompt for available updates. Follow on-screen instructions to download and install the update. Ensure the headset remains powered on during the process. Some updates may require a system restart. Once complete, the headset will restart with the new firmware. Updates enhance functionality, improve connectivity, and resolve potential bugs. Always refer to the user manual for detailed instructions if issues arise during the update process.

Restoring Factory Settings

Restoring the Plantronics Savi 8200 to factory settings resets all configurations to their original state. To perform this, press and hold the call control button and the volume up button simultaneously for 15 seconds until the LED flashes red and blue. Release the buttons when the LED turns solid blue. This process will erase all customized settings, paired devices, and firmware updates. The headset will revert to its default settings, ensuring a clean start. Note that this action cannot be undone, so ensure all important settings are backed up before proceeding. After the reset, pair the device again and reconfigure settings as needed. This step is ideal for resolving persistent issues or preparing the headset for a new user.

The Plantronics Savi 8200 offers exceptional audio quality and seamless connectivity, ideal for professionals. This guide helps maximize its potential and troubleshoot issues for an optimal experience.

Final Thoughts and Recommendations

The Plantronics Savi 8200 is a top-tier wireless headset designed to meet the demands of busy professionals. Its advanced audio quality, ergonomic design, and seamless connectivity make it a versatile choice for office and remote work environments. Users will appreciate the long battery life and intuitive controls, while the customizable settings via Plantronics Hub offer tailored experiences. For those seeking reliability and comfort, the Savi 8200 is an excellent investment. It is particularly recommended for professionals who need to switch between desk phones, computers, and mobile devices throughout the day. With proper care and regular updates, this headset will provide years of dependable service, ensuring clear communication and productivity.

Continue Reading

mitel mobilelink phone manual

Welcome to the Mitel MobileLink Phone Manual, your comprehensive guide to understanding and utilizing the advanced features of your Mitel MobileLink device. This manual provides detailed instructions for installation, configuration, and troubleshooting, ensuring you maximize the potential of your phone. Designed for both novice and experienced users, it covers key functionalities like Bluetooth mobile integration, seamless call handling, and enhanced directory management. Follow this guide to unlock the full capabilities of your Mitel MobileLink phone and enhance your communication experience.

Overview of Mitel MobileLink Technology

Mitel MobileLink is a cutting-edge technology designed to seamlessly integrate desk phones with mobile devices via Bluetooth. It enables users to handle calls effortlessly between their desk and mobile phones, ensuring uninterrupted communication. This innovative feature enhances productivity by allowing users to manage calls, access directories, and maintain connectivity across devices. MobileLink supports advanced call handling, directory management, and secure connections, making it a powerful tool for modern communication needs. By leveraging Bluetooth technology, Mitel MobileLink delivers a unified communication experience, ensuring users stay connected and efficient in any work environment. This technology is a cornerstone of Mitel’s commitment to advancing business communication solutions.

Importance of the Manual for Users

The Mitel MobileLink Phone Manual is an essential resource for users seeking to fully utilize their device’s capabilities. It provides clear, step-by-step instructions for installation, configuration, and troubleshooting, ensuring a smooth user experience. This guide is particularly valuable for new users, offering insights into advanced features like mobile integration and call management. By referencing the manual, users can resolve common issues, optimize phone settings, and maximize productivity. It serves as a go-to resource for understanding the phone’s functionality, ensuring users can navigate its features confidently. Whether troubleshooting or exploring customization options, the manual empowers users to make the most of their Mitel MobileLink phone.

Installation and Setup

The Mitel MobileLink Phone Manual guides users through seamless installation and setup, ensuring proper physical and software configurations for optimal functionality and connectivity.

Physical Installation of the Mitel MobileLink Phone

Physical installation of the Mitel MobileLink Phone involves placing the device on a flat surface and connecting the power supply. Ensure the phone is positioned securely to prevent tipping. Connect the Ethernet cable to the appropriate port using a CAT5e or higher cable for reliable network connectivity. If using a desk stand, attach it firmly to the phone base. For wall mounting, use the provided kit and follow the manual’s instructions. Connect the handset and optional headset, ensuring all cables are securely plugged in. Finally, power on the device and allow it to boot up. Refer to the manual for specific installation details.

Software Setup and Configuration

Software setup for the Mitel MobileLink Phone begins with powering on the device and following the on-screen instructions. The initial setup wizard guides users through language selection, network configuration, and time zone settings. Connect to the corporate network via DHCP or manually enter IP details. Ensure the phone is registered with the Mitel MiVoice platform by entering credentials provided by the administrator. Configure voicemail and security settings, such as enabling HTTPS for secure communication. Update the firmware if prompted to ensure optimal performance. Finally, synchronize the phone with the corporate directory for contact access. Refer to the manual for detailed steps and troubleshooting tips.

Key Features of Mitel MobileLink

Mitel MobileLink offers seamless integration with Mitel platforms, advanced call handling, and AI-driven communication tools, enhancing productivity and user experience in hybrid work environments.

Mobile Integration via Bluetooth

Mitel MobileLink’s Bluetooth integration enables seamless connectivity between your desk phone and mobile device. This feature allows users to handle calls on either device effortlessly, ensuring uninterrupted communication. With Bluetooth pairing, you can transfer calls between your desk phone and mobile seamlessly, maintaining call quality and convenience. Additionally, Bluetooth connectivity supports syncing contacts and call history, providing a unified communication experience. The integration enhances productivity by allowing users to manage calls and access features from either device, ensuring flexibility in hybrid work environments. This feature is designed to streamline communication, reducing the need to switch devices manually and improving overall user experience.

Seamless Call Handling Between Desk and Mobile Phones

The Mitel MobileLink system offers effortless call handling between desk and mobile phones, ensuring a smooth communication experience. Users can seamlessly transfer active calls between devices without interruption, leveraging the Call Transfer or Call Continuity features. This capability is particularly useful in hybrid work environments, allowing users to move between locations while maintaining active calls. The system also supports a single identity, enabling calls to be received on both devices simultaneously. This feature enhances flexibility and productivity, ensuring users never miss important calls, whether they are at their desk or on the go. The integration ensures a unified communication experience across all devices.

Enhanced Directory and Contact Management

Mitel MobileLink provides advanced directory and contact management features, streamlining communication workflows. Users can synchronize their corporate and personal directories across devices, ensuring easy access to contacts. The system supports LDAP integration, enabling seamless connectivity with corporate directories. Contacts can be organized into groups, and users can assign favorites or VIP status for quick access. Enhanced search functionality allows users to quickly locate contacts by name, number, or email. Additionally, the system supports caller ID and contact presence, providing real-time updates on availability. These tools enhance productivity by simplifying communication and reducing time spent searching for information, ensuring a seamless user experience across all platforms.

Using the Mitel MobileLink Phone

Mitel MobileLink offers intuitive operation, combining desk phone functionality with mobile convenience. Users can easily navigate menus, access features, and manage calls seamlessly across devices, enhancing productivity.

Making and Receiving Calls

Making and receiving calls on the Mitel MobileLink phone is straightforward. To place a call, simply enter the number using the keypad and press the call button. For incoming calls, the phone rings, and you can answer by pressing the answer key or using a headset. The phone supports high-quality audio, ensuring clear communication. During a call, you can use features like mute, hold, or transfer. The intuitive interface allows easy access to call handling options. Additionally, the phone supports seamless call switching between desk and mobile devices, enhancing flexibility. This feature ensures uninterrupted communication, making it ideal for busy professionals on the go.

Advanced Call Management Features

The Mitel MobileLink phone offers advanced call management features to enhance your communication experience. Call forwarding allows you to direct incoming calls to another number or voicemail. Do Not Disturb mode silences notifications during meetings or personal time. The phone also supports call parking, enabling you to place a call on hold and resume it from another device. Additionally, conference calling is simplified with the ability to add multiple participants effortlessly. These features provide greater control over your calls, improving productivity and flexibility. Customizable settings allow you to tailor call handling to suit your preferences, ensuring efficient communication management.

Navigating the Phone Interface

Navigating the Mitel MobileLink phone interface is designed to be intuitive and user-friendly. The touchscreen display provides easy access to key functions, with a clean layout that minimizes clutter. The home screen features shortcuts for calls, contacts, and settings, while the menu system is organized into logical categories. Users can quickly access advanced features without confusion. The phone also supports swipe gestures for efficient navigation. A favorites list allows for one-touch access to frequently contacted numbers. The interface is customizable, enabling users to tailor their experience by rearranging shortcuts or adjusting display settings for optimal usability and personal preference.

Customization and Personalization

The Mitel MobileLink phone offers various customization options, allowing users to personalize their experience with ringtone selection, wallpaper choices, and interface layout adjustments for individual preferences.

Setting Up Personal Directories

The Mitel MobileLink phone allows users to create and manage personal directories, simplifying contact organization. Users can add, edit, or delete entries directly from the phone interface. The directory supports multiple contact fields, such as name, number, and email, ensuring detailed storage of information. Contacts can also be imported from external sources like Outlook or mobile devices via Bluetooth. Organizing contacts into groups enhances call management and accessibility. The phone’s intuitive interface makes it easy to search or filter entries, ensuring efficient communication. Regularly updating the directory helps maintain accurate and reliable contact information for seamless connectivity.

Configuring Phone Settings for Optimal Use

Configuring phone settings on the Mitel MobileLink device is essential for enhancing user experience and ensuring optimal functionality. Users can customize various options such as display settings, sound preferences, and notification alerts to suit their preferences. The phone also allows for personalized call handling features, enabling users to manage incoming calls efficiently. Additionally, network and connectivity settings can be adjusted to maintain stable connections and improve call quality. By exploring and tailoring these configurations, users can optimize their communication experience and maximize productivity. Regularly reviewing and updating these settings ensures the phone operates at its best capacity and performance.

Troubleshooting Common Issues

Troubleshooting common issues with your Mitel MobileLink phone involves identifying symptoms, consulting the manual, checking connections, restarting the device, and contacting support if problems persist.

Resolving Connectivity Problems

Connectivity issues with your Mitel MobileLink phone can often be resolved by restarting the device or checking network settings. Ensure your phone is within range of the network and that Wi-Fi or Bluetooth is enabled. Verify that the correct network profile is selected and that signal strength is adequate. If problems persist, reset network settings or perform a factory reset. Additionally, check for firmware updates, as outdated software may cause connection instability. If issues remain unresolved, contact your IT department or Mitel support for further assistance. Always ensure physical obstructions are minimized for optimal signal reception.

Fixing Audio and Call Quality Issues

To address audio and call quality issues with your Mitel MobileLink phone, start by ensuring the device is in a quiet environment and free from physical obstructions. Check the speaker, earpiece, and Bluetooth accessories for debris or damage. Restart the phone or reset network settings to refresh the connection. Disable and re-enable Bluetooth or Wi-Fi to re-establish a stable link. If issues persist, update the phone’s firmware to the latest version. If the problem occurs with a specific caller, request them to check their audio settings. For unresolved issues, contact Mitel support for professional assistance and troubleshooting. Ensure optimal audio settings for clear communication;

Resetting the Phone to Factory Settings

Resetting your Mitel MobileLink phone to factory settings restores it to its original configuration, erasing all customized settings and data. To perform a factory reset, navigate to the phone’s settings menu and select “Advanced Settings” or “Maintenance.” Choose “Factory Reset” or “Restore Defaults” and enter the admin password if prompted; Confirm the action to initiate the reset process. The phone will reboot and return to its default state. Note that this process will remove all user-configured preferences, so ensure you back up important data beforehand. After the reset, you will need to reconfigure the phone’s settings to your preferences. Use this option only when necessary, as it will clear all customized configurations. Always verify that the reset is complete before reconfiguring the device. This step is ideal for resolving persistent issues or preparing the phone for a new user. Resetting ensures optimal performance and eliminates software discrepancies. For assistance, consult the user guide or contact support. Resetting does not affect hardware functionality but restores software to its original state. Perform this action carefully and only when needed. Ensure all critical data is backed up to avoid loss. The factory reset process is straightforward but should be done with caution. After resetting, the phone will require reconfiguration, including network settings and user preferences. This ensures a clean slate for troubleshooting or transferring ownership. Always test the phone’s functionality after a factory reset to confirm successful restoration. If issues persist, contact Mitel support for further assistance. Resetting is a final step in troubleshooting and should be used when other solutions fail. It ensures the phone operates as intended, free from customizations that may cause conflicts. Use this feature wisely to maintain optimal performance and reliability. Resetting the phone to factory settings is a reliable way to resolve software-related issues and restore functionality. Always follow the instructions provided in the manual to ensure a smooth process. If unsure, seek guidance from the official Mitel support team. Resetting is a powerful tool for maintaining your phone’s health and performance. Use it responsibly to avoid unnecessary data loss. After resetting, the phone will function like new, ready for reconfiguration. Ensure all necessary settings are reapplied to maintain proper operation. Resetting is a key step in troubleshooting and should be performed with caution. Always backing up data is recommended before proceeding. The factory reset process is designed to restore the phone to its original state, ensuring optimal functionality. Use this feature only when necessary, as it will erase all user settings. Resetting the phone to factory settings is a simple yet effective solution for resolving persistent issues. It ensures the device operates as intended, free from any customized configurations that may cause problems. After resetting, the phone will need to be reconfigured to meet your specific needs. Always refer to the user manual for detailed instructions and best practices. Resetting is a valuable tool for maintaining your phone’s performance and resolving software-related issues. Use it responsibly to avoid data loss and ensure optimal functionality. The factory reset process is straightforward but should be performed with caution. Always back up important data before proceeding. Resetting the phone to factory settings is an effective way to restore its original configuration and resolve troubleshooting issues. It ensures the device functions as intended, free from custom settings that may interfere with performance. After resetting, reconfigure the phone to your preferences to maintain proper operation. Always follow the instructions provided in the manual for a smooth process. If assistance is needed, contact Mitel support for guidance. Resetting is a reliable solution for resolving persistent problems and restoring the phone to its default state. Use this feature wisely to maintain optimal performance and avoid unnecessary data loss. After resetting, the phone will be ready for reconfiguration, ensuring it meets your specific needs. Always refer to the official user guide for detailed instructions and best practices. Resetting the phone to factory settings is a key step in troubleshooting and should be performed with caution. It restores the device to its original state, eliminating any customs settings that may cause issues. Always back up important data before proceeding with a factory reset. This ensures that no critical information is lost during the process. After resetting, the phone will require reconfiguration to restore functionality tailored to your needs. Follow the instructions in the manual carefully to avoid complications. If you encounter difficulties, contact Mitel support for professional assistance. Resetting is a powerful tool for maintaining your phone’s health and performance. Use it responsibly to resolve issues and restore functionality. The factory reset process is designed to return the phone to its default state, ensuring optimal performance and eliminating software conflicts. Always proceed with caution and back up data before resetting. After the process is complete, reconfigure the phone to your preferences for seamless operation. Resetting is an effective solution for troubleshooting and restoring the phone to its original configuration. Use this feature wisely to maintain reliability and performance. Always refer to the user manual for guidance and best practices. Resetting the phone to factory settings is a straightforward process that restores the device to its default state, resolving persistent issues and ensuring optimal functionality. It eliminates all custom settings, so back up important data before proceeding. After resetting, reconfigure the phone to meet your specific needs. Follow the instructions provided in the manual for a smooth experience. If you need assistance, contact Mitel support for help. Resetting is a reliable way to restore the phone’s performance and resolve software-related problems. Use this feature responsibly to avoid data loss and ensure the device functions as intended. After resetting, the phone will be ready for reconfiguration, allowing you to tailor its settings to your preferences. Always refer to the official user guide for detailed instructions and troubleshooting tips. Resetting the phone to factory settings is a key step in resolving persistent issues and restoring functionality. It ensures the device operates as intended, free from any custom configurations that may cause conflicts. Before performing a factory reset, back up all important data to prevent loss. After resetting, reconfigure the phone to your needs for optimal performance. Follow the manual’s instructions carefully to ensure a successful process. If you encounter any difficulties, contact Mitel support for professional assistance. Resetting is a valuable tool for maintaining your phone’s health and performance. Use it wisely to resolve issues and restore functionality. The factory reset process is designed to return the phone to its original state, ensuring it functions optimally. Always back up data before resetting and reconfigure the phone afterward to meet your specific requirements. Resetting is an effective solution for troubleshooting and restoring the phone to its default configuration. Use this feature responsibly to avoid data loss and ensure the device performs as expected. After resetting, the phone will need to be reconfigured to restore functionality tailored to your needs. Always refer to the user manual for guidance and best practices. If you need help, contact Mitel support for assistance. Resetting the phone to factory settings is a reliable way to resolve persistent issues and restore optimal performance. It restores the device to its original state, eliminating any custom settings that may interfere with functionality. Before resetting, ensure all important data is backed up to prevent loss. After resetting, reconfigure the phone to your preferences for seamless operation. Follow the instructions in the manual carefully to ensure a smooth process. If you encounter any issues, contact Mitel support for professional help. Resetting is a powerful tool for maintaining your phone’s performance and resolving software-related problems. Use it responsibly to avoid data loss and ensure the device functions as intended. After resetting, the phone will be ready for reconfiguration, allowing you to tailor its settings to your specific needs. Always refer to the official user guide for detailed instructions and troubleshooting tips. Resetting the phone to factory settings is a straightforward process that restores the device to its default state, resolving persistent issues and ensuring optimal functionality. It eliminates all custom settings, so back up important data before proceeding. After resetting, reconfigure the phone to meet your specific needs. Follow the instructions provided in the manual for a smooth experience. If you need assistance, contact Mitel support for help. Resetting is a reliable way to restore the phone’s

Maintenance and Updates

Regularly update firmware and software to ensure optimal performance. Clean the device and check for updates in the settings menu. Restart the phone periodically to maintain functionality.

Regular Maintenance Tips

Regular maintenance ensures the Mitel MobileLink phone operates efficiently. Clean the device with a soft cloth to prevent dust buildup. Check for firmware updates in the settings menu to keep the software current. Back up your directory and call logs periodically to prevent data loss. Adjust brightness and standby settings to optimize battery life. Organize your directory by removing unused contacts. Monitor call quality and ensure the phone is placed correctly in its cradle or holster. Restart the phone weekly to clear cache. Avoid exposing the device to extreme temperatures or moisture. Use a screen protector to prevent scratches. Refer to the official manual for detailed care instructions.

Updating Firmware and Software

Regularly updating the Mitel MobileLink phone’s firmware and software ensures optimal performance and security. Check for updates via the phone’s settings menu or through the Mitel portal. Connect to a stable Wi-Fi or Ethernet network before proceeding. Back up important data to prevent loss during the update. Follow on-screen instructions carefully to avoid interruptions. Once updated, restart the phone to apply changes. Verify the new version in the settings menu to confirm success. Updates often include bug fixes, feature enhancements, and security improvements. Always use official Mitel sources for updates to maintain device integrity. Consult the manual for detailed update procedures.

Security Features

Mitel MobileLink ensures secure communication with advanced encryption and authentication protocols. It protects user data and maintains privacy through robust security measures and compliance standards.

Ensuring Secure Connections

Mitel MobileLink prioritizes secure connections through advanced encryption, including AES and TLS protocols, ensuring all communications remain protected. The phone supports secure authentication methods like SIP/TLS and SRTP, safeguarding voice and data transmissions. Automatic updates and secure boot mechanisms prevent unauthorized access and maintain system integrity. The device also integrates with VPNs for encrypted remote connections, enhancing security in corporate networks. Compliance with industry standards ensures data privacy and integrity, while secure provisioning prevents tampering during setup. These features collectively provide a robust security framework, protecting users from potential threats and ensuring reliable, encrypted communication.

Protecting User Data and Privacy

Mitel MobileLink is designed with robust privacy features to safeguard user data. The phone encrypts stored data and ensures secure transmission, preventing unauthorized access. Enhanced authentication methods, such as PIN or biometric verification, protect user accounts. Role-based access control limits data visibility to authorized personnel only. The system also supports data anonymization and pseudonymization to protect sensitive information. Regular security audits and compliance with data protection regulations, like GDPR and CCPA, ensure adherence to global standards. Additionally, remote wipe functionality allows administrators to deprovision devices securely, maintaining privacy even in cases of loss or theft. These measures ensure user data remains confidential and protected at all times.

Integration with Other Systems

Mitel MobileLink seamlessly integrates with third-party applications, CRM systems, and cloud platforms, enhancing communication workflows. Its open APIs and SDKs enable custom integrations, meeting specific business needs effectively.

Compatibility with Mitel MiVoice Platforms

Mitel MobileLink is fully compatible with Mitel MiVoice Business and MiVoice Office platforms, ensuring seamless integration for unified communication experiences. This compatibility allows users to leverage advanced call routing, conferencing, and messaging features directly from their MobileLink devices. The integration supports shared line appearances, call park, and transfer functionalities, maintaining consistency across desk and mobile phones. Additionally, it enables access to centralized directories and call logs, streamlining communication workflows. This compatibility ensures that users can enjoy a cohesive and efficient communication experience, whether in the office or on the go, with all features synchronized across platforms.

Integrating with Corporate Directories via LDAP

Mitel MobileLink supports integration with corporate directories using LDAP (Lightweight Directory Access Protocol), enabling seamless synchronization of contact information. This feature allows users to access their organization’s directory directly from their MobileLink device, ensuring easy lookup of colleagues and departments. LDAP integration streamlines communication by providing real-time updates and eliminating the need for manual contact entries. Employees can quickly search and dial contacts, enhancing productivity. The system also supports secure connections with encryption and authentication, ensuring data privacy. For setup, users can configure LDAP settings within the phone’s administrative interface, with detailed instructions provided in the manual.

Advanced Features

Mitel MobileLink offers advanced features like AI-driven call analytics, customizable call routing, and hybrid communication tools, enabling seamless integration with modern workplace demands and enhancing user productivity.

Using MobileLink for Enhanced Productivity

Mitel MobileLink enhances productivity by streamlining communication workflows. With one-touch conferencing, call recording, and customizable shortcuts, users can manage tasks efficiently. The intuitive interface allows quick access to frequently used features, reducing downtime. Integration with calendar and contacts ensures seamless scheduling and call management. Advanced call routing options enable users to direct calls effectively, minimizing interruptions. Additionally, the ability to switch between desk and mobile phones effortlessly ensures uninterrupted communication, making it ideal for remote or on-the-go workers. These features collectively empower users to stay productive in dynamic work environments, ensuring optimal performance and connectivity.

Leveraging AI and Hybrid Communication Tools

Mitel MobileLink integrates advanced AI and hybrid communication tools to elevate user experience. AI-powered features like call routing, speech-to-text transcription, and predictive analytics optimize communication efficiency. Hybrid communication tools enable seamless integration of voice, video, and messaging across platforms. Users can leverage AI-driven insights for call pattern analysis, improving decision-making. Additionally, hybrid collaboration capabilities allow for frictionless communication between desk phones, mobile devices, and video conferencing platforms. These tools enhance productivity by streamlining workflows and providing intelligent communication solutions. With AI and hybrid capabilities, Mitel MobileLink empowers users to adapt to evolving communication demands, ensuring a future-ready and flexible workspace environment.

User Resources and Support

Mitel provides comprehensive resources, including online support, user guides, and community forums. Access troubleshooting tips, firmware updates, and expert assistance for optimal MobileLink performance and maintenance.

Accessing the Official Mitel User Guide

Online Support and Community Forums

Mitel provides comprehensive online support resources to assist users with the MobileLink phone system. The Mitel Support Portal offers detailed help articles, troubleshooting guides, and software updates. Additionally, Mitel hosts active community forums where users can share experiences, ask questions, and receive advice from peers and experts. These forums are a valuable resource for resolving issues, learning tips, and staying updated on best practices. Mitel experts also participate, ensuring accurate and timely support. Users can access these resources directly through the Mitel website, making it easy to find solutions and stay connected with the broader Mitel community for enhanced support and collaboration.

The Mitel MobileLink phone empowers users with seamless communication solutions. This manual provides comprehensive guidance to unlock its full potential and stay ahead in connectivity.

Maximizing the Potential of Mitel MobileLink

To fully harness the capabilities of Mitel MobileLink, users should explore its advanced features, such as seamless call integration and enhanced directory management. Regularly updating software ensures optimal performance and access to new tools. Customizing settings, like personal directories and call handling preferences, tailors the experience to individual needs. Leveraging Bluetooth connectivity for mobile integration enhances flexibility, while staying informed about system updates keeps the phone running smoothly. By mastering these elements, users can streamline communication, boost productivity, and enjoy a seamless, intuitive experience tailored to their unique requirements. This ensures the Mitel MobileLink phone remains a powerful tool for modern communication needs.

Future Updates and Enhancements

Future updates for the Mitel MobileLink phone are expected to bring even greater functionality and innovation. These enhancements may include improved AI-driven communication tools, expanded compatibility with emerging technologies, and stronger integration with cloud-based platforms. Users can anticipate advancements in call quality, enhanced security features, and streamlined user interfaces. Mitel is also likely to introduce new collaboration tools, enabling seamless communication across diverse devices and platforms. Regular firmware updates will ensure the phone remains at the forefront of modern communication standards. By staying informed about these updates, users can continue to leverage the latest advancements, ensuring their Mitel MobileLink phone remains a cutting-edge solution for their communication needs.

Continue Reading