lincoln ac 225 s arc welder manual

The Lincoln AC-225-S is a reliable AC arc welder designed for versatility and durability, ideal for professionals and hobbyists. Its robust design ensures consistent performance across various welding tasks, making it a trusted choice for metal fabrication and repair work. With a focus on user-friendly operation, the AC-225-S offers adjustable settings to suit different materials and welding techniques, ensuring high-quality results. This welder is particularly popular for its ability to handle thick materials and its compatibility with a range of electrodes. The included manual provides detailed guidance for setup, operation, and maintenance, ensuring safe and effective use.

1.1 Overview of the Lincoln AC-225-S Model

The Lincoln AC-225-S is a robust AC arc welder designed for versatility and durability. It is suitable for a wide range of welding tasks, from light repair work to heavy-duty fabrication. The model is known for its reliable performance, consistent arc quality, and ease of operation. It supports various electrode types, making it adaptable to different materials and welding techniques. The welder’s compact design and portability add to its convenience, making it a popular choice for both professionals and hobbyists. The included manual provides detailed specifications and operational guidelines to ensure optimal use.

1.2 Key Features and Capabilities

The Lincoln AC-225-S features a full-range 40-225 amp selector switch, enabling precise control over welding current for consistent arc quality. It supports both AC welding and cutting, making it versatile for various applications. The welder includes overload protection to prevent damage and ensure longevity. Its durable construction and efficient cooling system allow for extended use, while the intuitive control panel simplifies operation. Additionally, it is compatible with a variety of electrodes, enhancing its adaptability for different welding tasks and materials.

Safety Precautions and Guidelines

Proper grounding and insulation are essential to prevent electrical shocks. Always use personal protective equipment, including gloves and a welding helmet, to safeguard against arcs and sparks.

2.1 Essential Safety Measures Before Operating

Before using the Lincoln AC-225-S, ensure all electrical connections are secure and properly grounded. Disconnect the power supply when not in use or during maintenance. Inspect cables and components for damage or wear. Always operate in a well-ventilated area to avoid fume inhalation. Keep loose clothing and long hair tied back, and avoid wearing jewelry that could conduct electricity. Ensure the work area is clear of flammable materials. Never touch electrical components with wet hands or while standing on a conductive surface.

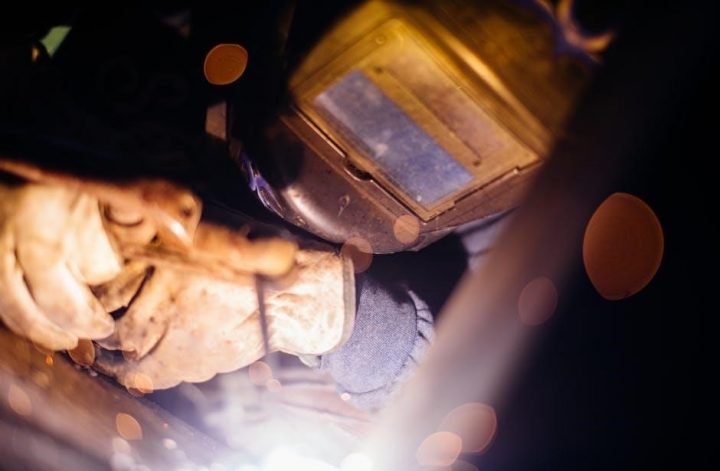
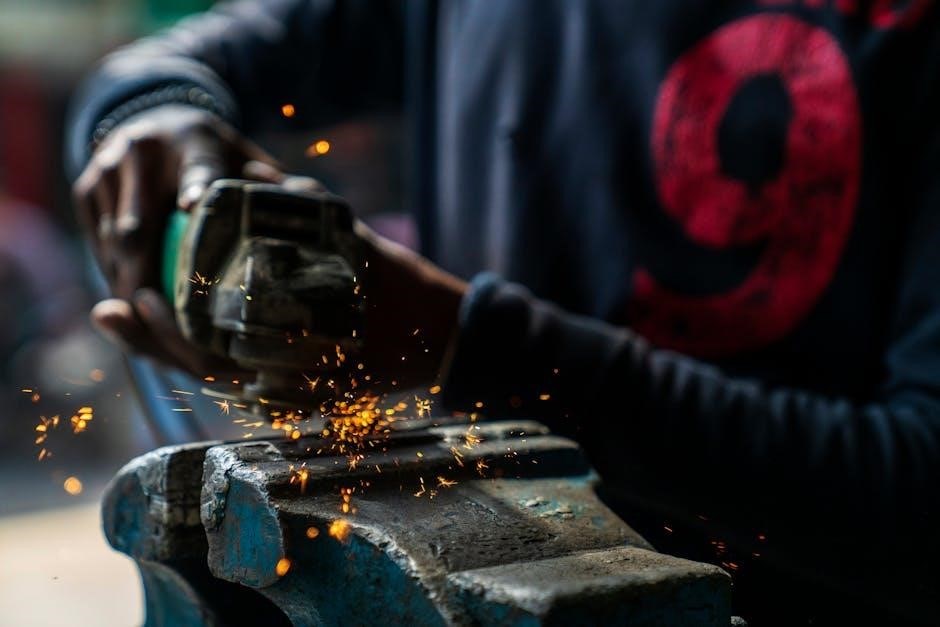
2.2 Personal Protective Equipment (PPE) Requirements

Always wear approved welding helmets with shaded lenses to protect eyes from arc flashes and UV radiation. Use heat-resistant gloves to prevent burns and ensure a secure grip on welding tools. Wear flame-resistant jackets, pants, and safety boots to minimize fire hazards. Keep clothing tight-fitting to avoid catching sparks. Ensure proper ventilation in the workspace to prevent inhaling fumes. Use PPE that meets industry safety standards for optimal protection during welding operations.

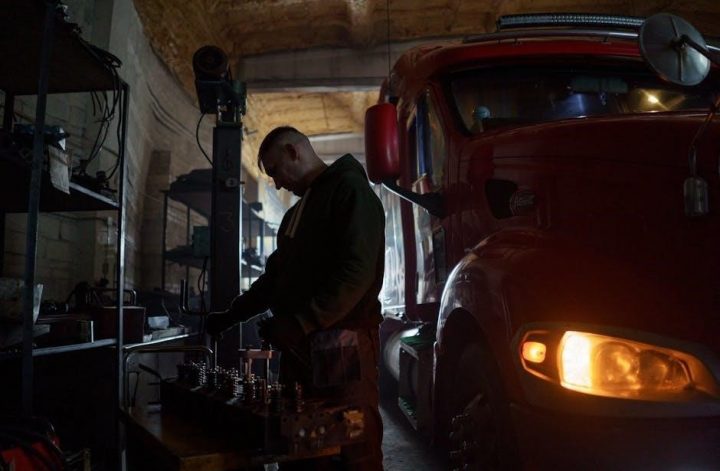
Installation and Setup Instructions

Ensure the welder is placed on a stable, heat-resistant surface with proper ventilation. Connect to a 230V, 50-amp circuit and ensure all electrical connections are secure. Ground the machine correctly to prevent electrical hazards. Keep the area clear of flammable materials and organize cables to avoid tripping. Follow manual guidelines for proper setup and safety precautions before initial use.

3.1 Electrical Requirements and Connections

The Lincoln AC-225-S requires a 230VAC, 50-amp electrical supply. Ensure the circuit is dedicated and properly rated to handle the welder’s power demands. Connect the welder to a grounded outlet to maintain safety and prevent electrical hazards. Verify all connections are secure and free from corrosion to ensure optimal performance. Avoid using extension cords unless necessary, and always follow the manual’s guidelines for wiring and electrical setup to prevent overheating or damage to the unit.

3.2 Mounting and Placement Recommendations

Mount the Lincoln AC-225-S on a level, stable surface to ensure proper operation. Ensure good airflow by placing it in a well-ventilated area, away from flammable materials. Avoid tight spaces that could restrict air circulation through the welder’s louvers and vents. Keep the unit away from direct sunlight or moisture to prevent damage. Secure the welder firmly to prevent movement during use, and ensure all electrical connections are accessible and protected from damage or interference.

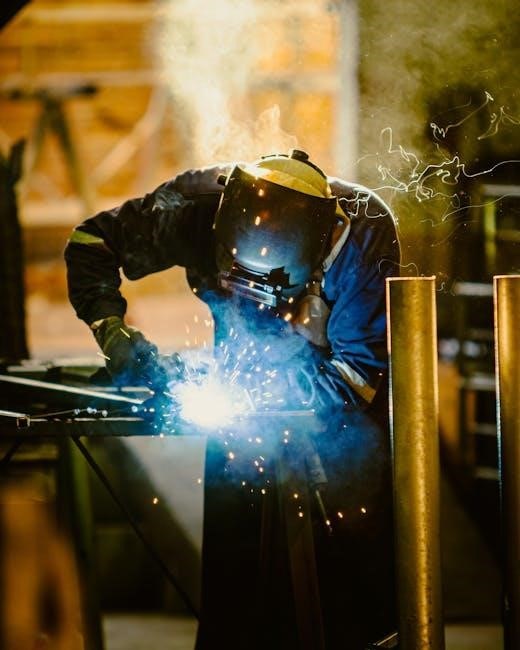
Operating Instructions for the AC-225-S

The Lincoln AC-225-S offers a full range of 40-225 amp settings for precise control. Its smooth arc technology ensures consistent weld quality, while the intuitive interface simplifies operation for both professionals and hobbyists. The welder is designed to handle various materials efficiently, providing reliable performance for Stick welding applications. Adjust settings according to material thickness and type for optimal results, leveraging its durability and versatility for demanding projects.

4.1 Understanding the Control Panel and Settings

The Lincoln AC-225-S control panel features a straightforward design with a 40-225 amp selector switch, allowing precise current adjustment. The smooth arc technology ensures consistent welds, while the dial enables easy setting of output for various materials. Operators can quickly select the desired amperage, ensuring optimal performance for different electrode types and material thicknesses. The intuitive layout simplifies operation, making it user-friendly for both novices and experienced welders. Proper adjustment of settings is key to achieving high-quality welds efficiently.

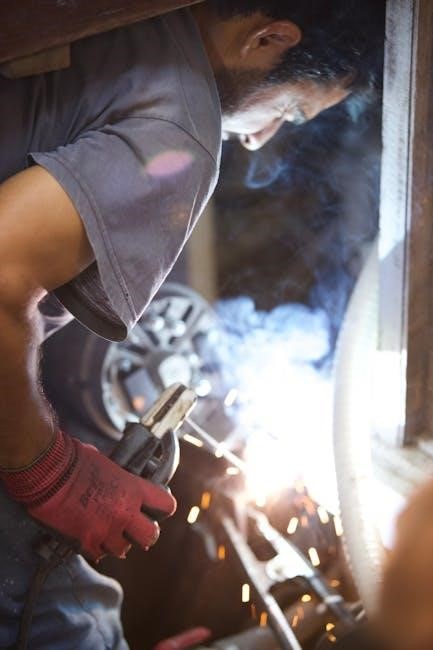
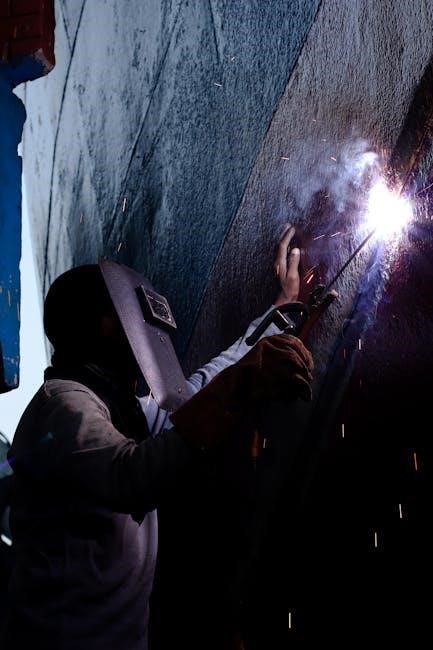
4.2 Welding Techniques and Best Practices

For optimal results with the Lincoln AC-225-S, maintain proper arc length and travel speed. Use the correct electrode type for the material being welded. Pre-clean the workpiece to ensure strong, consistent welds. Keep the electrode holder and work clamp secure to prevent electrical resistance issues. Practice good posture and ergonomics to reduce fatigue. Regularly inspect and replace worn electrodes to maintain weld quality. Always follow safety guidelines to avoid accidents and ensure reliable performance.

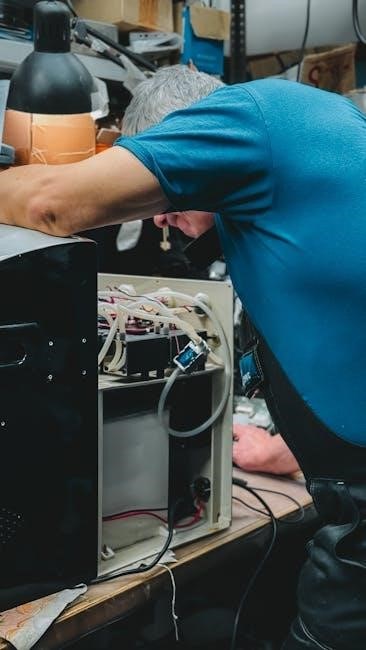
Maintenance and Troubleshooting

Regularly clean the welder’s vents and internal components to prevent dust buildup. Inspect cables and connections for damage or corrosion. Lubricate moving parts annually. Check for loose connections and tighten as needed. Address overheating by ensuring proper ventilation. For troubleshooting, refer to the manual for diagnostic steps and solutions to common issues like inconsistent arcs or power fluctuations.

5.1 Routine Maintenance Tasks

Regular maintenance is crucial for optimal performance. Clean the welder’s exterior and internal components with a soft brush to remove dust and debris. Check all electrical connections and cables for wear or corrosion, ensuring they are secure and functioning properly. Lubricate moving parts, such as fan bearings, annually to prevent overheating. Inspect the electrode holder and cable for damage, replacing them if necessary. Ensure proper ventilation by clearing airflow paths. Refer to the manual for a detailed maintenance schedule.

5.2 Common Issues and Diagnostic Steps

Common issues include no arc, inconsistent arcs, or overheating. Check power sources, cables, and connections for damage or corrosion. Ensure proper ventilation to prevent overheating. If the arc is unstable, inspect the electrode holder and cable for wear. Clean or replace faulty parts as needed. For no arc, verify the welder is turned on and all connections are secure. Refer to the manual for detailed diagnostic steps and solutions to restore optimal performance.

Welding Accessories and Consumables

The Lincoln AC-225-S requires specific welding accessories like electrodes (E6011, E6013, E7014) and consumables. Additional equipment, such as welding guns and nozzles, enhances performance and durability.

6.1 Recommended Electrodes and Wire Types

The Lincoln AC-225-S works best with electrodes like E6011, E6013, and E7014, each suited for different welding tasks. E6011 is ideal for general-purpose welding, offering strong, ductile welds. E6013 provides smooth, flat welds with minimal spatter, excellent for thin materials. E7014 excels in high-speed, all-position welding, producing consistent results. Always use high-quality consumables to ensure optimal arc performance and durability. Proper electrode selection enhances weld quality and machine efficiency, catering to various metal types and thicknesses.

6.2 Additional Equipment for Enhanced Performance

Enhancing the Lincoln AC-225-S’s performance involves adding key accessories. A wire feeder is essential for flux-cored welding, ensuring smooth wire feeding. A TIG torch kit enables precise AC welding on materials like aluminum. Cooling systems, such as a water cooler, prevent overheating during extended use. High-quality grinding and cleaning tools prepare surfaces for welding, improving results. These accessories optimize the welder’s capabilities, catering to diverse projects and ensuring professional-grade outcomes. Investing in compatible equipment enhances both performance and efficiency.

Comparison with Other Lincoln Models

The Lincoln AC-225-S differs from AC/DC models like the 225 and 125 in its AC-only functionality, offering a cost-effective solution for specific welding needs and materials.

7.1 AC-225-S vs. AC/DC 225/125 Models

The Lincoln AC-225-S differs from the AC/DC 225/125 models primarily in its AC-only operation, while the latter offers both AC and DC welding capabilities. The AC-225-S is ideal for welding aluminum and other materials requiring AC current, making it a cost-effective choice for specific tasks. In contrast, the AC/DC models provide greater versatility, supporting a broader range of welding techniques and materials, especially for applications requiring DC current, such as steel welding. This makes the AC/DC models preferable for professionals needing flexibility.

7.2 Upgrading from Older Models

Upgrading from older models to the Lincoln AC-225-S offers enhanced performance and reliability. Newer models like the Hobart Stickmate AC/DC provide advanced features such as DC welding capability, improved arc stability, and better duty cycles. Upgrading ensures access to modern technologies, reducing maintenance and increasing efficiency. For those seeking versatility, newer models often support both AC and DC welding, making them ideal for diverse projects. This upgrade path is recommended for users needing advanced welding capabilities and long-term durability.

Resources and Support

Access official Lincoln AC-225-S manuals online for detailed guides and troubleshooting. Join welding forums and communities for peer support and expert advice. Lincoln Electric also provides dedicated customer service for inquiries and technical assistance, ensuring optimal performance and resolving issues efficiently. These resources help users maximize their welding experience and maintain equipment longevity.

8.1 Accessing the Official Manual and Guides

The official Lincoln AC-225-S manual is available online, providing comprehensive instructions for setup, operation, and maintenance. Refer to page 6 for installation details and page 7 for operational guidelines. The manual includes troubleshooting tips, safety precautions, and warranty information. It is essential for understanding the welder’s capabilities and ensuring safe usage. Download the PDF from Lincoln Electric’s official website or access it through their customer support portal for accurate and detailed guidance. Regularly updated, it remains a vital resource for optimal performance. Always consult the manual before performing any adjustments or repairs to avoid damage or injury. By following the manual’s instructions, users can maximize the welder’s efficiency and longevity. This resource is indispensable for both novice and experienced welders, offering clear, step-by-step instructions tailored to the AC-225-S model. Ensure you have the latest version for the most accurate information.Online communities and forums also provide additional support and user-generated guides, but the official manual remains the primary source for reliable information. It is recommended to keep a printed or digital copy handy for quick reference during welding projects. The manual’s troubleshooting section is particularly useful for diagnosing common issues, such as inconsistent arcs or overheating, and provides solutions to get the welder functioning properly. Familiarizing yourself with the manual ensures you can fully utilize the welder’s features and maintain it effectively. Lincoln Electric’s commitment to providing thorough documentation reflects their dedication to user satisfaction and safety. Use the manual to explore advanced welding techniques and customize settings for specific materials. This guide is your go-to resource for mastering the Lincoln AC-225-S and achieving professional-grade welds.

8.2 Online Communities and Forums for Support

Online forums and communities offer valuable support for Lincoln AC-225-S users, providing practical advice and troubleshooting tips. Websites like Yesterday’s Tractor Co. and welding enthusiast forums feature discussions on maintenance, upgrades, and common issues. Users share experiences, such as resolving overheating problems or optimizing arc performance. These platforms are ideal for connecting with experienced welders and gaining insights into maximizing the welder’s capabilities. They complement the official manual with real-world applications and solutions, fostering a supportive environment for both novices and professionals. Active participation can enhance your welding skills and problem-solving abilities.

The Lincoln AC-225-S arc welder is a dependable and versatile tool for both professionals and hobbyists. Its durability, consistent performance, and ease of use make it a valuable addition to any workshop. With proper maintenance and adherence to safety guidelines, this welder delivers excellent results. The comprehensive manual and active online communities provide robust support, ensuring users can troubleshoot and optimize their welding experience; Overall, the Lincoln AC-225-S remains a reliable choice for achieving high-quality welds across various projects.

Continue Reading

chpn study guide

The CHPN Study Guide is a comprehensive resource designed to help nurses excel in hospice and palliative care․ It features evidence-based principles, practice questions, and real-world case studies․

With expert advice and detailed explanations, this guide ensures nurses are well-prepared for the certification exam and delivers practical insights for improving patient care․

Overview of the Certified Hospice and Palliative Nurse (CHPN) Certification

The Certified Hospice and Palliative Nurse (CHPN) certification is a professional credential for nurses specializing in end-of-life care․ It validates expertise in managing life-limiting conditions, pain, and symptoms, while addressing patient and family needs․ Offered by the Hospice and Palliative Nurses Association (HPNA), the certification requires passing a 150-question multiple-choice exam within a 3-hour timeframe․ The exam focuses on domains such as pain management, symptom control, and holistic patient care․ It is designed for experienced RNs committed to delivering compassionate, evidence-based care in hospice and palliative settings․

Importance of the CHPN Study Guide for Exam Preparation

The CHPN Study Guide is an essential tool for nurses preparing for the certification exam․ It provides a structured approach to mastering key concepts, with evidence-based principles and case studies․ The guide includes practice questions and detailed rationales, helping candidates identify knowledge gaps and improve test-taking skills․ By focusing on critical areas like pain management, symptom control, and patient care, the study guide ensures a comprehensive understanding of hospice and palliative nursing․ It serves as a valuable resource for both experienced professionals and those new to the field, enhancing their readiness for the certification exam․

Understanding the CHPN Exam Structure

The CHPN exam is a 3-hour, 150 multiple-choice question assessment, with 15 unscored questions․ It evaluates expertise in hospice and palliative care through computer-administered testing via PSI/AMP․

Exam Format: Multiple Choice Questions and Time Limit

The CHPN exam consists of 150 multiple-choice questions, with 15 unscored pretest items․ Candidates have a 3-hour time limit to complete the exam․ The questions assess clinical knowledge and application in hospice and palliative care․ The exam is computer-administered through PSI/AMP at one of over 200 testing locations nationwide․ Proper time management is essential, as the format requires careful planning to answer all questions within the allotted time․ This structured approach ensures a fair and consistent evaluation of each candidate’s expertise․

Key Domains of Practice: Life-Limiting Conditions, Pain Management, Symptom Management, Patient and Family Care

The CHPN exam focuses on four core domains of hospice and palliative nursing․ Life-limiting conditions emphasize comprehensive care for patients nearing end-of-life․ Pain management involves advanced assessment and intervention strategies․ Symptom management covers both physical and emotional distress․ Patient and family care addresses psychosocial support, communication, and shared decision-making․ These domains reflect the critical skills required for holistic care, ensuring nurses are proficient in addressing the complex needs of patients and their families․ Mastery of these areas is essential for effective practice and exam success․

Comprehensive Review of Hospice and Palliative Nursing Concepts

This section provides an in-depth review of advanced care topics, including managing complex conditions, ethical considerations, and cultural sensitivity in end-of-life care․

Evidence-Based Principles and Case Studies

This section delves into evidence-based nursing practices, supported by real-world case studies․ It covers pain management, symptom control, and ethical decision-making, aligning with current clinical guidelines․ Expert contributors provide insights into complex patient scenarios, ensuring practical application of knowledge․ The content is enriched with detailed rationales and outcomes, helping nurses apply theories to actual care situations․ These case studies also prepare candidates for exam questions, as they mirror the types of scenarios encountered on the CHPN certification test․ This approach enhances both clinical competence and test-taking confidence;

Advanced Skills and Issues in Hospice and Palliative Care

This section focuses on advanced competencies required in hospice and palliative nursing, addressing complex patient scenarios and emerging challenges․ It explores pain management strategies, ethical dilemmas, and cultural sensitivity in end-of-life care․ The guide also covers psychosocial support for patients and families, emphasizing holistic approaches․ Advanced communication techniques and collaborative care models are highlighted, along with managing challenging symptoms․ Expert insights and practical tips help nurses navigate these advanced issues, ensuring they are equipped to provide compassionate, patient-centered care in diverse settings․

Practice Questions and Test-Taking Strategies

This section offers 150 multiple-choice practice questions aligned with the CHPN exam format, covering key domains like pain management and symptom control․ It includes strategies to improve test performance․

Sample Questions and Rationale for Correct Answers

The study guide includes 48 sample questions with detailed rationales for correct and incorrect answers, covering topics like pain management and symptom control․ These questions mirror the actual exam format, helping candidates understand their strengths and weaknesses․ Case-based scenarios are also provided to enhance critical thinking and application of knowledge․ The rationales offer in-depth explanations, ensuring learners grasp the underlying principles of hospice and palliative care․ This feature is invaluable for targeted study and improving test-taking confidence․

Techniques to Improve Test Performance

The study guide provides actionable strategies to enhance test-taking skills, such as time management and question prioritization․ Techniques include eliminating incorrect answers, identifying key terms, and practicing under timed conditions․ These methods help candidates stay focused and calm during the exam․ Additionally, the guide offers tips on reviewing rationales for sample questions, which improves understanding and reduces test anxiety․ By mastering these techniques, nurses can approach the CHPN exam with confidence and maximize their performance․

Recommended Study Resources

Key resources include the Core Curriculum for Hospice and Palliative Registered Nurses and Mometrix study tools․ HPNA educational materials and practice exams are also essential for success․

  • Mometrix CHPN Study Guide with flashcards and video tutorials․
  • HPNA Handbook for detailed exam preparation and guidelines․

These resources provide a well-rounded approach to understanding hospice and palliative care principles․

Textbooks: Core Curriculum for Hospice and Palliative Registered Nurses

The Core Curriculum for Hospice and Palliative Registered Nurses is a foundational textbook designed to enhance understanding of palliative care principles․ It covers essential topics like pain management, symptom control, and patient-family care․ This evidence-based resource is often paired with the CHPN study guide to provide in-depth knowledge․ Updated regularly, it includes case studies and practice questions to reinforce learning․ Nurses preparing for certification find it invaluable for mastering complex concepts and applying them in real-world scenarios․ Its comprehensive approach ensures a strong foundation for exam success and clinical practice․

Online Resources: HPNA Educational Materials and Mometrix Study Tools

HPNA offers extensive online resources, including a study guide and practice exams, to help nurses prepare for the CHPN certification․ Mometrix provides additional support with flashcards, video tutorials, and detailed lessons․ These tools cover critical concepts like pain management and symptom control․ Mometrix’s CHPN Exam Secrets guide includes 600 practice questions and 51 lessons, ensuring comprehensive exam preparation․ Both resources are designed to enhance understanding and improve test-taking skills, making them invaluable for nurses aiming to succeed in their certification journey․

Study Tips for Success

Develop a structured study schedule, utilize active learning techniques, and join study groups to enhance retention․ Prioritize self-care and maintain a balanced work-study routine for optimal focus․

Time Management and Effective Study Habits

Effective time management is crucial for successful CHPN exam preparation․ Allocate specific time slots for each domain, focusing on life-limiting conditions, pain, and symptom management․ Use flashcards and practice questions to reinforce concepts․ Prioritize active learning, like summarizing key points, to enhance retention․ Incorporate regular breaks to maintain focus and avoid burnout․ A structured study plan ensures comprehensive coverage of all exam topics while balancing work and personal life․

Advice from Experienced CHPN Nurses

Experienced CHPN nurses emphasize the importance of clinical experience and focused studying․ Prioritize understanding core concepts over memorization, as this enhances critical thinking during the exam․ Join study groups to discuss challenging topics and gain diverse perspectives․ Utilize practice exams to identify weak areas and refine test-taking strategies․ Stay updated with the latest evidence-based practices in palliative care․ Lastly, maintain confidence and trust in your preparation—your hands-on experience and dedication will shine through on exam day․

Final Exam Preparation

Ensure thorough review of all domains, focusing on weak areas identified during practice․ Employ test-taking strategies, manage time effectively, and remain calm to maximize performance on exam day․

Registration Process and Exam Fees

The CHPN exam fees are $305 for HPNA members and $445 for non-members․ A reTEST Assured fee of $125 applies for retakes․ Members can access discounted rates by joining HPNA, which offers various membership categories․

Registration is managed through HPNA, with detailed instructions provided on their official website; Ensure all eligibility criteria are met before applying․ Contact HPNA for membership inquiries or fee verification․

Final Review and Strategies for Exam Day

On exam day, arrive early and remain calm․ Review key concepts using flashcards or summaries․ Time management is crucial; allocate minutes per question to avoid running out of time․ Practice with sample questions to build confidence and familiarize yourself with the format․

Stay focused and read each question carefully․ Eliminate incorrect answers to increase chances of selecting the right one․ Utilize the process of elimination and trust your preparation․ A well-rested and positive mindset will enhance performance․

Continue Reading

honda odyssey 2015 user manual

Welcome to the official user manual for the 2015 Honda Odyssey, your comprehensive guide to understanding and maintaining your vehicle. This manual provides essential information.

From maintenance schedules to advanced features, it ensures a safe and enjoyable driving experience. Refer to this manual for detailed instructions and recommendations.

Purpose and Structure of the Manual

The 2015 Honda Odyssey User Manual is designed to provide owners with comprehensive guidance on operating, maintaining, and troubleshooting their vehicle. It is structured into logical sections, covering essential topics such as safety features, maintenance schedules, and customization options. The manual aims to enhance the driving experience by offering clear, step-by-step instructions and helpful tips. Each section is organized to ensure easy navigation, making it a valuable resource for both new and experienced drivers. This guide empowers owners to optimize their Odyssey’s performance and longevity effectively.

Key Features of the 2015 Honda Odyssey

The 2015 Honda Odyssey stands out with its versatile design and innovative features. It offers a spacious interior, seating up to eight passengers, and includes multi-configurable seating options. The vehicle features a powerful V6 engine, delivering smooth performance and efficient fuel economy. Advanced safety features like the Multi-Angle Rearview Camera and ACE body structure enhance protection. Additionally, the Odyssey includes entertainment systems, such as a built-in DVD player, ensuring comfort for all passengers. These features make it a reliable choice for families and long-distance travelers alike, combining practicality with modern technology.

Important Safety Information

Always wear seat belts and ensure proper airbag functionality. Follow maintenance schedules to prevent mechanical failures. Adhere to guidelines to minimize risks and ensure safe vehicle operation.

Seat Belt and Airbag Systems

The Honda Odyssey 2015 is equipped with advanced safety features, including a robust seat belt system and airbag network. Proper seat belt use is critical for passenger safety. Ensure all occupants wear seat belts correctly, with the lap belt snug across the hips and the shoulder belt across the chest. The vehicle features front, side, and curtain airbags designed to deploy in specific collision scenarios. Never tamper with the airbag system, as this can compromise safety. Always check the dashboard for airbag warning lights and address issues promptly to ensure optimal protection. Regular inspection of seat belts and airbags is essential for reliability.

Vehicle Safety Features and Precautions

The 2015 Honda Odyssey includes advanced safety features like Vehicle Stability Assist (VSA) and Electronic Brake Distribution (EBD) to enhance control and braking performance. The Tire Pressure Monitoring System (TPMS) alerts drivers to underinflated tires, improving safety and efficiency. Always ensure proper cargo loading to avoid shifting weights that could affect stability. Avoid modifications that compromise safety systems. Never ignore dashboard warnings, as they indicate potential issues requiring immediate attention. Proper maintenance of brakes and suspension is crucial for reliable operation. Always follow recommended guidelines to ensure the vehicle operates safely under all conditions.

Maintenance and Service Schedule

The 2015 Honda Odyssey requires routine maintenance, including oil changes every 5,000 miles and transmission fluid replacements every 15,000-30,000 miles. Tire rotations and brake inspections should be done regularly. Proper servicing ensures longevity and optimal performance. Always consult the owner’s manual for detailed schedules and guidelines.

Recommended Maintenance Intervals

Regular maintenance is crucial for the 2015 Honda Odyssey. Oil changes are recommended every 5,000 miles, while tire rotations should occur every 6,000-8,000 miles. The transmission fluid should be replaced every 15,000-30,000 miles. Brake pads and rotors should be inspected every 12,000 miles. Spark plugs need replacement at 30,000 miles, and the timing belt should be replaced at 90,000 miles. Adhering to these intervals ensures optimal performance, prevents costly repairs, and prolongs the vehicle’s lifespan. Always consult the owner’s manual for detailed guidelines and specific recommendations.

Transmission Fluid and Timing Belt Replacement

Transmission fluid replacement for the 2015 Honda Odyssey is recommended every 15,000 to 30,000 miles to maintain smooth gear transitions. The timing belt should be replaced at 90,000 miles to prevent engine damage. Always use OEM or equivalent parts to ensure reliability. Proper replacement requires consulting the manual for exact procedures. Neglecting these services can lead to costly repairs. Check for any recalls related to these components and follow the manufacturer’s guidelines for optimal performance and longevity of your vehicle.

Diagnostics and Troubleshooting

Use the 2015 Honda Odyssey manual to identify dashboard warning lights, reset service lights, and address common issues like timing belt failure or transmission leaks promptly.

Understanding Dashboard Warning Lights

The 2015 Honda Odyssey dashboard features various warning lights indicating system status or potential issues. Common lights include the oil pressure, battery, and engine lights. Each light corresponds to specific conditions, such as low oil levels or engine faults. Refer to your manual for detailed explanations and troubleshooting steps. Addressing illuminated warnings promptly can prevent serious damage. If unsure, consult a certified mechanic or Honda service center for professional assistance. Regular checks ensure your vehicle operates safely and efficiently.

Resetting Service Lights and Common Issues

Resetting service lights on your 2015 Honda Odyssey can be done by disconnecting the battery or using a scan tool. Common issues include the oil maintenance light, which illuminates after oil changes. To reset, press and hold the odometer button while turning the ignition. For other lights, refer to your manual or a professional. Addressing issues promptly prevents damage. If a light persists, check for underlying problems, such as a loose gas cap or vacuum leaks, and ensure proper repairs are made. Always consult the manual or a certified technician for assistance.

Customization and Settings

Customize your 2015 Honda Odyssey settings to personalize your driving experience. Adjust preferences for audio, climate, and convenience features through the dashboard controls. Consult your manual for guidance on disabling telemetry and tracking features to maintain privacy and control over vehicle data. Explore settings to enhance comfort and functionality, ensuring your Odyssey is tailored to your needs and preferences.

Adjusting Vehicle Settings and Preferences

Adjust your 2015 Honda Odyssey settings to suit your preferences. Use the dashboard controls to customize seat positions, mirror adjustments, and climate settings. The manual provides guidance on personalizing audio, navigation, and convenience features. Explore options for tailoring your driving experience, such as steering wheel adjustments and display settings. Ensure all preferences are set according to your comfort and driving style for an optimal journey. Refer to the manual for detailed instructions on accessing and modifying these settings effectively.

Disabling Tracking and Telemetry Features

To disable tracking and telemetry features in your 2015 Honda Odyssey, consult the owner’s manual for specific instructions. Some users opt to deactivate GPS and data-sharing settings for privacy. Navigate to the settings menu, deselect data-sharing options, and confirm changes. For advanced features, consider consulting a professional mechanic. Note that disabling certain features may affect connected services or emergency systems. Ensure compliance with manufacturer guidelines and local regulations when modifying these settings.

Fuel Efficiency and Performance Tips

Optimize fuel efficiency by maintaining proper tire pressure, driving steadily, and avoiding rapid acceleration. Regular maintenance ensures engine performance and maximizes mileage. Keep your Odyssey tuned.

Optimizing Fuel Economy

To maximize fuel efficiency in your 2015 Honda Odyssey, ensure proper tire pressure, avoid aggressive driving, and maintain a consistent speed. Regular oil changes and air filter replacements are crucial. Remove unnecessary weight from the vehicle and plan routes to minimize stop-and-go traffic. Use cruise control on highways and avoid idling for extended periods. Check for any vacuum leaks or gas cap issues, as these can affect mileage. Proper maintenance and driving habits will help you achieve optimal fuel economy and performance.

Engine Break-In and Performance Recommendations

For the 2015 Honda Odyssey, proper engine break-in involves avoiding high RPMs and rapid acceleration during the first 500 miles. Drive in varying conditions to help the piston rings seat properly. To maintain performance, keep engine RPMs moderate, avoid extreme temperatures, and ensure regular transmission fluid changes. Deactivating the Variable Cylinder Management (VCM) can also improve engine longevity. Avoid aggressive driving and adhere to recommended maintenance schedules. Use high-quality oil and filters to keep your engine running smoothly and efficiently over time.

Winter and Seasonal Preparation

Prepare your 2015 Honda Odyssey for cold weather by checking coolant, antifreeze, and tire pressure; Inspect the battery condition and ensure windshield fluid is rated for freezing temperatures.

Preparing Your Odyssey for Cold Weather

Ensure your 2015 Honda Odyssey is winter-ready by inspecting the cooling system, antifreeze levels, and battery condition. Check tire pressure and consider installing winter tires for improved traction. Replace windshield fluid with a freeze-resistant formula and inspect wiper blades for optimal visibility. Test the heating system to ensure proper function. Store an emergency kit with blankets, gloves, and a flashlight in the vehicle. Refer to your manual for specific guidelines on preparing your Odyssey for cold weather conditions and safe winter driving practices.

Winter Driving Tips and Safety Measures

When driving your 2015 Honda Odyssey in cold weather, reduce speed and increase following distance to account for reduced traction. Avoid sudden acceleration or braking, as this can lead to skidding. Use low beam headlights in snowy or icy conditions to improve visibility for other drivers. Keep a safe distance from snowplows and never pass them. Always wear seat belts and ensure passengers do the same. Keep an emergency kit in the vehicle, including blankets, a flashlight, and ice scraper. Stay alert and avoid driving in extreme weather conditions if possible.

Warranty and Support Information

Your 2015 Honda Odyssey is backed by a comprehensive warranty. Visit owners.honda.com for details or contact Honda customer support for assistance and resources.

Understanding Your Vehicle’s Warranty

Your 2015 Honda Odyssey is protected by a comprehensive warranty program. The bumper-to-bumper warranty typically covers parts and labor for 3 years or 36,000 miles, while the powertrain warranty extends to 5 years or 60,000 miles. Additional coverage includes corrosion protection and emissions-related components. Proper maintenance, as outlined in the manual, is essential to ensure warranty validity. For detailed terms and conditions, visit owners.honda;com or consult your local Honda dealership.

Accessing Honda Support and Resources

For assistance with your 2015 Honda Odyssey, visit the official Honda website at owners.honda.com. Here, you can access digital versions of your owner’s manual, warranty information, and maintenance schedules. Additionally, Honda offers a dedicated customer support hotline for inquiries. Engaging with Honda-authorized dealerships ensures personalized service and genuine parts. Online forums like odyclub.com also provide valuable community insights and troubleshooting tips from experienced Odyssey owners.

Continue Reading

one dnd playtest pdf

The One D&D Playtest is a groundbreaking initiative by Wizards of the Coast, refining the next edition of Dungeons & Dragons through player feedback.

Overview of the Playtest Initiative

The One D&D Playtest Initiative is a comprehensive program designed to refine the next iteration of Dungeons & Dragons through extensive player feedback. Wizards of the Coast releases periodic playtest documents, such as Playtest 5, 6, and 7, which introduce new classes, class revisions, and rule changes. These documents are part of the Unearthed Arcana series, offering experimental content for players to test and provide feedback on. The initiative focuses on updating core classes like the Bard, Cleric, Druid, and Paladin, while also introducing new mechanics, such as the Psion class and Energy Dice system. Players can access these materials via D&D Beyond, with feedback collected through surveys to shape the final version of the game.

Purpose and Goals of the Playtest PDF

The primary purpose of the One D&D Playtest PDFs is to gather player feedback to refine and improve the game’s upcoming iteration. These documents, released periodically, introduce new and revised content, such as classes, subclasses, spells, and mechanics, for players to test in actual campaigns. By providing detailed feedback through surveys, players help shape the final version of the game. The PDFs are experimental, offering insights into potential changes while allowing Wizards of the Coast to assess balance, clarity, and overall player satisfaction. This iterative process ensures that the next edition of D&D reflects the community’s needs and preferences, making it a collaborative and player-driven development journey.

The One D&D Playtest introduces the Psion class, a mind-bending magic user harnessing psionics through an Energy Dice system. Feedback for this class ended on June 3rd, 2025.

The Psion Class: Mechanics and Features

The Psion class introduces a fresh take on psionic magic, leveraging an Energy Dice pool to fuel abilities. This system allows players to allocate dice to various psionic powers, offering flexibility in combat and exploration. Wild Talents, such as Telekinesis or Cryokinesis, provide unique abilities, enhancing the class’s versatility. The Psion’s design emphasizes mental resilience and adaptability, with features that reward creative problem-solving. Feedback for this class was collected until June 3rd, 2025, shaping its final form in the upcoming Players Handbook. This innovative class brings new strategic depth to D&D, appealing to fans of psychic and mystical playstyles.

Energy Dice System: A New Approach to Magic

The Energy Dice System revolutionizes magic by replacing traditional spell slots with a dynamic dice pool. Players allocate dice to powers, enabling flexible spellcasting and strategic decision-making. This system allows for varied effects, from precise manipulations to overwhelming bursts, enhancing gameplay depth. It encourages creative problem-solving and adaptability, making each encounter unique. The Energy Dice System debuts in the Psion class, offering a fresh take on magical mechanics. This innovative approach streamlines resource management while expanding tactical options, providing a more intuitive and engaging experience for players.

Updates to Existing Classes

The One D&D Playtest introduces significant updates to core classes like Bard, Cleric, and Druid, refining their abilities and balancing gameplay mechanics for enhanced playability.

Revisions to Bard, Cleric, Druid, and Other Core Classes

The One D&D Playtest revises core classes like Bards, Clerics, and Druids, adjusting spell lists, class features, and ability progression. Bards gain new performance options, while Clerics see tweaks to Domain abilities. Druids experience changes in Wild Shape mechanics, offering more flexibility. These updates aim to balance and enhance gameplay, ensuring each class feels unique and dynamic. Feedback from playtesters is crucial in shaping these revisions, ensuring the final version meets player expectations and improves overall game satisfaction.

Subclass Overhauls: Paladin, Ranger, and Rogue

The One D&D Playtest introduces significant overhauls to subclasses for Paladins, Rangers, and Rogues. Paladins see adjustments to their oath abilities and smite mechanics, enhancing divine playstyles. Rangers gain improved exploration tools and pet companions, refining their wilderness expertise. Rogues receive tweaks to Sneak Attack and new ways to leverage Cunning Action, emphasizing stealth and agility. These changes aim to balance and diversify subclass options, ensuring each feels distinct and impactful. Feedback from playtesters is instrumental in refining these updates, ensuring the subclasses meet player expectations for fun and viability in the next edition of the game.

Feedback and Iteration Process

Wizards of the Coast gathers feedback through surveys and forums, driving iterative improvements. Community input shapes the game, ensuring balance and polish.

How Wizards of the Coast Uses Playtester Input

Wizards of the Coast actively collects feedback from playtesters through surveys and forums, ensuring player insights shape the game’s development. This iterative process involves analyzing feedback to identify trends, balance issues, and areas for improvement. Playtester input directly influences class mechanics, spell adjustments, and overall game design. For example, feedback from Playtest 7 led to refined adjustments, while earlier playtests informed changes to core classes and subclasses. The company prioritizes transparency, sharing updates and acknowledging community contributions. This collaborative approach ensures One D&D reflects the preferences and needs of its players, fostering a game that is both balanced and enjoyable.

  • Feedback is gathered through surveys and forums.
  • Input shapes class mechanics and spell adjustments.
  • Playtest 7 adjustments reflect community feedback.
  • Transparency is key, with regular updates shared.

Key Changes Based on Feedback

Based on playtester input, several significant changes have been implemented in the One D&D playtest materials. One notable adjustment is the revision of spellcasting mechanics, particularly for classes like the Cleric and Druid, ensuring better balance and clarity. Feedback also led to tweaks in core class features, such as the Bard’s Inspiration system and the Rogue’s Sneak Attack. Additionally, playtesters influenced changes to the Energy Dice system for the Psion class, making it more intuitive and accessible. Subclass overhauls, like the Paladin’s Oath of the Ancients, were refined to address power disparities. These changes reflect Wizards of the Coast’s commitment to incorporating community feedback to enhance gameplay and satisfaction.

  • Spellcasting mechanics revised for balance.
  • Core class features adjusted based on feedback.
  • Energy Dice system refined for clarity.
  • Subclass overhauls addressed power disparities.

Playtest Document Highlights

The One D&D playtest documents introduce the Psion class, revise core classes, and refine spellcasting mechanics, offering a comprehensive look at the game’s future direction and improvements.

Playtest 5: Major Updates and Additions

Playtest 5 introduces significant updates to the One D&D system, including new class mechanics and spell revisions. The Psion class debuts, utilizing the innovative Energy Dice system. This playtest also features adjustments to core classes like the Bard, Cleric, and Druid, enhancing their balance and playability. Feedback from players has shaped these changes, ensuring a more polished and engaging experience. Wizards of the Coast continues to refine the game through iterative playtesting, incorporating community input to shape the future of D&D. This document highlights the major additions and modifications, offering a glimpse into the evolving design of One D&D.

Playtest 6: Spell and Weapon Revisions

Playtest 6 focuses on refining spells and weapons, addressing balance and clarity. Changes include updates to spell lists, adjustments to weapon properties, and revisions to multiclassing rules. For example, the rounding rules for spell slots in multiclass builds now round up, improving accessibility for hybrid characters. Additionally, weapon starting equipment for certain classes, like the Bard, has been corrected to remove inconsistencies. Feedback from players has influenced these tweaks, ensuring a more cohesive and balanced gameplay experience. This playtest also introduces minor adjustments to subclass features, such as the Eldritch Knight’s spellcasting abilities. These revisions aim to enhance the overall playability and fairness of the game.

Playtest 7: Final Adjustments and Polish

Playtest 7 marks the culmination of the One D&D playtest cycle, focusing on final tweaks and refinements. This document incorporates extensive player feedback, fine-tuning classes, subclasses, and spells. Notable changes include adjustments to the Fate Domain subclass for clerics, offering clerics more influence over fortune and destiny. Additionally, the Pact of the Blade feature now allows greater flexibility, with no restrictions on weapon types and the addition of Mastery benefits. Healing mechanics have also been enhanced, making dedicated healers more viable. Playtest 7 ensures a balanced and polished experience, addressing minor inconsistencies and clarifying ambiguous rules. These adjustments reflect Wizards of the Coast’s commitment to a refined and cohesive final product.

Continue Reading

character sheet 5e pdf

A Dungeons & Dragons 5e character sheet is a essential tool for players to organize and track their character’s stats, skills, and equipment․ Available as fillable PDFs, these sheets simplify character creation and customization, offering a user-friendly way to manage your hero’s journey in D&D campaigns․

  • Official and community-created options available․
  • Fillable formats for easy digital editing․
  • Customizable to suit any player’s needs․

Official Sources

The official Dungeons & Dragons 5th Edition character sheet is widely available from trusted sources․ Wizards of the Coast, the creators of D&D, provide a free, downloadable PDF version of the character sheet on their website․ This sheet is fillable, allowing players to easily input and edit their character’s details digitally․ It covers all essential aspects of character creation, including ability scores, skills, equipment, and class features․

In addition to the basic sheet, official sources offer specialized versions tailored for specific campaigns or player needs․ For example, the Starter Set and adventures like Dragons of Stormwreck Isle include pre-made character sheets designed to streamline the creation process for new players․ These sheets are often available as zipped PDF files, ready for printing or digital use․

Official character sheets are also available through platforms like D&D Beyond, which provides interactive tools to build and manage characters․ These resources ensure compatibility with the latest updates and expansions, making them a reliable choice for both new and experienced players․

  • Official D&D 5e character sheet from Wizards of the Coast․
  • Starter Set and adventure-specific sheets․
  • Fillable PDFs for easy customization․
  • Availability through D&D Beyond and other official platforms․

Using official sources guarantees accuracy and adherence to the game’s rules, providing a solid foundation for your D&D journey․

Fillable Character Sheets

Fillable character sheets for D&D 5e are a convenient and time-saving option for players who prefer digital character management․ These sheets allow users to input and edit information directly within PDF documents, eliminating the need for handwritten notes․ Official and community-created fillable sheets are widely available, offering a range of designs and features․

Tools like Adobe Acrobat Reader or online PDF editors enable players to type directly into the sheets, ensuring legibility and ease of use․ Some fillable sheets are also available in spreadsheet formats, compatible with Excel or Google Sheets, making it easy to calculate stats and track inventory․ Many of these sheets are form-fillable, with checkboxes and dropdown menus for streamlined data entry․

Popular options include the official D&D 5e character sheet PDF from Wizards of the Coast, as well as community creations like MorePurpleMoreBetter’s automated character record sheets․ These resources often include advanced features like automated skill modifiers, spell trackers, and equipment lists․ Fillable sheets are ideal for both new players and veterans, providing a flexible and organized way to manage characters digitally․

  • Editable PDFs for digital character management․
  • Compatibility with PDF editors and spreadsheets․
  • Form-fillable designs with checkboxes and dropdowns․
  • Official and community-created options available․

Fillable sheets are a modern and efficient way to handle character creation and progression in D&D 5e․

Design Variations

D&D 5e character sheets come in a wide array of designs, catering to different preferences and playstyles․ Whether you’re a veteran player or a newcomer, there’s a sheet design to suit your needs․ Official sheets from Wizards of the Coast offer a clean, minimalist layout, while community creations often feature elaborate artwork and thematic designs․

Some sheets are tailored for specific campaigns or settings, such as futuristic-themed sheets for sci-fi adventures or medieval-style designs for traditional fantasy․ Others focus on accessibility, like dyslexia-friendly sheets with clear fonts and high contrast․ Additionally, there are sheets designed specifically for new players, simplifying complex rules and emphasizing essential information․

  • Official sheets with clean, professional layouts․
  • Community-created sheets with unique artwork and themes․
  • Accessible designs for players with special needs․
  • Themed sheets for specific campaign settings․

For example, the “New Player Friendly” sheet strips away unnecessary complexity, while the “Project 2050” sheet offers a futuristic take for modern or sci-fi campaigns․ These design variations ensure that every player can find a sheet that matches their style and enhances their D&D experience․

Digital Tools

Digital tools have revolutionized the way players create and manage their D&D 5e character sheets․ These tools offer unparalleled convenience, allowing players to easily fill out, customize, and store their sheets digitally․ Programs like Adobe Acrobat and DocFly enable players to edit fillable PDF sheets directly, while spreadsheet tools such as Google Sheets and Excel provide a more interactive approach to character management․

In addition to these, online platforms like D&D Beyond and specialized character builders offer advanced features such as automated calculations, spell tracking, and equipment management․ These tools simplify the often complex process of character creation and upkeep, making it accessible for both new and experienced players․ Digital tools also allow for seamless sharing and collaboration, making it easier for players and Dungeon Masters to work together․

  • PDF editors for fillable character sheets․
  • Spreadsheets for detailed character tracking․
  • D&D Beyond for integrated character management․
  • Online platforms for custom sheet creation․

With these tools, players can focus more on storytelling and gameplay, knowing their character’s stats and abilities are well-organized and easily accessible․ Digital tools have become an indispensable part of the modern D&D experience, enhancing both convenience and creativity․

Printing Tips

Printing your D&D 5e character sheet PDF can enhance your gameplay experience by providing a tangible record of your character’s stats and abilities․ To ensure high-quality prints, use standard letter-sized paper (8․5×11 inches) and set your printer to “Actual Size” to maintain the sheet’s layout․ For better readability, choose a high-resolution PDF and print in black and white to save ink, as color is unnecessary for most character sheets․

Double-sided printing is recommended to save paper, especially for multi-page sheets․ Ensure your printer is calibrated to avoid misalignment of text and checkboxes․ If the sheet includes form fields, make sure they are filled out digitally before printing to avoid clutter․ For durability, consider laminating your printed sheet or placing it in a protective sleeve․

  • Use high-quality paper for clarity․
  • Print in black and white to save ink․
  • Double-sided printing saves paper․
  • Laminate or sleeve for protection․

Review your sheet for accuracy before printing, as errors may be harder to correct afterward․ If you’re printing multiple copies for a party, organize them neatly for easy access during sessions․ Properly printed character sheets not only look professional but also enhance gameplay efficiency․

Advanced Features

Advanced features in D&D 5e character sheet PDFs offer enhanced functionality for players seeking a more streamlined and immersive experience․ These features go beyond basic fillable fields, incorporating dynamic elements that automate calculations and improve customization․ For instance, some PDFs include auto-calculation for ability scores, skill bonuses, and spell slots, reducing manual errors and saving time during character creation․ Conditional formatting is another advanced feature, where fields change color or highlight when values exceed specified thresholds, such as low hit points or invalid entries․

Digital enhancements like form validation ensure data integrity, preventing players from entering incorrect values․ Some sheets also support exporting character data to external tools or importing from popular platforms, allowing seamless integration with digital campaigns․ Additionally, version control features enable players to track character progression over time, maintaining a record of updates and changes․ These advanced capabilities make character management more efficient and enjoyable, catering to both experienced players and newcomers alike․

  • Auto-calculation for stats and skills․
  • Conditional formatting for alerts and validation․
  • Data export/import for external tools․
  • Version control for tracking changes․

These features enhance gameplay by simplifying complex tasks, allowing players to focus on storytelling and strategy․ Whether you’re a seasoned adventurer or just starting your D&D journey, advanced character sheets elevate your experience with powerful, intuitive tools․

Community Contributions

The D&D community has created a wealth of innovative and diverse character sheet PDFs for 5e, offering unique designs and features that cater to different playstyles and preferences․ These contributions, often shared on platforms like DMs Guild, DriveThruRPG, and Reddit, showcase the creativity and dedication of fans․ Many community-created sheets are free or pay-what-you-want, making them accessible to everyone․

Community sheets often include themed designs, such as futuristic, medieval, or even handwritten styles, allowing players to personalize their characters visually․ Some sheets are tailored for specific settings or house rules, while others focus on accessibility, like dyslexia-friendly formats․ These contributions not only enhance gameplay but also foster a sense of connection among players and creators․

  • Themed sheets for unique visual styles;
  • Accessible designs for inclusivity․
  • Custom layouts for specific playstyles․

By sharing their work, the community has expanded the possibilities for character creation, ensuring that every player can find a sheet that matches their vision and needs․ These contributions highlight the collaborative spirit of the D&D community and its passion for improving the game experience․

Step-by-Step Guide

Creating and using a D&D 5e character sheet PDF is straightforward, thanks to the availability of fillable and editable templates․ Here’s a step-by-step guide to help you get started:

  1. Download the PDF: Start by downloading an official or community-created 5e character sheet PDF from reputable sources like Wizards of the Coast, DMs Guild, or DriveThruRPG․
  2. Open with a PDF Editor: Use a PDF editor such as Adobe Acrobat, DocHub, or DocFly to open the file․ These tools allow you to fill in the fields digitally․
  3. Fill in Character Details: Begin by entering basic information like your character’s name, race, class, and background․ Proceed to fill in ability scores, skills, and equipment․
  4. Customize and Save: Once all fields are completed, save the PDF to your device․ This ensures your progress is preserved for future updates․
  5. Print (Optional): If you prefer a physical copy, print the PDF․ Ensure your printer settings are correct for the best results․

This guide simplifies the process of creating and managing your character sheet, making it accessible for both new and experienced players․

D&D 5e character sheets in PDF format are indispensable tools for both new and experienced players, offering a convenient way to organize and track character details․ Whether you prefer the official versions from Wizards of the Coast or creative designs from the community, these sheets provide flexibility and customization options to suit every playstyle․ With fillable fields, editable templates, and the ability to save progress digitally, they streamline character creation and management, making your D&D experience more enjoyable and efficient․

Moreover, the availability of these sheets in various formats ensures that players can choose what works best for them, from simple designs for beginners to intricate layouts for seasoned adventurers․ The rise of digital tools has further enhanced their accessibility, allowing players to create, edit, and share character sheets effortlessly․ While character sheets are practical, they also serve as a gateway to the creative and strategic aspects of Dungeons & Dragons, helping players bring their unique characters to life in every campaign․

Continue Reading

tc helicon voicelive play manual

Welcome to the TC Helicon VoiceLive Play manual! This guide helps you unlock the full potential of your vocal processor‚ covering features‚ setup‚ and operation for singers‚ guitarists‚ and musicians. Explore harmonies‚ effects‚ looping‚ and RoomSense technology to enhance your performances. Whether you’re a beginner or an advanced user‚ this manual ensures you get the most out of your VoiceLive Play.

Overview of the TC Helicon VoiceLive Play

The TC Helicon VoiceLive Play is a powerful vocal processor designed for singers and musicians seeking professional-grade effects and harmonies. This compact‚ user-friendly device offers a wide range of features‚ including automatic harmonies‚ pitch correction‚ and customizable effects. It also supports looping and layering‚ making it ideal for live performances and practice. The VoiceLive Play is equipped with advanced technologies like RoomSense‚ which adapts to your environment for optimal sound quality. Whether you’re a seasoned artist or just starting out‚ this device provides the tools to elevate your vocal performances to new heights with ease and creativity.

Key Features of the VoiceLive Play

The VoiceLive Play offers a wide array of professional-grade vocal effects‚ including automatic harmonies‚ pitch correction‚ and customizable presets. It features looping and layering capabilities‚ allowing for intricate vocal arrangements. The device also includes RoomSense technology‚ which adapts to your performance environment for optimal sound quality. With a user-friendly interface and real-time controls‚ the VoiceLive Play is designed to enhance both live performances and practice sessions. Its compact design makes it portable and easy to integrate into any setup‚ while its advanced features ensure a polished and professional sound‚ catering to singers‚ guitarists‚ and musicians of all levels.

Installation and Setup

Connect your microphone and instruments‚ ensuring proper hardware connections. Install the latest software and firmware updates from the TC Helicon website for optimal performance and functionality.

Hardware Connections

Connect your microphone to the XLR input on the VoiceLive Play. Use a 1/8″ cable for aux inputs‚ such as connecting an MP3 player or guitar. Ensure proper phantom power is enabled for condenser mics. The USB port allows for firmware updates and computer connectivity. Connect the output to your sound system or mixer using XLR cables. For optimal performance‚ use the provided TC Helicon power supply. Refer to the manual for detailed diagrams and connection guidelines to ensure all hardware is properly linked for seamless operation.

Software Installation and Firmware Updates

Download and install the latest VoiceSupport software from the TC Helicon website. Connect your VoiceLive Play to your computer via USB to access firmware updates. Use the VoiceSupport app to check for new firmware versions and install them to ensure optimal performance. Regular updates enhance features and fix bugs. Always use the provided TC Helicon power supply during updates to prevent device damage. After updating‚ restart your VoiceLive Play to apply changes. Refer to the manual or online support for detailed step-by-step instructions and troubleshooting tips.

Basic Operations

Learn to set up your VoiceLive Play with ease. Adjust mic gain for optimal levels‚ enable phantom power for condenser mics‚ and use Talk Mode for clear communication.

Setting Up the Mic Gain

Adjusting the mic gain on the TC Helicon VoiceLive Play is crucial for optimal sound quality. To set the mic gain‚ start by enabling phantom power if using a condenser microphone. Next‚ sing or speak into the mic while turning the Mic Gain knob. Monitor the LED indicator on the top of the device: aim for green lights‚ which indicate a good signal level. If the LED turns yellow occasionally‚ it’s acceptable‚ but avoid red‚ as it signifies distortion. Adjust the gain knob until the LED is mostly green for clear‚ undistorted audio. This ensures your voice is heard clearly without feedback or distortion‚ whether singing or speaking. Proper mic gain setup enhances your overall performance quality‚ making it essential for both beginners and advanced users to master this step.

Enabling Phantom Power

To enable phantom power on the TC Helicon VoiceLive Play‚ navigate to the Setup menu. Select “Mic Type” and choose “Condenser” to activate 48V phantom power. The LED will turn yellow when enabled. This step is essential for using condenser microphones‚ ensuring they receive the necessary power for optimal performance. Always use the TC-Helicon power supply to avoid damage. Once enabled‚ connect your condenser microphone and adjust the mic gain as needed for clear audio. Phantom power is a crucial setting for achieving high-quality sound with condenser mics‚ so ensure it’s correctly configured before use.

Using Talk Mode

Press and hold the HIT/TALK button to activate Talk Mode on the TC Helicon VoiceLive Play. This feature mutes all effects‚ allowing your mic input to pass directly to the output. Use Talk Mode for clear communication with your audience or bandmates without echo or reverb. The LED will indicate when Talk Mode is active. This function is ideal for spoken introductions or transitions between songs. Ensure the mic is set to the correct type in the Setup menu for optimal performance. Talk Mode works seamlessly with both XLR and phone outputs‚ maintaining audio clarity in any setting.

Effects and Harmonies

Explore the TC Helicon VoiceLive Play’s effects and harmonies to enhance your vocal and instrumental performances. The device offers real-time harmonies‚ pitch correction‚ and effects like reverb and delay. Use the advanced menu to customize settings and create unique sounds. The RoomSense technology analyzes ambient audio to automatically adjust harmonies. Perfect for singers and musicians‚ the VoiceLive Play ensures professional-grade vocal processing with intuitive controls and versatile effects options.

Understanding Harmony and Pitch Correction

The TC Helicon VoiceLive Play offers advanced harmony and pitch correction features to enhance your vocal performances. Harmonies are generated based on the input from your voice or connected instruments‚ creating a natural‚ multi-voice sound. The device automatically detects the key and adjusts harmonies accordingly‚ while pitch correction ensures your vocals stay in tune. RoomSense technology analyzes ambient audio to refine harmonies in real-time. Adjust harmony levels‚ intervals‚ and scales to match your style. Pitch correction can be set to subtle or aggressive modes‚ maintaining the integrity of your performance while keeping it polished and professional.

Exploring Other Effects

Beyond harmonies‚ the VoiceLive Play offers a range of effects to enhance your vocals. Reverb‚ delay‚ and doubling create depth and texture‚ while distortion adds edge for modern sounds. The device also features a built-in looper for creating layered vocal performances. Adaptive Tone automatically adjusts EQ‚ compression‚ and gate settings to refine your sound. Effects can be blended to suit your style‚ with real-time control via the interface or optional footswitch. Experiment with these tools to craft unique vocal textures and elevate your performances to new creative heights.

Advanced Features

The VoiceLive Play offers advanced features like looping and layering vocals‚ RoomSense technology for adaptive harmonies‚ and LED indicators for phantom power and effect status monitoring.

Looping and Layering

The TC Helicon VoiceLive Play allows for advanced looping and layering of vocals and harmonies‚ enabling creative live performances. Press and hold the HIT/TALK button to engage looping mode‚ where you can record‚ overdub‚ and playback layers seamlessly. The device supports up to 30 seconds of looped audio‚ perfect for building intricate vocal textures. Layering allows you to stack multiple vocal parts‚ creating a full‚ professional sound. Use the LED indicators to monitor loop status and levels‚ ensuring your performance stays on track. This feature is ideal for singers and musicians looking to expand their sonic possibilities during gigs or practice sessions.

RoomSense Technology

RoomSense Technology enhances your vocal performance by adapting to your environment. It uses internal microphones to detect ambient sound‚ automatically adjusting harmonies and effects to blend naturally with your surroundings. This innovative feature ensures your voice sits perfectly in the mix‚ whether performing in a small room or large venue. By continuously monitoring the acoustic landscape‚ RoomSense Technology delivers a balanced and professional sound‚ making it an invaluable tool for singers seeking a polished and responsive performance experience.

Navigation and Customization

The VoiceLive Play offers an intuitive menu system for easy navigation. Customize your settings and save favorites for quick access‚ tailoring your sound to your performance needs.

Menu System

The VoiceLive Play features an intuitive menu system designed for easy navigation. Access various settings by pressing and holding the soft buttons‚ which light up to indicate active features. The menu is divided into sections like Setup‚ Effects‚ and Favorites‚ allowing you to customize input levels‚ effects parameters‚ and save preferred configurations. Use the scroll wheel to move through options and adjust settings with the value knob. This user-friendly interface ensures quick access to all functionalities‚ making it easy to tailor your sound during performances or rehearsals. The menu system is a key tool for unlocking the device’s full creative potential.

Saving Favorites

Saving your favorite settings on the VoiceLive Play is a convenient way to quickly recall your preferred configurations. To save a favorite‚ navigate to the desired preset and press the Save button. Use the scroll wheel to select an empty slot‚ then confirm to save your settings. You can store multiple configurations‚ making it easy to switch between different vocal styles or effects during performances. This feature enhances your workflow‚ allowing you to focus on your music while maintaining consistent‚ high-quality sound. Saving favorites ensures your unique settings are always accessible‚ streamlining your creative process and live shows.

Troubleshooting Common Issues

Identify and resolve common issues with the VoiceLive Play using the manual’s troubleshooting guide. Address audio problems‚ LED indicator errors‚ and operational glitches with practical solutions and reset options.

Resolving Audio Problems

To resolve audio issues with the VoiceLive Play‚ start by checking all hardware connections‚ ensuring cables are securely plugged in and not damaged. Verify the input levels by adjusting the Mic Gain knob while monitoring the LED indicator—avoid red levels to prevent distortion. If audio is muted‚ ensure Talk Mode is not active. Restart the device and check for firmware updates‚ as outdated software may cause issues. For persistent problems‚ consult the troubleshooting guide in the manual or contact TC Helicon support for assistance.

Understanding LED Indicators

The LED indicators on the VoiceLive Play provide essential feedback for optimal performance. The Mic Gain LED changes color as you adjust the gain: green indicates optimal levels‚ yellow signals higher gain‚ and red warns of distortion. The blue LED above the effects buttons illuminates when an effect is active. Additionally‚ the HIT button’s ring LED indicates the active preset‚ with different colors for Favorites. Monitoring these LEDs ensures proper gain staging‚ effect engagement‚ and preset selection. This visual feedback helps you maintain control and achieve the best sound possible during your performances.

The TC Helicon VoiceLive Play manual provides comprehensive guidance for maximizing your vocal and instrumental performances. By mastering its features‚ from harmonies and effects to looping and RoomSense technology‚ you can elevate your sound and creativity. Troubleshooting tips and customization options ensure seamless operation. Whether you’re a seasoned artist or just starting out‚ this manual equips you with the knowledge to unlock the full potential of the VoiceLive Play. Refer back to these pages whenever you need assistance‚ and enjoy the enhanced musical experience this powerful tool offers.

Continue Reading

resident evil 2 remake trophy guide

Welcome to the Resident Evil 2 Remake Trophy Guide! This comprehensive guide helps you unlock all 44 trophies, including the elusive Platinum. With detailed strategies for both Leon and Claire’s campaigns, you’ll navigate the horrors of Raccoon City, solve puzzles, and master combat. Whether you’re a veteran or new to the series, this guide ensures you achieve 100% completion and conquer the challenging difficulty modes. Get ready to face zombies, puzzles, and intense boss battles on your journey to platinum glory!

Welcome to the Resident Evil 2 Remake Trophy Guide! This game is a masterful reimagining of the 1998 classic, blending survival horror with modern gameplay; Trophies are a key part of the experience, rewarding skill, exploration, and perseverance. With 44 trophies to unlock, including the prestigious Platinum, this guide will help you navigate the challenges, from combat and puzzles to collectibles and high-difficulty modes. Prepare to immerse yourself in Raccoon City’s horrors and achieve 100% completion!

Trophy List Overview

Resident Evil 2 Remake features 44 trophies, ranging from story-related to combat and exploration challenges. The list includes 4 Platinum, 6 Gold, 11 Silver, and 23 Bronze trophies, with an average difficulty of 6/10. Completionists will find a rewarding experience.

Story-Related Trophies

The Story-Related Trophies in Resident Evil 2 Remake are unlocked by progressing through the game’s narrative. These include completing the story with Leon or Claire, as well as achieving specific outcomes tied to key plot points. Trophies like “A Hero’s Welcome” and “A Small Departure” are awarded for completing the game on either character’s first playthrough. Additionally, completing both Leon’s and Claire’s campaigns unlocks the “True Ending” trophy, ensuring a full understanding of the story. Save points and key decisions are crucial to avoid missing these trophies.

Combat and Action Trophies

The Combat and Action Trophies in Resident Evil 2 Remake reward mastery of the game’s combat mechanics. Trophies like “Zombie Round-Up” and “Sergeant’s Orders” are earned by defeating hordes of undead or completing specific combat challenges. Achievements such as “Raccoon City Native” and “First Break-In” focus on weapon proficiency, like landing headshots or using the combat knife effectively. Utilizing the infinite ammo DLC can simplify these challenges, ensuring you unlock every combat-related trophy seamlessly.

Exploration and Collectibles Trophies

The Exploration and Collectibles Trophies in Resident Evil 2 Remake emphasize thorough investigation of Raccoon City. Trophies like “Mr. Raccoon Collector” require finding all 15 hidden Mr. Raccoon figures. “File Collector” is awarded for gathering every in-game file, providing lore and backstory. Additionally, “Inventory Upgrade” is unlocked by expanding your storage capacity. These achievements highlight the importance of meticulous exploration and attention to detail, rewarding players for uncovering the game’s hidden secrets and items;

Challenge and Difficulty Trophies

The Challenge and Difficulty Trophies in Resident Evil 2 Remake test your skills and resilience. Trophies like “Hardcore” and “No Death Run” require completing the game without dying, showcasing mastery. These achievements push players to optimize resource management, avoid damage, and perfect boss fight strategies. Earning these trophies demands precision, patience, and a deep understanding of the game mechanics, making them a true test of survival horror expertise.

Basic Trophy Hunting Tips

Master trophy hunting in Resident Evil 2 Remake with these essential tips. Understand requirements, plan efficient routes, and use guides to avoid missing collectibles or achievements. Stay organized and thorough to ensure a smooth path to platinum glory!

Understanding Trophy Requirements

Understanding trophy requirements is crucial for efficient progression. Each trophy has specific tasks, from story completion to finding hidden items. Some trophies, like those tied to combat or exploration, require precise actions. Missable trophies, such as those linked to collectibles, demand careful attention. Familiarize yourself with the list to avoid unnecessary replays and ensure a streamlined path to unlocking all achievements in Resident Evil 2 Remake.

Efficient Playthrough Strategies

Optimize your playthrough by focusing on trophy requirements early. Use guides to locate collectibles and complete puzzles swiftly. Manage resources like ammo and health to minimize unnecessary backtracking. Complete story-related trophies first, then focus on combat and exploration achievements. Utilize speedrun strategies to reduce time and repetition. Prioritize unlocking infinite ammo DLC for easier gameplay. Plan your route to collect all hidden items in one go, ensuring a smooth path to platinum without multiple replays.

Utilizing Guides and Resources

Leverage detailed walkthroughs and trophy guides from trusted sources like PowerPyx to streamline your progress. Use collectible maps to pinpoint file locations and hidden items. Refer to puzzle solutions for the Lab Code, Chess Plug, and Maiden Statue to avoid wasted time. Watch video guides for complex sections and boss battles. Join trophy-hunting communities for tips and support, ensuring every achievement is unlocked efficiently and stress-free. Stay informed with updated resources to tackle challenges head-on.

Key Puzzles and Their Solutions

Master the Lab Code Puzzle, Chess Plug Socket Puzzle, and Maiden Statue Puzzle with precise solutions. These challenges are crucial for progression and unlocking hidden rewards. Solve them efficiently to progress seamlessly through the game’s story and earn key trophies. Each puzzle requires careful observation and pattern recognition to unlock the next section. Use the provided solutions to overcome them without frustration. Keep track of clues and symbols to ensure smooth gameplay. These puzzles are integral to the game’s design and story, so understanding their mechanics is essential for completion. By solving these, you’ll unlock new areas, items, and story elements. Stay alert and methodical to conquer each puzzle successfully. The solutions are designed to test your attention to detail and problem-solving skills, making the experience rewarding. With practice, you’ll navigate these challenges with ease. The puzzles are a mix of logic, pattern recognition, and environmental clues, ensuring a varied and engaging experience. Each solved puzzle brings you closer to the game’s climax. Use this guide to bypass trial and error, ensuring a smooth journey through Raccoon City. The puzzles are memorable and add depth to the gameplay, so enjoy the challenge. By mastering these, you’ll fully immerse yourself in the game’s world. The solutions are detailed to help you overcome any obstacles quickly. The puzzles are a testament to the game’s clever design and will keep you engaged throughout your playthrough. With the right approach, you’ll conquer every puzzle efficiently. The guide provides clear steps to solve each puzzle, ensuring you never get stuck. The combination of logic and creativity in the puzzles makes them a standout feature. By following the solutions, you’ll experience the game’s story without interruptions. The puzzles are a key part of the game’s charm, so embrace the challenge. The guide is here to help you succeed, so use it wisely. The puzzles are waiting—get ready to test your skills!

Lab Code Puzzle Solution

The Lab Code Puzzle involves entering specific codes into terminals in the Greenhouse Control Room and Drug Testing Lab. Locate the two Trophies with symbols on their bases. The first is in the Lounge, and the second is in the Low-Temp Testing Lab. Input the codes in sequence to unlock the Herbicide. Use the Dispersal Cartridge to complete the puzzle. This solution is crucial for story progression and unlocking key items. Follow the steps carefully to avoid missing any clues.

Chess Plug Socket Puzzle Solution

The Chess Plug Socket Puzzle in the Monitor Room requires inserting electronic parts shaped like chess pieces into the correct sockets. The correct order is based on chess piece movement: plug in the knight first, followed by the king, queen, rook, bishop, and finally the pawn. This sequence unlocks the door to progress. Note that the puzzle changes slightly in the B-Story campaign, so adapt your strategy accordingly for completion.

Maiden Statue Puzzle Solution

The Maiden Statue Puzzle is located in the West Storage Room on the third floor of the Police Station. To solve it, examine the Maiden Statue and input the symbols found on the bottom of the Trophy item into the terminal in the Greenhouse Control Room. This unlocks a secret compartment, rewarding you with the Maiden Medal, a key item for 100% completion. Ensure you don’t miss this step, as it’s crucial for achieving all trophies.

Collectibles and Their Locations

Discover the locations of all Mr. Raccoon toys, files, safes, and key items essential for 100% completion. These collectibles are hidden throughout the game, guiding you through Raccoon City’s eerie atmosphere.

Files and Their Importance

There are 58 files hidden throughout the game, providing crucial story context and background information on characters and events. These documents include memos, journals, and reports that deepen the narrative. Some files are essential for solving puzzles or unlocking secret paths. Collecting all files is required for the “Read All About It” trophy, making them a key part of your 100% completion journey. Start your search with Leon’s campaign for the best results.

Mr. Raccoon Locations

Discovering all 15 Mr. Raccoon statues is essential for the “Squirrel Master” trophy. These small, hidden figures are scattered across the game’s environment. Use your keen eyesight or a guide to locate them efficiently. Each statue emits a distinct sound when approached, aiding in detection. Ensure you find them all during your initial playthrough to avoid missing out on this achievement. Their placement varies between Leon and Claire’s campaigns, so stay vigilant throughout your journey.

Inventory Upgrades and Maps

Upgrading your inventory is crucial for carrying more items, enhancing your survival chances. There are six Inventory Upgrades hidden throughout the game, each increasing your carrying capacity. Maps are equally vital, revealing key locations and item placements. Collecting all maps and upgrades aids in exploration and ensures you don’t miss essential items. Keep an eye out for these hidden treasures to optimize your inventory management and progress smoothly through the game.

Walkthrough for Trophy Completion

Follow our detailed walkthrough to guide you through Leon and Claire’s campaigns, ensuring you complete all main objectives and unlock every trophy. Explore key locations, solve puzzles, and defeat bosses to progress smoothly through the story. This section helps you navigate the game’s challenges and uncover hidden paths, making trophy completion straightforward and efficient.

Leon’s Campaign Walkthrough

Leon’s campaign in Resident Evil 2 Remake begins with his arrival in Raccoon City, where he soon discovers the horrors unleashed by the T-virus. This walkthrough guides you through Leon’s journey, from the Raccoon City Police Station to the Underground Facility. Key objectives include solving puzzles, defeating bosses like the T-00, and uncovering the conspiracy behind the outbreak. Tips for handling enemies and managing resources are provided to ensure trophy progression and a smooth path to the campaign’s climax.

Claire’s Campaign Walkthrough

Claire’s campaign in Resident Evil 2 Remake offers a unique perspective on the events in Raccoon City. Starting with her search for her brother, Claire faces distinct challenges, including encounters with the Chief and Sherry. This walkthrough covers her journey through the Police Station, Orphanage, and Factory, highlighting key objectives, boss battles, and strategies to manage resources effectively, ensuring trophy progression and a successful campaign completion.

Unlockables and Bonus Content

Unlock hidden modes, bonus characters, and powerful weapons in Resident Evil 2 Remake, enhancing gameplay and providing exciting new challenges for trophy hunters and fans alike.

Hidden Modes and Characters

Complete the game to unlock hidden modes like The 4th Survivor and Tofu Survivor, offering unique challenges. Additionally, completing both Leon and Claire’s campaigns unlocks bonus characters and special weapons, enhancing replayability. These modes provide fresh perspectives and intense gameplay, adding depth to the Resident Evil 2 Remake experience for trophy hunters and completionists.

Infinite Ammo and Special Weapons

Unlocking infinite ammo for select weapons is a game-changer for trophy hunters. Purchase the Infinite Ammo DLC to equip weapons like the Samurai Edge and Minigun with unlimited firepower, making hardcore modes and no-death runs more manageable. Additionally, completing specific challenges or finding hidden items can grant access to unique weapons, enhancing your combat effectiveness and adding variety to your gameplay experience in Resident Evil 2 Remake.

Platinum Trophy Roadmap

Achieving the Platinum Trophy in Resident Evil 2 Remake requires completing both Leon’s and Claire’s campaigns, earning all story-related trophies, and mastering challenges. With an estimated 30-hour completion time, this roadmap guides you through efficient playthroughs, utilizing DLCs like infinite ammo for easier hardcore modes. Follow the step-by-step strategies to unlock every trophy and claim your well-deserved Platinum!

Step-by-Step Guide to Platinum

Earning the Platinum Trophy in Resident Evil 2 Remake involves a strategic two-playthrough approach. Start with Leon’s campaign on Standard difficulty, completing story missions and collecting all files, Mr. Raccoons, and inventory upgrades. On your second playthrough, choose Claire’s campaign, focusing on remaining collectibles and trophies. Use the infinite ammo DLC for Hardcore mode to simplify challenging sections. Ensure no missable trophies are overlooked, and refer to puzzle solutions for tricky segments. With careful planning and execution, the Platinum is yours to claim!

Time and Difficulty Considerations

Completing Resident Evil 2 Remake and earning the Platinum Trophy requires approximately 30 hours of gameplay, depending on your skill level and use of DLCs. The difficulty ranges from Standard to Hardcore, with the latter offering a significant challenge. Playing on Standard first is recommended to familiarize yourself with the game. Purchasing the infinite ammo DLC can simplify Hardcore mode, reducing overall difficulty. Plan your playthroughs strategically to balance exploration and progression efficiently.

Tips for 100% Completion

Complete both Leon and Claire’s campaigns, solve puzzles like the Lab Code and Chess Plug, find all Mr. Raccoon statues, and use guides to ensure 100% completion.

Speedrun Strategies

Mastering speedruns in Resident Evil 2 Remake requires precise movement and optimized routes. Use the infinite ammo DLC to bypass ammo scarcity and focus on key item collection. Memorize enemy patterns and shortcuts to shave precious seconds. Prioritize essential objectives and skip non-essential interactions. Practice segment-by-segment to refine your strategy and achieve the fastest completion times, ensuring a smooth path to the platinum trophy.

No Death Run Techniques

Surviving Resident Evil 2 Remake without a single death demands meticulous planning and skill. Avoid direct confrontations with enemies when possible, utilizing stealth and evasion. Exploit enemy AI by luring them into traps or distractions. Conserve ammo and health items, and always prioritize escape over combat in dire situations. Use quick turns and precise dodges to evade attacks, and memorize enemy patterns for safer navigation. Mastery of these techniques ensures a flawless no-death playthrough, a true test of skill and strategy.

and Final Thoughts

Common Mistakes to Avoid

  • Overlooking hidden items in rush.
  • Improper inventory management.
  • Neglecting stealth, causing extra fights.
  • Skipping crucial items for puzzles.
Continue Reading

kubota user manual pdf

Kubota user manuals are essential guides for operating and maintaining Kubota equipment. They provide detailed instructions, troubleshooting tips, and maintenance schedules in PDF format for easy access.

Overview of Kubota User Manuals

Kubota user manuals are comprehensive guides designed to help users understand and utilize their equipment effectively. These manuals cover essential topics such as operation, maintenance, and troubleshooting. They are typically available in PDF format, making them easily accessible and portable. Each manual is tailored to specific Kubota models, ensuring relevance and accuracy. Whether you’re operating a tractor, excavator, or lawn mower, the manual provides detailed instructions to maximize efficiency and safety. Additionally, these documents often include diagrams, charts, and step-by-step procedures to simplify complex tasks. With thousands of manuals available online, users can download them from official Kubota websites, trusted third-party platforms, or community forums, ensuring easy access to the information they need.

Importance of User Manuals for Kubota Equipment

Kubota user manuals are vital for ensuring the proper operation, maintenance, and safety of Kubota equipment. They provide essential information to help users understand their machinery’s features, optimal usage, and troubleshooting procedures. These manuals are designed to enhance efficiency, reduce errors, and prolong the lifespan of the equipment. By following the guidelines outlined in the manuals, users can avoid potential risks and ensure compliance with safety standards. Additionally, the manuals serve as a valuable resource for diagnosing and resolving issues, minimizing downtime and repair costs. Whether for routine maintenance or complex repairs, Kubota user manuals are indispensable for maximizing the performance and longevity of the equipment, making them a must-have for every Kubota owner or operator.

Key Features of Kubota User Manuals

Kubota user manuals offer comprehensive operating instructions, detailed maintenance schedules, and troubleshooting guides. They are available in PDF format, ensuring easy access and readability for users.

Comprehensive Operating Instructions

Kubota user manuals provide detailed operating instructions to help users understand their equipment fully. These guides cover startup procedures, fuel types, lubrication, and attachment usage. They also include safety precautions and step-by-step instructions for various operations. The manuals are designed to ensure optimal performance and longevity of Kubota machinery. Whether it’s a tractor, excavator, or lawn mower, the instructions are tailored to specific models. Troubleshooting tips and maintenance reminders are often included to address common issues. Visual diagrams and clear language make the manuals accessible to both new and experienced operators. By following these instructions, users can maximize efficiency, safety, and productivity while operating their Kubota equipment effectively.

Detailed Maintenance Schedules

Kubota user manuals include detailed maintenance schedules to ensure equipment longevity. These schedules outline recommended service intervals for oil changes, filter replacements, and hydraulic system checks. They provide step-by-step guidance for routine inspections, such as checking tire pressure, coolant levels, and belt condition. Specific timelines are given for replacing parts like air filters and spark plugs. Additionally, the manuals emphasize the importance of using genuine Kubota parts for optimal performance. By following these schedules, operators can prevent unexpected breakdowns and maintain warranty compliance. The manuals also offer tips for seasonal maintenance, ensuring equipment runs smoothly in various conditions. Regular upkeep, as outlined, helps extend the lifespan and efficiency of Kubota machinery, making it a vital resource for owners.

Troubleshooting Guides

Kubota user manuals include comprehensive troubleshooting guides to help operators diagnose and resolve common issues. These guides provide step-by-step instructions for identifying symptoms, such as engine overheating or unusual noises, and offer solutions to address them. Detailed error codes and their meanings are often included, enabling users to pinpoint problems quickly. The manuals also list recommended tools and procedures for repairs, ensuring safety and efficiency. By following these guides, operators can address issues before they escalate, reducing downtime and extending equipment lifespan. Troubleshooting sections are organized by system, covering hydraulic, electrical, and engine components. This resource empowers users to maintain their equipment effectively, minimizing the need for professional assistance. Regular use of these guides ensures optimal performance and reliability of Kubota machinery.

Popular Kubota Models and Their Manuals

Kubota’s popular models, such as the B26, Z781KWTi, and KX018-4, are well-documented with user manuals. These PDF guides provide detailed operating and maintenance instructions for optimal equipment performance.

Kubota B26 User Manual

The Kubota B26 user manual is a comprehensive guide designed to help operators maximize the potential of their equipment. Available in PDF format, this 118-page manual covers essential topics such as safety precautions, instrument panel overview, routine maintenance, and troubleshooting. It provides detailed instructions for proper operation, ensuring efficient and safe usage. The manual also includes maintenance schedules, diagnostic procedures, and parts diagrams, making it an invaluable resource for both novice and experienced users. Whether you’re performing daily checks or addressing specific issues, the Kubota B26 manual offers clear, step-by-step guidance. It is widely available for free download on the official Kubota website, trusted third-party platforms, and community forums, ensuring easy access for all users.

Kubota Z781KWTi User Manual

The Kubota Z781KWTi user manual is a detailed 102-page guide designed to assist operators in understanding and maintaining their equipment effectively. Available in PDF format, this manual provides comprehensive instructions for operation, maintenance, and troubleshooting. It includes safety guidelines, instrument panel explanations, and step-by-step procedures for routine checks and repairs. The manual also offers diagnostic tips and parts diagrams, ensuring users can address issues efficiently. Accessible on the official Kubota website, trusted third-party platforms, and community forums, the Z781KWTi manual is a valuable resource for both novice and experienced operators. Its clear and concise content ensures optimal performance and longevity of the equipment, making it an essential tool for anyone using the Kubota Z781KWTi model.

Kubota KX018-4 User Manual

The Kubota KX018-4 user manual is a 110-page comprehensive guide designed to help operators understand and maintain their equipment effectively. Available in PDF format, this manual covers essential topics such as operating instructions, safety precautions, and maintenance schedules. It also includes detailed troubleshooting guides and parts diagrams, making it easier for users to diagnose and resolve issues. The manual is accessible for free on the official Kubota website, trusted third-party platforms, and community forums. Whether you’re a new or experienced operator, the Kubota KX018-4 manual provides clear and concise information to ensure optimal performance and longevity of the equipment. Its detailed content makes it an indispensable resource for anyone using this model.

Where to Find Kubota User Manuals

Kubota user manuals are available on the official Kubota website, trusted third-party sites like ManualsPDF.ru, and community forums where users freely share downloadable PDF versions.

Official Kubota Website

The official Kubota website is the most reliable source for user manuals. It offers free PDF downloads for various Kubota models, ensuring authenticity and accuracy. Users can easily navigate through the site, select their product range, and access detailed manuals. The website provides comprehensive guides, including operating instructions, maintenance schedules, and troubleshooting tips. It is updated regularly with the latest manuals, making it a one-stop solution for Kubota equipment owners. The official site guarantees genuine and up-to-date information, eliminating the risk of downloading incorrect or outdated manuals. This makes it the preferred choice for users seeking trusted resources to optimize their equipment’s performance and longevity.

Trusted Third-Party Websites

Trusted third-party websites like ManualsLib and ManualsOnline provide free access to Kubota user manuals in PDF format. These platforms host a wide range of manuals for various Kubota models, ensuring users can find the specific guide they need. They are popular alternatives to the official website, offering quick and easy downloads without requiring subscriptions or sign-ups. Many of these sites are community-driven, with manuals uploaded by Kubota owners and enthusiasts. While they may not be as comprehensive as the official source, they are reliable and convenient options for accessing manuals. Users can search by model number or product type, making it simple to locate the correct manual for their equipment.

Community Forums and User-Sharing Platforms

Community forums and user-sharing platforms have become valuable resources for accessing Kubota user manuals. These platforms allow users to share and download PDF manuals for various Kubota models, often for free. Many enthusiasts and owners upload their own manuals, creating a collaborative environment where individuals can support one another. Websites like ManualsLib and forums dedicated to Kubota equipment host a wide range of user-contributed content. These platforms are particularly useful for locating manuals for older or less common models. While they may not be as official as manufacturer sources, they provide a convenient and community-driven way to access the information needed to operate and maintain Kubota equipment effectively.

Continue Reading

truck manual

Truck manuals are essential resources for maintaining‚ repairing‚ and optimizing vehicle performance‚ providing detailed instructions and troubleshooting tips for professionals and DIY enthusiasts alike.

1.1 What is a Truck Manual?

A truck manual is a comprehensive guide detailing essential information for vehicle operation‚ maintenance‚ and repair. It includes detailed instructions‚ troubleshooting tips‚ wiring diagrams‚ and fault codes. Available as operator‚ service‚ and repair manuals‚ these resources are designed for both professionals and DIY enthusiasts. They provide in-depth knowledge to ensure optimal performance and safety‚ making them indispensable for truck owners and mechanics. Manuals are accessible online‚ offering convenience and ease of use.

1.2 Importance of Truck Manuals for Vehicle Maintenance

Truck manuals are crucial for maintaining vehicle performance‚ preventing breakdowns‚ and ensuring safety. They provide detailed maintenance schedules‚ troubleshooting guides‚ and repair instructions‚ enabling regular inspections and timely repairs. With fault codes and wiring diagrams‚ manuals help diagnose issues quickly‚ reducing downtime. Accessible online‚ they empower owners and mechanics to perform maintenance efficiently‚ keeping trucks operational and minimizing costly disruptions. Regular use of manuals ensures compliance with manufacturer recommendations‚ extending vehicle lifespan and optimizing productivity.

Types of Truck Manuals

Truck manuals include operator manuals‚ service and repair manuals‚ and parts catalogs‚ each providing specific guidance for operation‚ maintenance‚ and component identification.

2.1 Operator Manuals

Operator manuals provide essential guidance for drivers‚ detailing proper truck operation‚ safety protocols‚ and best practices for maximizing performance and longevity. These manuals typically include instructions for dashboard controls‚ navigation systems‚ and maintenance checks. They are available in both print and digital formats‚ ensuring accessibility for drivers on the go. Key features include troubleshooting tips‚ fuel efficiency strategies‚ and compliance with safety regulations. Regularly updating these manuals ensures drivers stay informed about the latest operational standards and vehicle advancements.

2.2 Service and Repair Manuals

Service and repair manuals are comprehensive guides designed for mechanics and technicians‚ offering detailed procedures for diagnosing and fixing issues. These manuals include step-by-step instructions‚ wiring diagrams‚ and fault code explanations. They cover components like engines‚ transmissions‚ and suspension systems‚ ensuring precise repairs. Available for various truck models‚ these resources are indispensable for maintaining vehicle health and preventing costly breakdowns. Digital versions often feature interactive tools‚ enhancing the repair experience for modern technicians.

2.3 Parts Catalogs

Parts catalogs provide detailed listings of truck components‚ including spare parts‚ wiring diagrams‚ and fault codes. These resources help identify and source genuine parts‚ ensuring compatibility and quality. Accessible online‚ they cover various truck models‚ enabling users to locate specific components efficiently. By referencing these catalogs‚ technicians and enthusiasts can avoid costly errors and ensure accurate repairs. They are essential for maintaining vehicle performance and extending lifespan‚ offering a comprehensive guide to all necessary parts and accessories.

Key Features of Truck Manuals

Truck manuals offer detailed maintenance schedules‚ troubleshooting guides‚ wiring diagrams‚ and fault codes‚ providing comprehensive resources for professionals and DIY enthusiasts to ensure optimal vehicle performance and repairs.

3.1 Detailed Maintenance Schedules

Detailed maintenance schedules in truck manuals outline service intervals based on mileage or usage‚ ensuring timely replacements and inspections. These schedules cover oil changes‚ tire rotations‚ brake inspections‚ and fluid checks‚ helping prevent breakdowns. They are tailored to specific truck models‚ such as Freightliner or Volvo‚ and provide a clear checklist for routine servicing. By following these schedules‚ operators can optimize performance‚ reduce downtime‚ and extend the vehicle’s lifespan. Additionally‚ they often include recommendations for heavy-duty applications or extreme operating conditions‚ ensuring safety and efficiency on the road.

3.2 Troubleshooting Guides

Troubleshooting guides in truck manuals provide step-by-step solutions for diagnosing and resolving common issues. They cover symptoms‚ error codes‚ and repair procedures‚ helping users identify problems quickly. These guides often include wiring diagrams‚ fault code lists‚ and diagnostic tools for precise issue identification. Whether it’s an engine malfunction or electrical failure‚ troubleshooting guides empower users to address problems efficiently‚ minimizing downtime and repair costs; They are indispensable for both professional mechanics and DIY enthusiasts‚ ensuring effective and safe resolutions. Detailed fault code explanations‚ like DTC lists for Freightliner or Volvo trucks‚ further enhance their utility for targeted repairs.

3.3 Wiring Diagrams and Fault Codes

Wiring diagrams and fault codes are crucial components of truck manuals‚ aiding in electrical system diagnostics. Diagrams illustrate circuit connections‚ helping technicians trace issues efficiently. Fault codes‚ such as DTCs‚ provide specific error identifiers‚ guiding repairs. These resources are essential for troubleshooting and ensure accurate diagnoses‚ reducing repair times. Manuals often include detailed code explanations and repair procedures‚ making them invaluable for professionals and enthusiasts alike. They enhance diagnostic precision and streamline the repair process‚ ensuring vehicles return to optimal operation swiftly.

Accessing Truck Manuals

Truck manuals can be easily accessed through various online platforms and subscription-based services‚ ensuring fast and convenient downloads for your maintenance and repair needs.

4.1 Online Platforms for Downloading Manuals

Online platforms like ManualsforTrucks.com and Heavy-EquipmentManual.com offer free downloads of truck manuals‚ including service‚ repair‚ and parts catalogs. These sites provide instant access to detailed instructions‚ wiring diagrams‚ and fault codes for various truck models. Users can easily search and download PDF manuals‚ making it convenient for professionals and DIY enthusiasts to maintain and repair their vehicles efficiently.

4.2 Subscription-Based Services

Subscription-based services like ManualsforTrucks.com and Heavy-EquipmentManual.com provide unlimited access to extensive libraries of truck manuals‚ parts catalogs‚ and diagnostic tools. For a monthly fee‚ users can download PDF manuals‚ wiring diagrams‚ and fault codes for top brands like Freightliner and Volvo. These platforms are ideal for professionals and fleets‚ offering cost-effective solutions to maintain and repair vehicles efficiently‚ reducing downtime and operational costs.

DIY Repair vs. Professional Service

Truck manuals empower users to tackle routine maintenance and minor repairs independently‚ saving costs. However‚ complex issues require professional expertise to ensure safety and compliance with manufacturer standards.

5.1 When to Use a Manual for DIY Repairs

Truck manuals are invaluable for DIY repairs when tackling routine maintenance‚ such as oil changes or filter replacements‚ and minor fixes like replacing brake pads or belts. They provide step-by-step instructions‚ ensuring tasks are completed safely and correctly. For troubleshooting common issues like faulty sensors or warning lights‚ manuals offer diagnostic guides and fault codes‚ helping identify problems quickly. However‚ complex repairs requiring specialized tools or expertise should be left to professionals to avoid safety risks and potential damage.

5.2 Knowing When to Seek Professional Help

While truck manuals empower DIY enthusiasts‚ certain situations demand professional expertise. Major repairs‚ such as engine overhauls or complex electrical issues‚ require specialized tools and knowledge. If a repair involves critical safety systems or advanced diagnostics‚ consulting a certified mechanic is essential. Additionally‚ if troubleshooting reveals issues beyond your skill level or time constraints‚ seeking professional help ensures safety and prevents further damage to your truck.

Safety Precautions

Essential safety measures include adhering to manufacturer guidelines‚ using proper tools‚ and ensuring the truck is out of service until repairs are completed safely and efficiently.

6.1 Essential Safety Measures While Repairing Trucks

When repairing trucks‚ always wear protective gear like gloves and goggles. Ensure the vehicle is on level ground and apply brakes securely. Disconnect the battery to prevent accidental starts. Use jack stands for lifting and never rely solely on hydraulics. Follow the manufacturer’s guidelines for specific procedures and keep tools organized to avoid accidents. Regularly inspect equipment and ensure proper ventilation to minimize risks during maintenance or repairs.

The Future of Truck Manuals

Truck manuals are evolving with digitalization‚ offering interactive features‚ real-time diagnostics‚ and integration with advanced tools for enhanced efficiency and precision in vehicle maintenance and repair.

7.1 Digitalization and Interactive Manuals

The shift toward digitalization is transforming truck manuals‚ making them more interactive and accessible. Modern platforms now offer downloadable PDFs‚ online viewing‚ and mobile access‚ ensuring technicians and drivers can retrieve critical information anywhere. Interactive features like searchable content‚ zoomable diagrams‚ and hyperlinked indexes enhance usability. Digital manuals also integrate real-time updates‚ ensuring users always have the latest technical data. This trend is revolutionizing how maintenance and repairs are approached‚ offering unparalleled convenience and efficiency for both professionals and DIY enthusiasts.

7.2 Integration with Diagnostic Tools

Modern truck manuals are increasingly integrated with diagnostic tools‚ enhancing troubleshooting efficiency. Many platforms now offer fault code lookup‚ wiring diagrams‚ and diagnostic trouble codes (DTCs) within the manual itself. This integration allows technicians to identify issues faster and access repair procedures simultaneously. Advanced systems also enable real-time data synchronization‚ providing a seamless experience between diagnostics and manual guidance. This fusion of resources streamlines maintenance and repair processes‚ reducing downtime and improving overall efficiency for both professionals and DIY enthusiasts.

Truck manuals are indispensable resources for vehicle maintenance and repair‚ offering detailed guidance and troubleshooting solutions. They empower professionals and DIYers to optimize performance and minimize downtime effectively.

8.1 Final Thoughts on the Value of Truck Manuals

Truck manuals are indispensable tools for both professionals and enthusiasts‚ offering comprehensive guidance on maintenance‚ repair‚ and troubleshooting. By providing detailed instructions and diagnostics‚ they empower users to optimize vehicle performance‚ reduce downtime‚ and ensure safety. Accessing these resources through online platforms or subscription services has become increasingly convenient‚ making them vital for anyone aiming to maintain or repair their trucks effectively and efficiently.

Continue Reading

keto acv gummies instructions

Keto ACV Gummies are a popular dietary supplement combining the ketogenic diet’s fat-burning benefits with apple cider vinegar’s digestive and metabolic advantages, offering a convenient, tasty weight-loss aid.

1.1 What Are Keto ACV Gummies?

Keto ACV Gummies are chewable supplements combining the ketogenic diet’s fat-burning benefits with apple cider vinegar’s digestive and metabolic advantages. These gummies are designed to support weight loss, improve gut health, and boost energy levels. They typically contain BHB salts, MCTs, and acetic acid, promoting ketosis and fat burning. Available in fruity flavors, they offer a convenient and tasty way to complement a keto lifestyle.

1.2 The Purpose and Popularity of Keto ACV Gummies

Keto ACV Gummies are designed to support weight loss, digestion, and energy by combining the ketogenic diet’s fat-burning benefits with apple cider vinegar’s metabolic advantages. Their popularity stems from their convenience, delicious flavors, and dual-action formula, making them an attractive choice for those seeking a natural, easy-to-follow weight loss solution that complements a keto lifestyle.

Benefits of Keto ACV Gummies

Keto ACV Gummies offer weight loss through ketosis, improve digestion, and boost energy. They support metabolism, appetite control, and gut health, enhancing overall well-being naturally.

2.1 Weight Loss Support Through Ketosis

Keto ACV Gummies promote weight loss by inducing ketosis, a metabolic state where the body burns fat instead of carbs. BHB salts and MCTs help transition into ketosis, accelerating fat breakdown. ACV suppresses appetite and enhances fat metabolism, supporting a ketogenic lifestyle. Consistent use, combined with a keto-friendly diet, maximizes weight loss results. These gummies are designed to make ketosis easier and more sustainable.

2.2 Improved Digestion and Gut Health

Keto ACV Gummies support gut health by leveraging apple cider vinegar’s natural probiotic properties, which aid digestion and reduce bloating. The acetic acid in ACV promotes a balanced gut microbiome, enhancing nutrient absorption and overall digestive function. Regular consumption may alleviate digestive discomfort and support a healthy stomach lining, complementing the ketogenic diet’s focus on whole, nutrient-dense foods.

2.3 Enhanced Energy and Metabolism Boost

Keto ACV Gummies contain ingredients like BHB salts and MCTs, which support energy production during ketosis. The acetic acid in apple cider vinegar may boost metabolism, aiding calorie burning. These gummies help maintain energy levels while transitioning into a ketogenic state, reducing fatigue and enhancing overall metabolic function for a more active lifestyle.

Instructions for Taking Keto ACV Gummies

To maximize benefits, take 1-3 gummies 1-3 times daily, preferably with water. Consistency and combining with a keto diet and lifestyle yield the best results.

3.1 Recommended Dosage and Timing

The recommended dosage for Keto ACV Gummies is typically 1-3 gummies, taken 1-3 times daily. Manufacturer guidelines suggest starting with a lower dose and adjusting based on tolerance and goals. Timing is crucial; taking gummies before meals can enhance digestion, while consuming them in the morning may boost metabolism throughout the day. Consistency is key for optimal results.

3.2 Step-by-Step Guide to Incorporating Gummies Into Your Routine

To incorporate Keto ACV Gummies into your routine, start by selecting a high-quality product. Read the label for dosage instructions. Take 1-3 gummies with water, ideally before meals or workouts. Track your progress weekly and adjust as needed. Stay consistent with your intake and pair with a ketogenic diet for enhanced results. Consult a healthcare professional if unsure.

Safety and Precautions

Keto ACV Gummies are generally safe but may cause digestive discomfort in some users. Moderation is key to avoid side effects. Always consult a healthcare professional before use.

4.1 Potential Side Effects and Risks

While generally safe, Keto ACV Gummies may cause mild side effects like digestive discomfort, bloating, or an upset stomach. Overconsumption can lead to heartburn or acidity due to the vinegar content. Allergic reactions to specific ingredients are rare but possible. Individuals with sensitive stomachs or underlying health conditions should consult a healthcare provider before use. Moderation is key to minimizing risks.

4.2 Special Considerations for Different Groups

Certain groups should exercise caution when using Keto ACV Gummies. Pregnant or breastfeeding women, individuals with diabetes, or those with digestive conditions like acid reflux should consult a healthcare provider. Children under 18 and people with severe health issues should avoid these gummies. Additionally, anyone taking medications should check for potential interactions. Moderation and professional advice are crucial for these groups.

Choosing the Right Keto ACV Gummies

When selecting Keto ACV Gummies, choose a high-quality product from reputable brands. Ensure it contains BHB and apple cider vinegar, and avoid unnecessary fillers for optimal effectiveness.

5.1 How to Select a High-Quality Product

When choosing Keto ACV Gummies, prioritize products with BHB, MCTs, and pure apple cider vinegar. Ensure the product is sugar-free, low-carb, and free from artificial additives. Opt for reputable brands with third-party testing and certifications. Avoid fillers and focus on transparent ingredient lists. Always check customer reviews and consult with a healthcare professional if necessary.

5.2 Key Ingredients to Look For

High-quality Keto ACV Gummies should contain BHB (Beta-Hydroxybutyrate) to support ketosis, MCTs for sustained energy, and pure apple cider vinegar for digestion. Look for electrolytes like sodium and potassium to balance fluids. Ensure the product includes natural flavors and avoid artificial colors or preservatives; The presence of probiotics can enhance gut health, while ketogenic-friendly ingredients ensure compatibility with your diet.

5.3 Popular Brands and Their Features

Leading brands like NutriGummies offer 60-count bottles with 2-3 gummies per serving, combining BHB and ACV for enhanced fat loss; Vyto Keto ACV Gummies provide electrolyte support, while Trim Vantage Keto ACV Gummies focus on metabolism and appetite control. Nutra Pro Keto Gummies blend MCTs and probiotics for energy and digestion, ensuring high quality and effectiveness in supporting your keto journey.

Customer Reviews and Testimonials

Users report mixed experiences with Keto ACV Gummies, citing weight loss and improved digestion, while others note minimal effects. Feedback highlights individual variability in results and satisfaction.

6.1 Real User Experiences and Feedback

Many users praise Keto ACV Gummies for aiding weight loss and improving digestion, while others report minimal effects. Positive reviews highlight increased energy and reduced bloating, though some note no significant weight loss. Feedback varies, with satisfied customers appreciating convenience and taste, while others express disappointment. Overall, experiences depend on individual health goals and expectations from the product.

6.2 Success Stories and Results

Numerous users share inspiring success stories, citing significant weight loss and improved metabolism. Many report enhanced energy levels and reduced cravings, making it easier to adhere to their keto lifestyle. Some users mention achieving ketosis faster, while others highlight better digestion. These positive results highlight the potential benefits of incorporating Keto ACV Gummies into a ketogenic regimen.

Common Mistakes to Avoid

Common mistakes include overconsumption, ignoring dietary recommendations, and neglecting electrolyte balance, which can hinder progress and cause discomfort. Always follow instructions carefully.

7.1 Overconsumption and Underconsumption

Overconsumption of Keto ACV Gummies can lead to digestive discomfort, while underconsumption may reduce their effectiveness. Adhering to the recommended dosage is crucial for optimal results and minimizing potential side effects. Always follow the instructions provided to avoid these common pitfalls and ensure a safe, effective experience. Proper usage balances benefits and safety;

7.2 Ignoring Dietary and Lifestyle Recommendations

Ignoring dietary and lifestyle recommendations while using Keto ACV Gummies can hinder their effectiveness. These gummies work best when paired with a ketogenic diet and healthy habits. Failing to maintain a balanced diet or exercise routine may limit weight loss progress and overall health benefits. Always follow the suggested lifestyle guidelines to maximize results and ensure safety.

Scientific Evidence and Research

Research supports the effectiveness of keto ACV gummies in promoting weight loss and improving metabolism. Studies highlight how apple cider vinegar aids in fat-burning and metabolic enhancement, while keto ingredients boost ketosis.

8.1 Studies Supporting the Effectiveness of Keto ACV Gummies

Research indicates that keto ACV gummies effectively support weight loss by enhancing fat-burning and metabolic rates. Studies highlight the role of apple cider vinegar in improving digestion and reducing appetite, while ketogenic ingredients promote ketosis. These findings suggest that combining these elements may offer synergistic benefits for weight management and overall health.

8.2 The Role of Apple Cider Vinegar in Weight Loss

Apple cider vinegar (ACV) is renowned for its potential to aid weight loss by accelerating metabolism and suppressing appetite. Its acetic acid content may inhibit fat storage and enhance fat burning. When combined with ketogenic principles, ACV’s effects are amplified, supporting a faster transition into ketosis and improving overall weight management outcomes naturally.

Keto ACV Gummies are a convenient and effective supplement for weight loss and improved health. They combine the benefits of apple cider vinegar with ketogenic principles, supporting fat burning, digestion, and energy. For best results, follow the recommended dosage and maintain a healthy lifestyle.

9.1 Summary of Benefits and Instructions

Keto ACV Gummies offer a blend of weight loss support, improved digestion, and enhanced energy. They aid in ketosis, promoting fat burning and metabolism. For best results, follow the recommended dosage, typically 1-3 gummies daily, and pair with a ketogenic diet. Maintain a balanced lifestyle to maximize benefits and achieve your health goals effectively.

9.2 Encouragement for Responsible Use and Further Exploration

To maximize the benefits of Keto ACV Gummies, use them responsibly alongside a balanced diet and active lifestyle. Explore scientific research and user reviews to make informed decisions. Prioritize your health by consulting a healthcare professional before starting any new supplement regimen, ensuring a safe and effective journey toward your wellness goals.

Continue Reading